Businesses constantly seek intelligent automation solutions to streamline customer interactions, automate processes, and improve overall efficiency. Agentforce, an AI-driven agent platform, helps organizations to optimize customer service by leveraging automation and smart integrations. Agentforce is a powerful tool that enables agents to manage customer interactions effectively.
By integrating Agentforce with MuleSoft, businesses can extend its capabilities to level-up automation and streamline workflows. This blog will walk you through the steps to enable Agentforce, create agents, and integrate with MuleSoft for seamless connectivity.
Activating Einstein in Agentforce for Smarter Automation
Einstein AI enhances Agentforce by providing predictive analytics and automation to improve customer interactions. By enabling Einstein within Agentforce, businesses can empower their agents with AI-driven recommendations and insights, making their workflows more efficient and customer-centric.
Steps to Enable Einstein in Agentforce:
- Navigate to Einstein Settings in Agentforce.
- Turn on the Enable Einstein toggle switch.
- Save the settings to activate AI-powered functionalities.
Getting Started with Agentforce for Intelligent Workflows
To make the most of Agentforce, businesses need to enable and configure the platform for their use case. The following steps outline the initial setup:
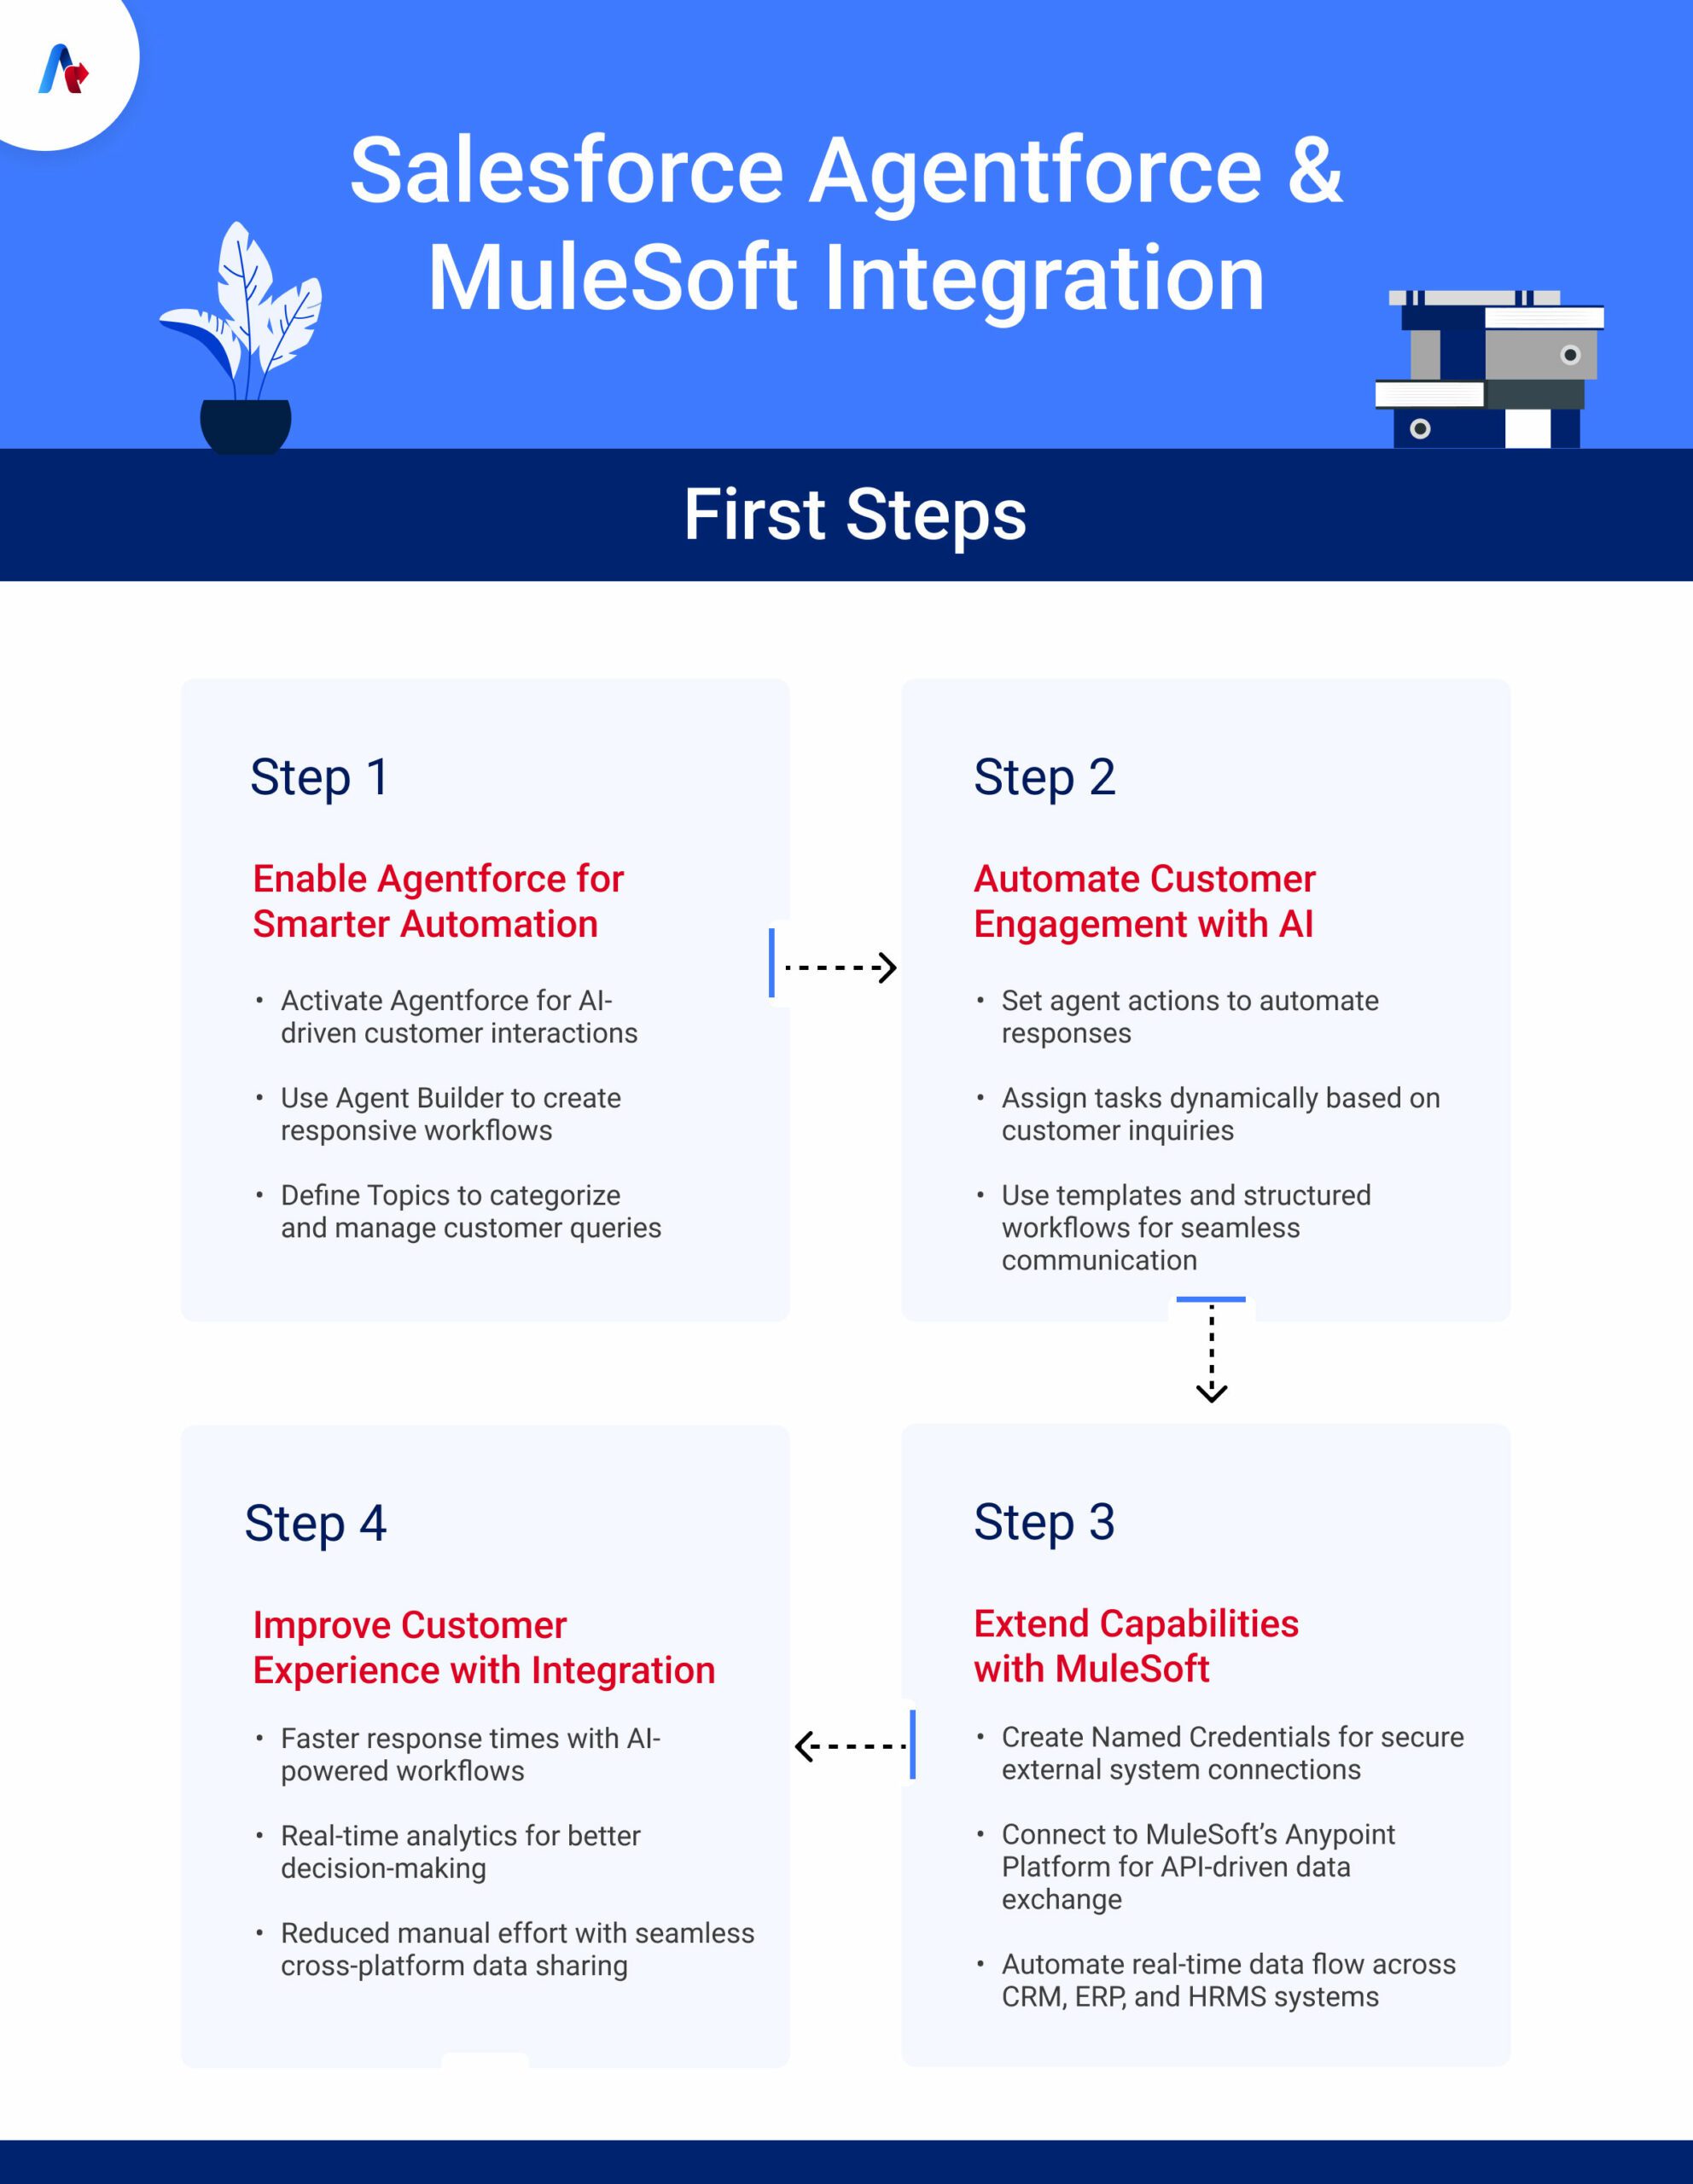
- Enable Agentforce – Activate Agentforce to allow AI agents to interact with customers through intelligent automation.
- Use the Agent Builder – Configure and define agents using the Agent Builder to create responsive and efficient workflows.
- Create Topics – Define topics within Agentforce to categorize and manage customer queries efficiently.
Configuring Agents for Optimal Performance
Once Agentforce is enabled, you can start configuring your agents.
Steps to Enable Agents:
- Go to the Agentforce Dashboard.
- Click on Enable Agents.
- Configure agent settings and permissions.
- Save the changes to activate the agents.
Building Agent Actions and Workflows
Once an agent is activated, it performs a series of predefined actions to deliver meaningful responses. The workflow includes:
- Creating agent actions to define how the agent interacts with customers.
- Automating responses and assigning tasks based on customer inquiries.
- Enhancing communication with predefined templates and structured workflows.
Creating an Agent with Agent Builder
Agent Builder helps define how an agent functions and interacts with users.
Steps to Create an Agent:
- Navigate to Agent Builder.
- Click on Create New Agent.
- Define the agent’s role and tasks.
- Set up workflows and triggers.
- Save and activate the agent.
Organizing Topics for Better Query Management
Topics help categorize interactions, making it easier for agents to handle different types of customer queries efficiently.
Steps to Create a Topic
- Open Agentforce Topics.
- Click on Create Topic.
- Define the topic name and description.
- Assign relevant agents.
- Save and activate the topic.
Planning to extend your MuleSoft capabilities with Agentforce?
Let’s discuss!Connecting Agentforce with MuleSoft for Seamless Data Flow
MuleSoft integration extends Agentforce’s capabilities by enabling seamless connectivity between different enterprise systems. Through MuleSoft’s Anypoint Platform, businesses can connect Agentforce with various applications, such as CRM, ERP, and HRMS systems, ensuring real-time data exchange.
Steps to Integrate Agentforce with MuleSoft:
Step 1: Setting Up Named Credentials
Named credentials enable secure authentication for connecting Agentforce with external systems.
- Open Integration Settings.
- Click on Create Named Credentials.
- Enter API endpoint, authentication details, and permissions.
- Save the credentials.
Step 2: Connecting to Anypoint Platform
MuleSoft’s Anypoint Platform serves as the bridge for data integration. Leverage the platform to create APIs that facilitate smooth data exchange.
- Log into Anypoint Platform.
- Navigate to API Manager.
- Register the Agentforce API.
- Deploy an API proxy for secure connectivity.
- Configure policies and security settings.
- Save and deploy the integration.
Step 3: Automating Data Flow Between Systems
After successful integration, automation can be implemented to ensure smooth workflows.
- Sync customer interactions, sales data, and support tickets in real time.
- Automate data sharing between Agentforce and CRM/ERP platforms.
- Trigger automated actions based on customer interactions.
Improving Customer Experience with Integration
By integrating Agentforce with MuleSoft, organizations can:
- Improve response times with automated workflows.
- Gain valuable customer insights through real-time data analytics.
- Reduce manual effort by enabling seamless cross-platform data sharing.
Now, let’s look at a step-by-step process covering all the required stages that can help you integrate Agentforce with MuleSoft faster and much easily. We have also attached stepwise screenshots for a better visibility and understanding of the process.
Integrating Agentforce with MuleSoft: A Step-by-Step Guide

By integrating Agentforce with MuleSoft, businesses can automate workflows, streamline data sharing, and improve customer interactions. This integration not only reduces manual efforts but also provides real-time insights for better decision-making.
This step-by-step guide will walk you through the process from enabling Einstein in Agentforce to creating agents and integrating them with MuleSoft for seamless connectivity. Let’s begin.
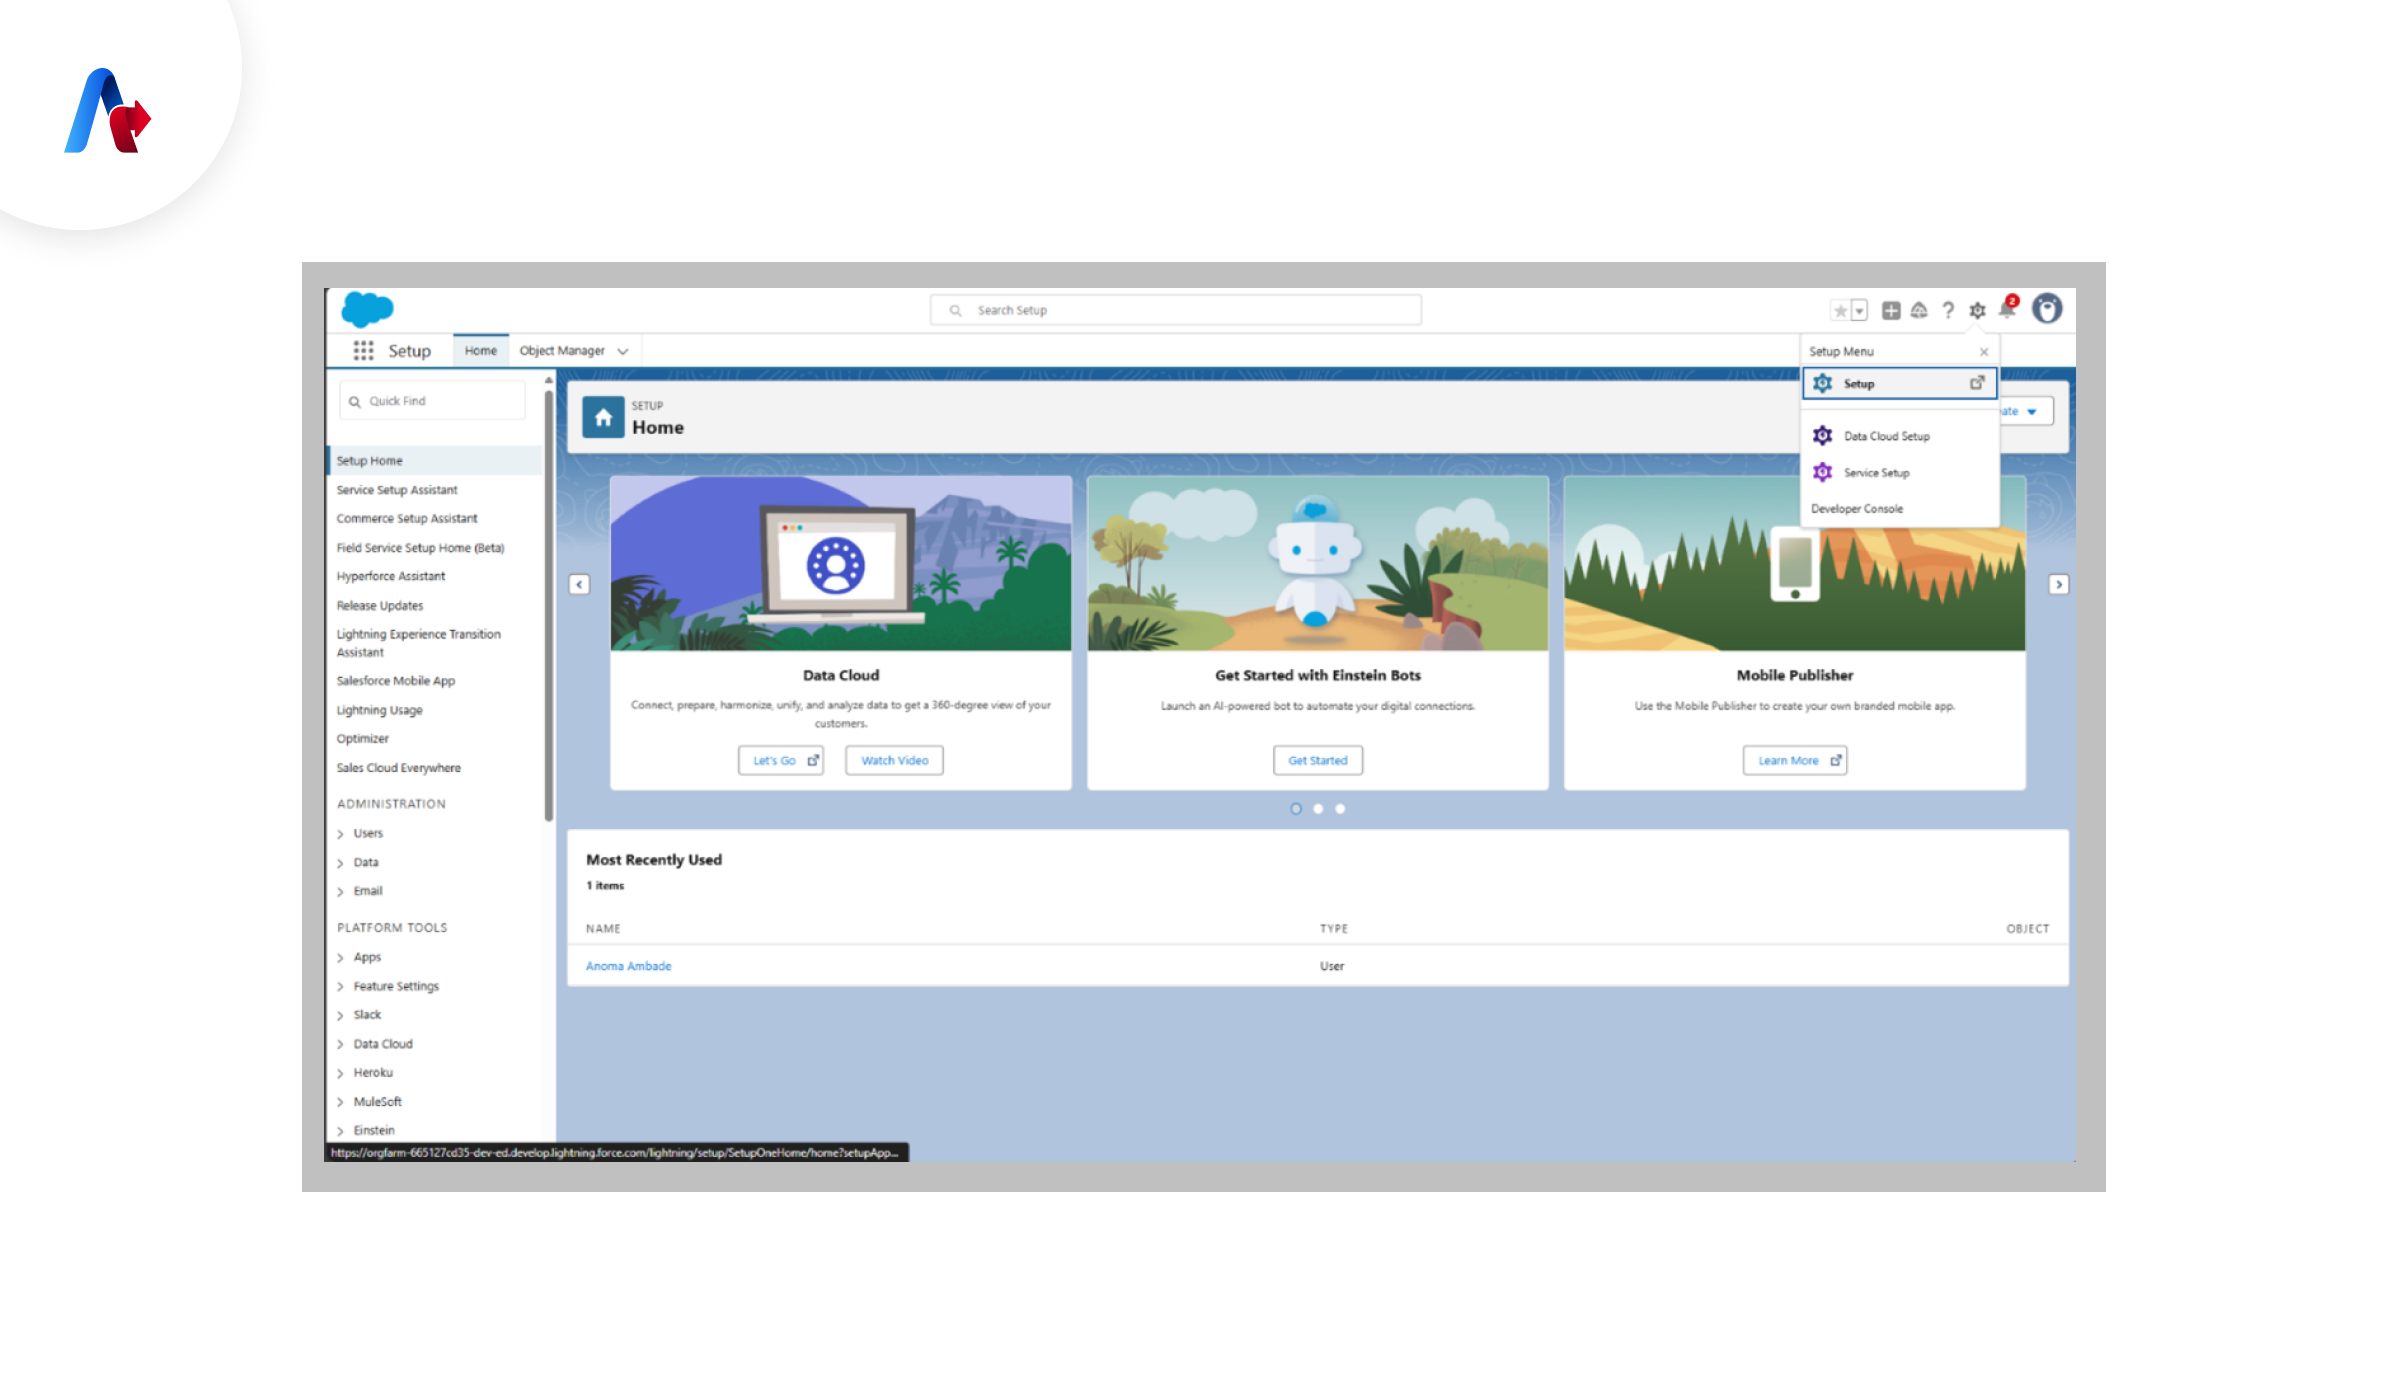
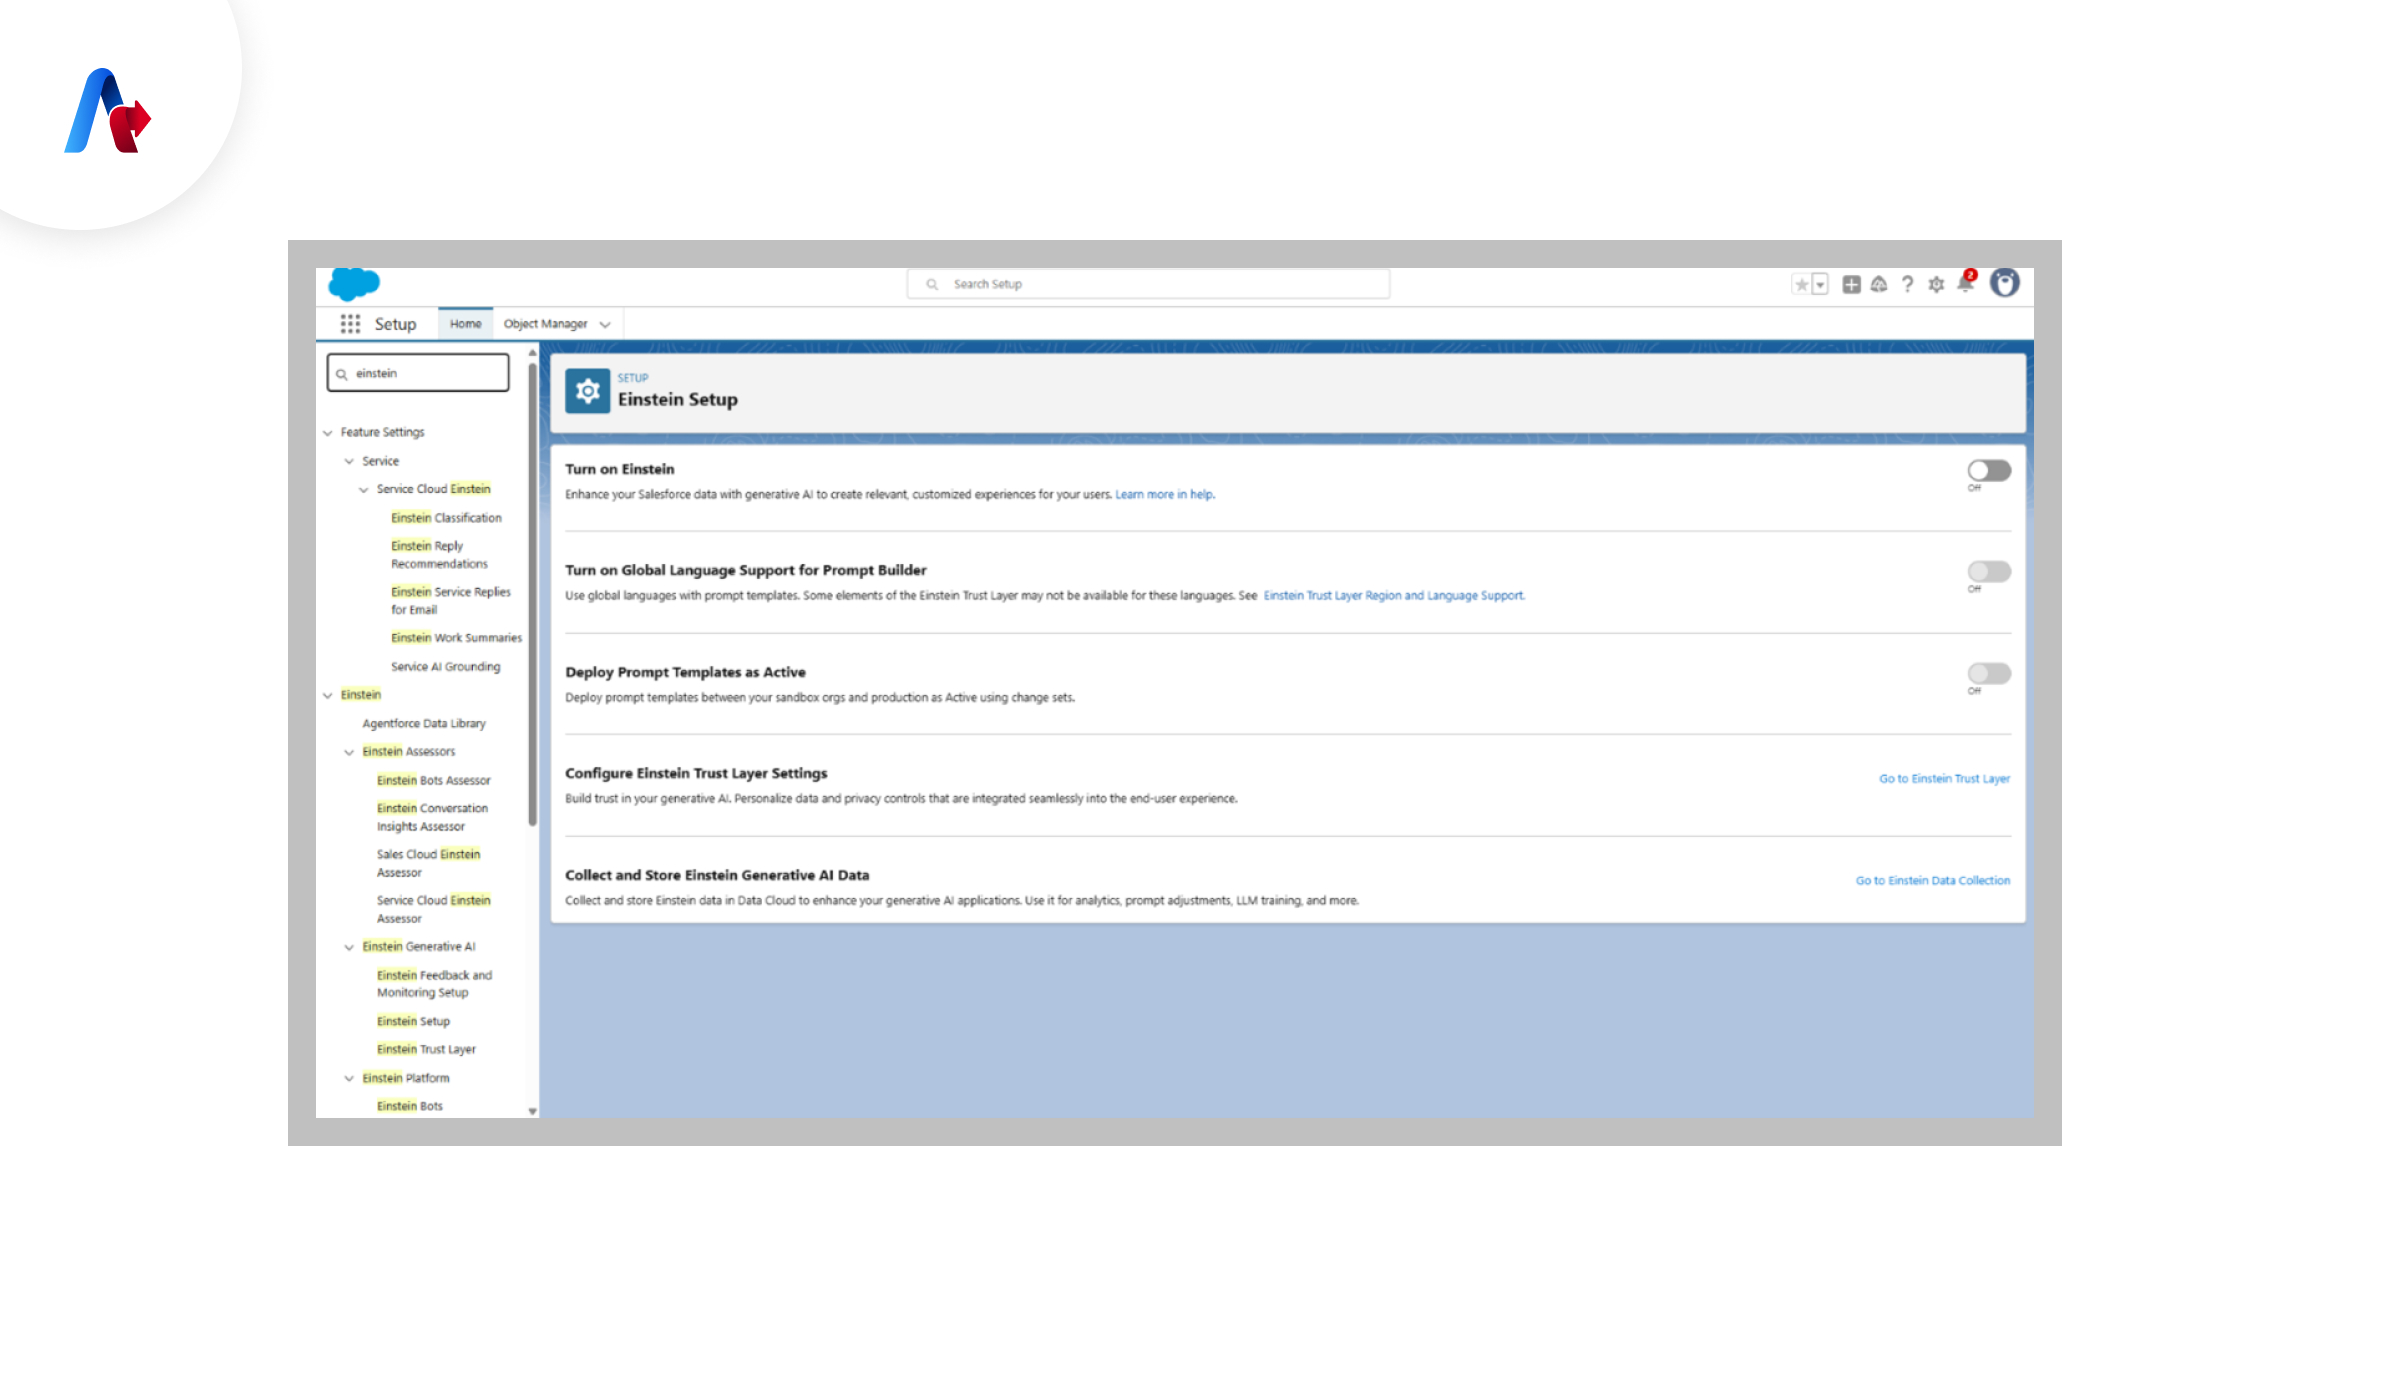
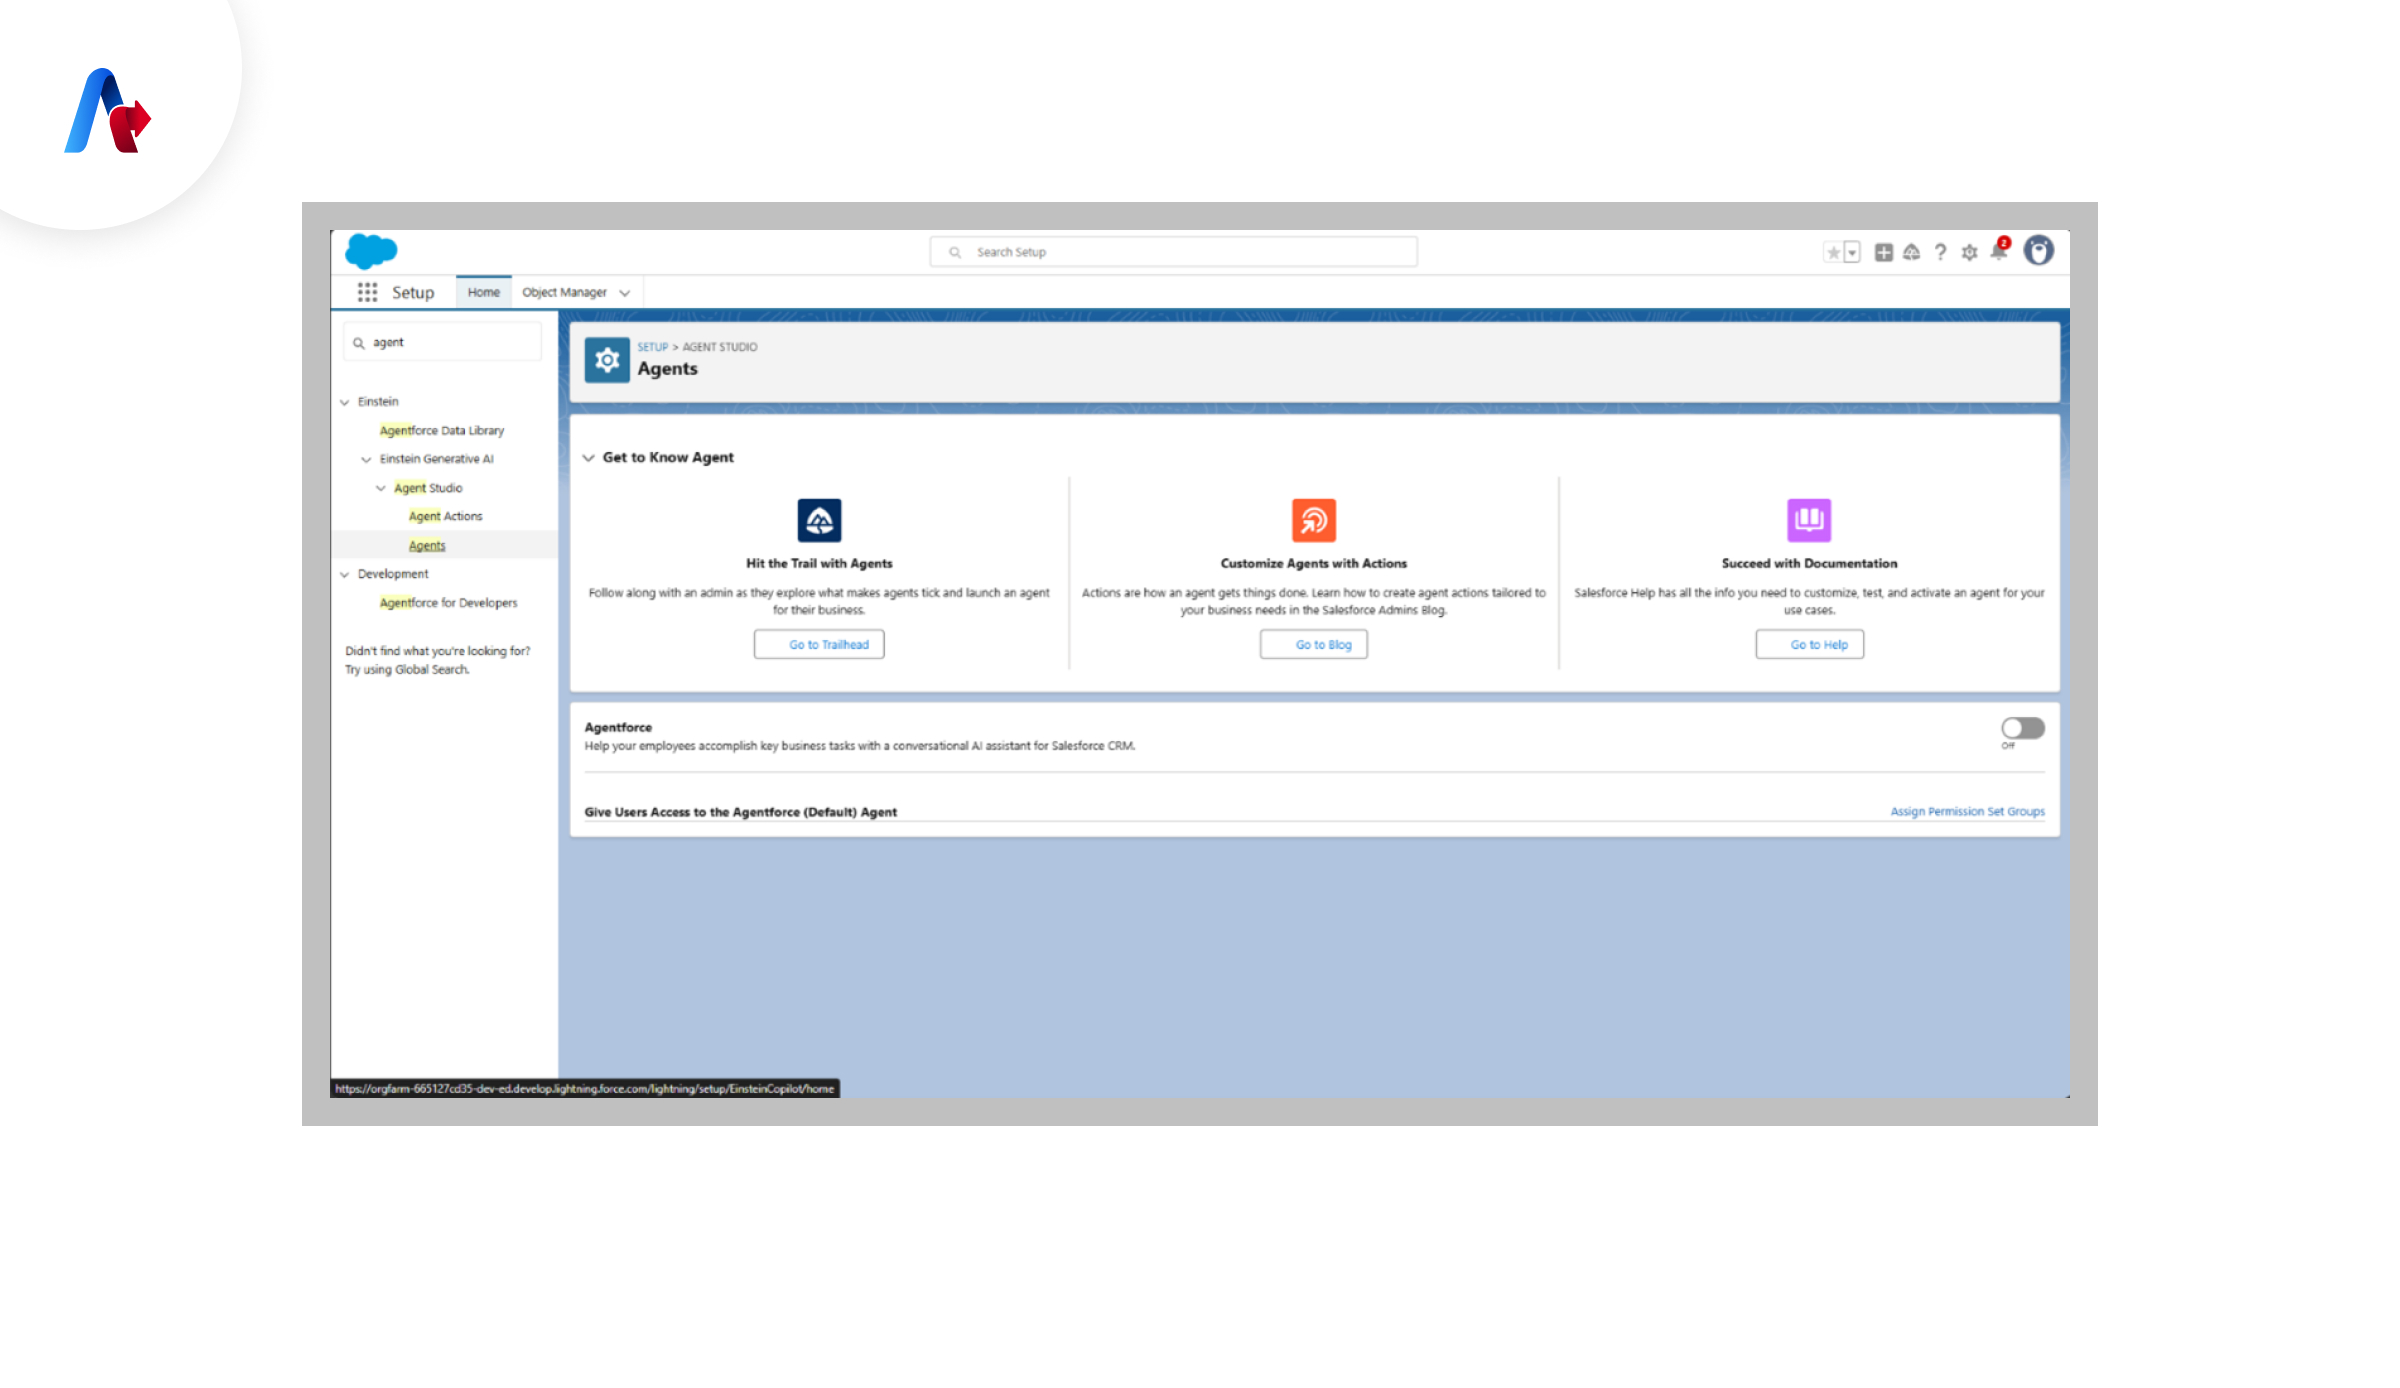
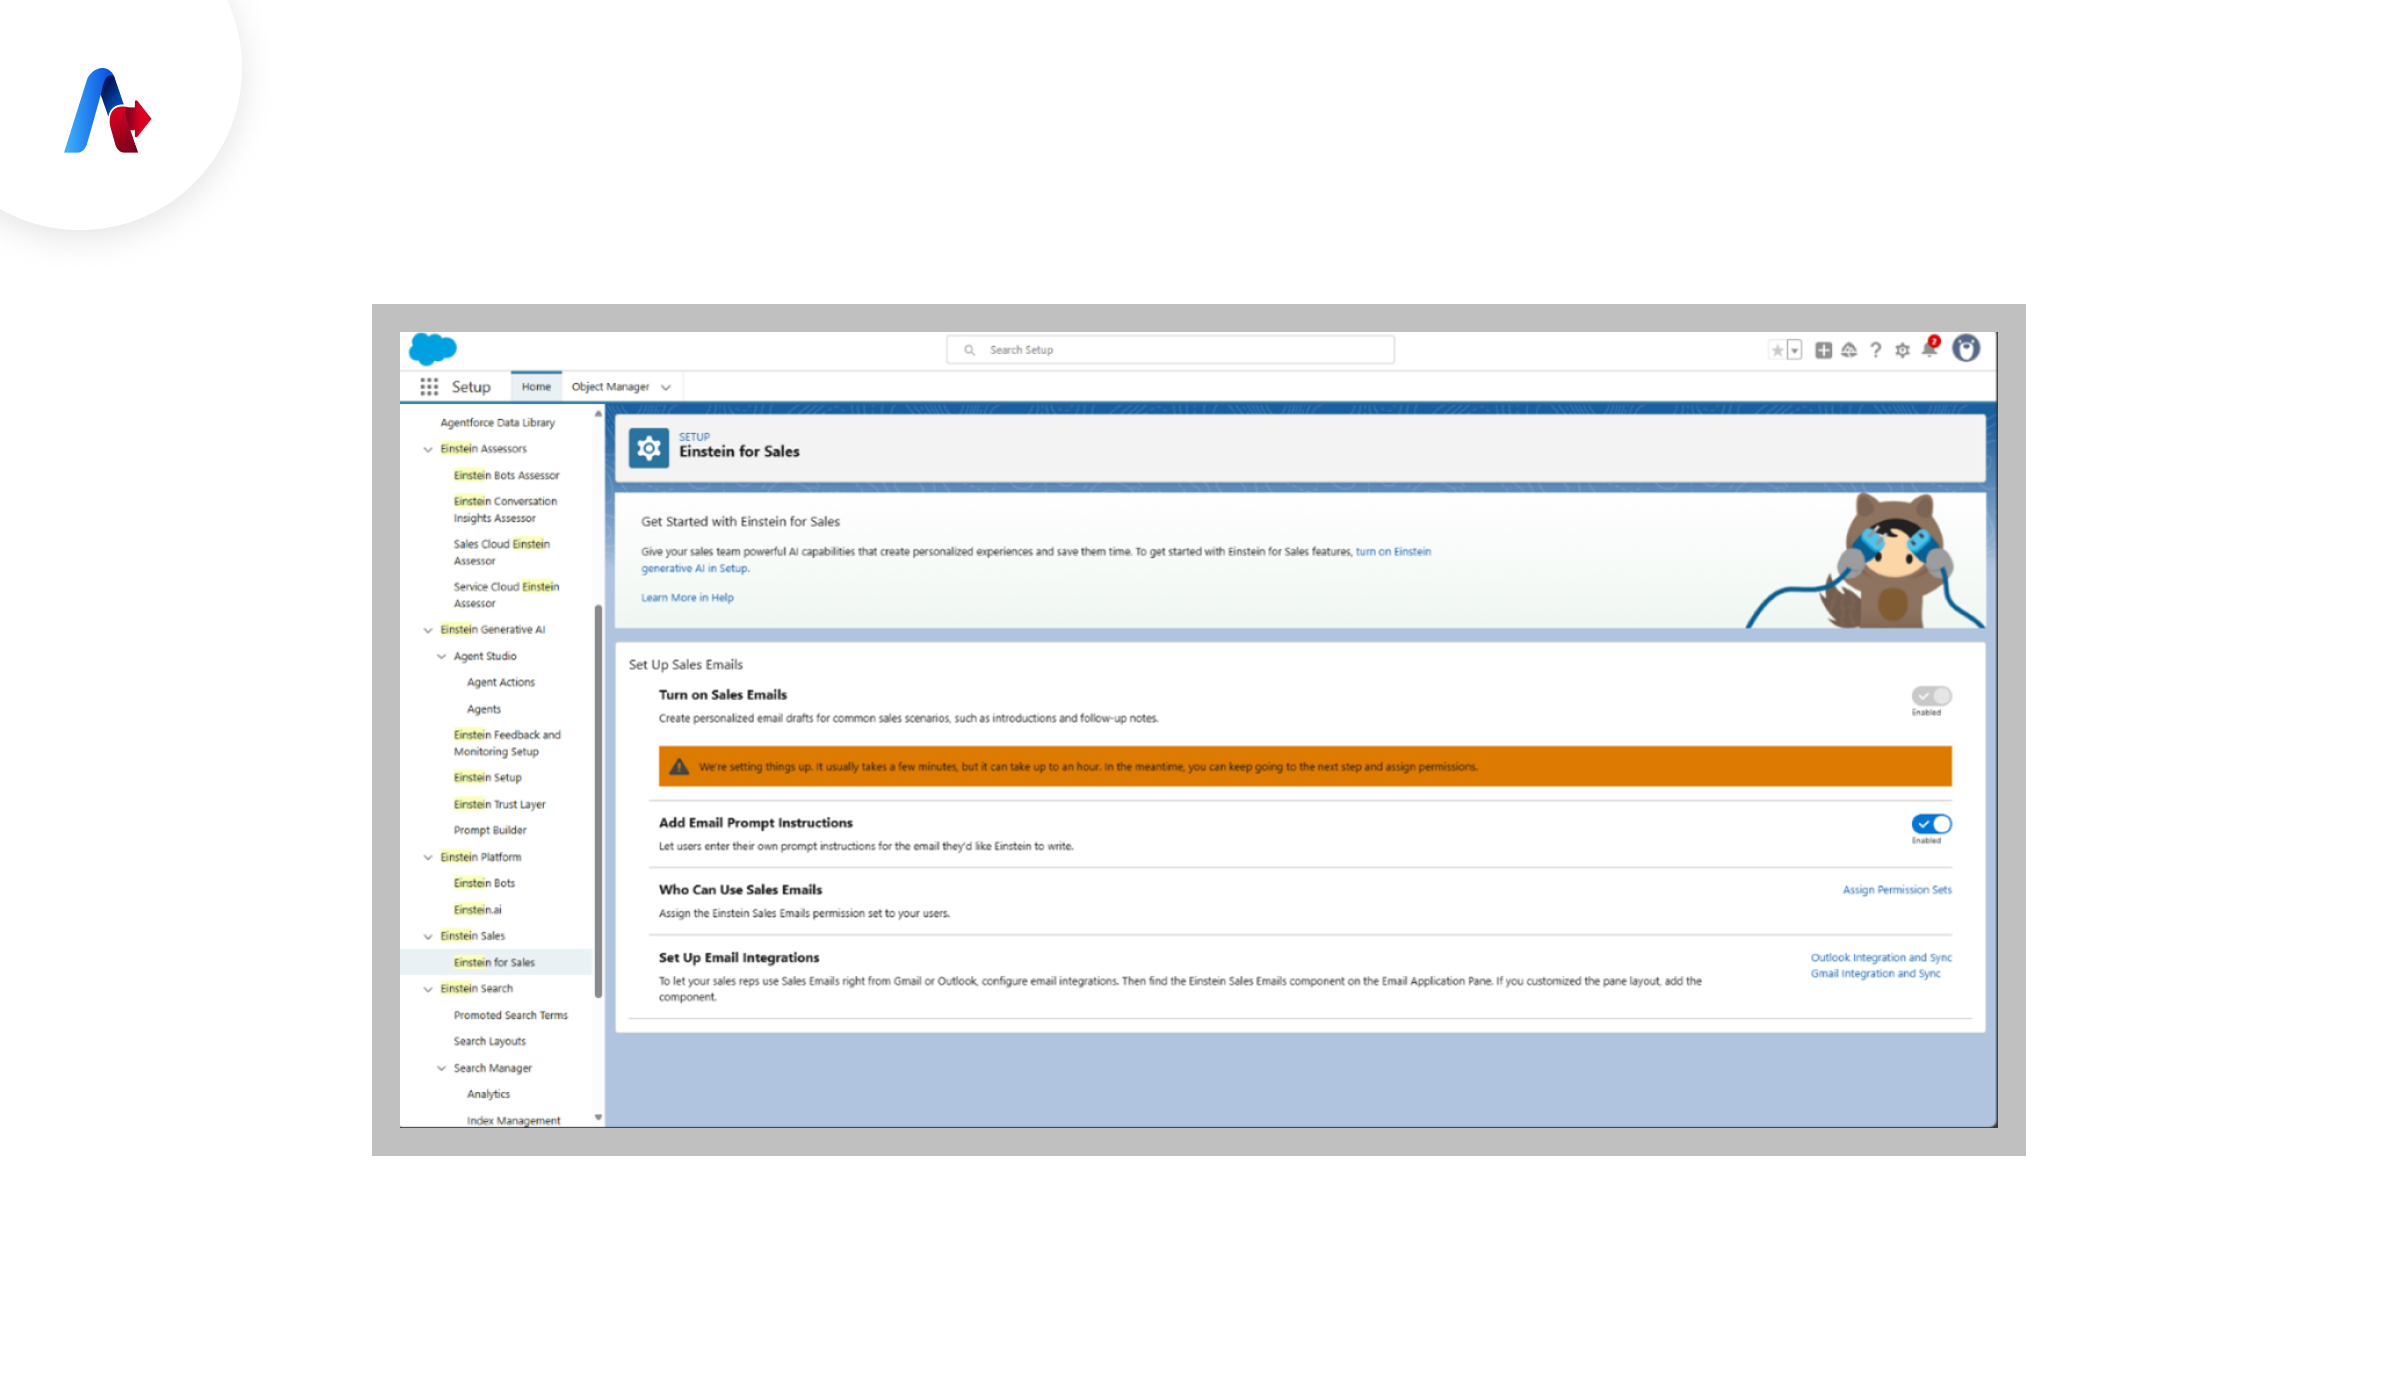
Step 1: Enabling Einstein in Agentforce
To leverage AI-powered functionalities in Agentforce, you first need to enable Einstein. This allows the system to automate responses and optimize agent performance.
- Navigate to the Einstein Settings in Agentforce.
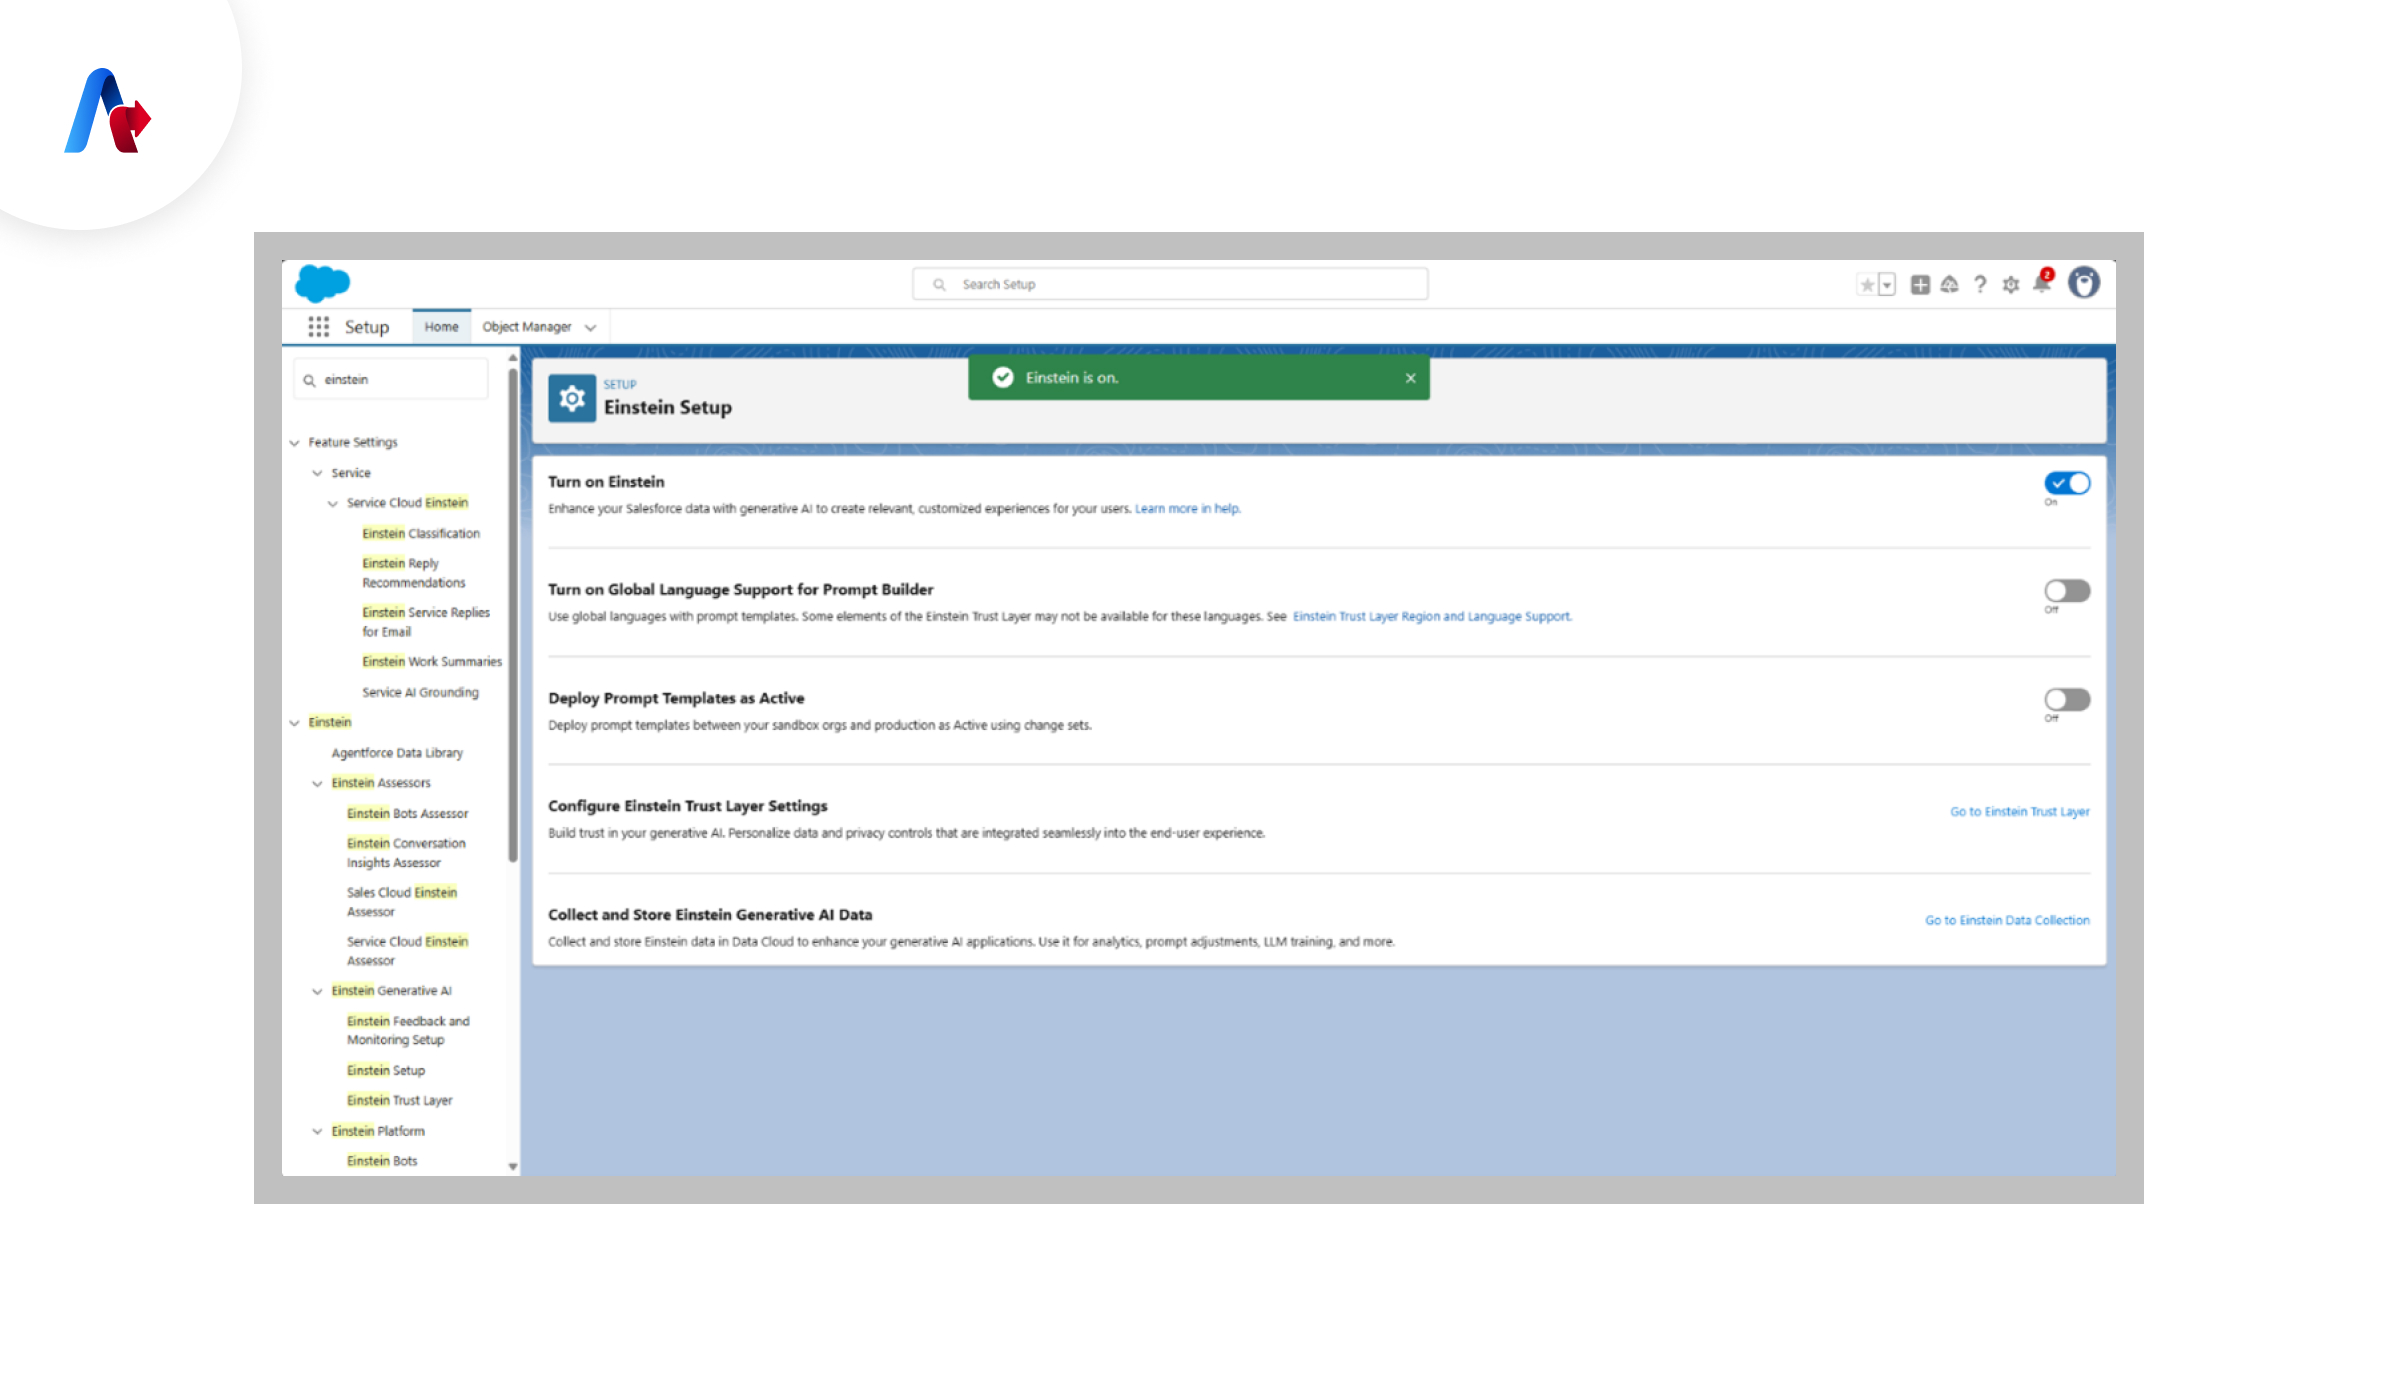
- Enable the Einstein toggle switch.
- Save the settings to activate AI functionalities.
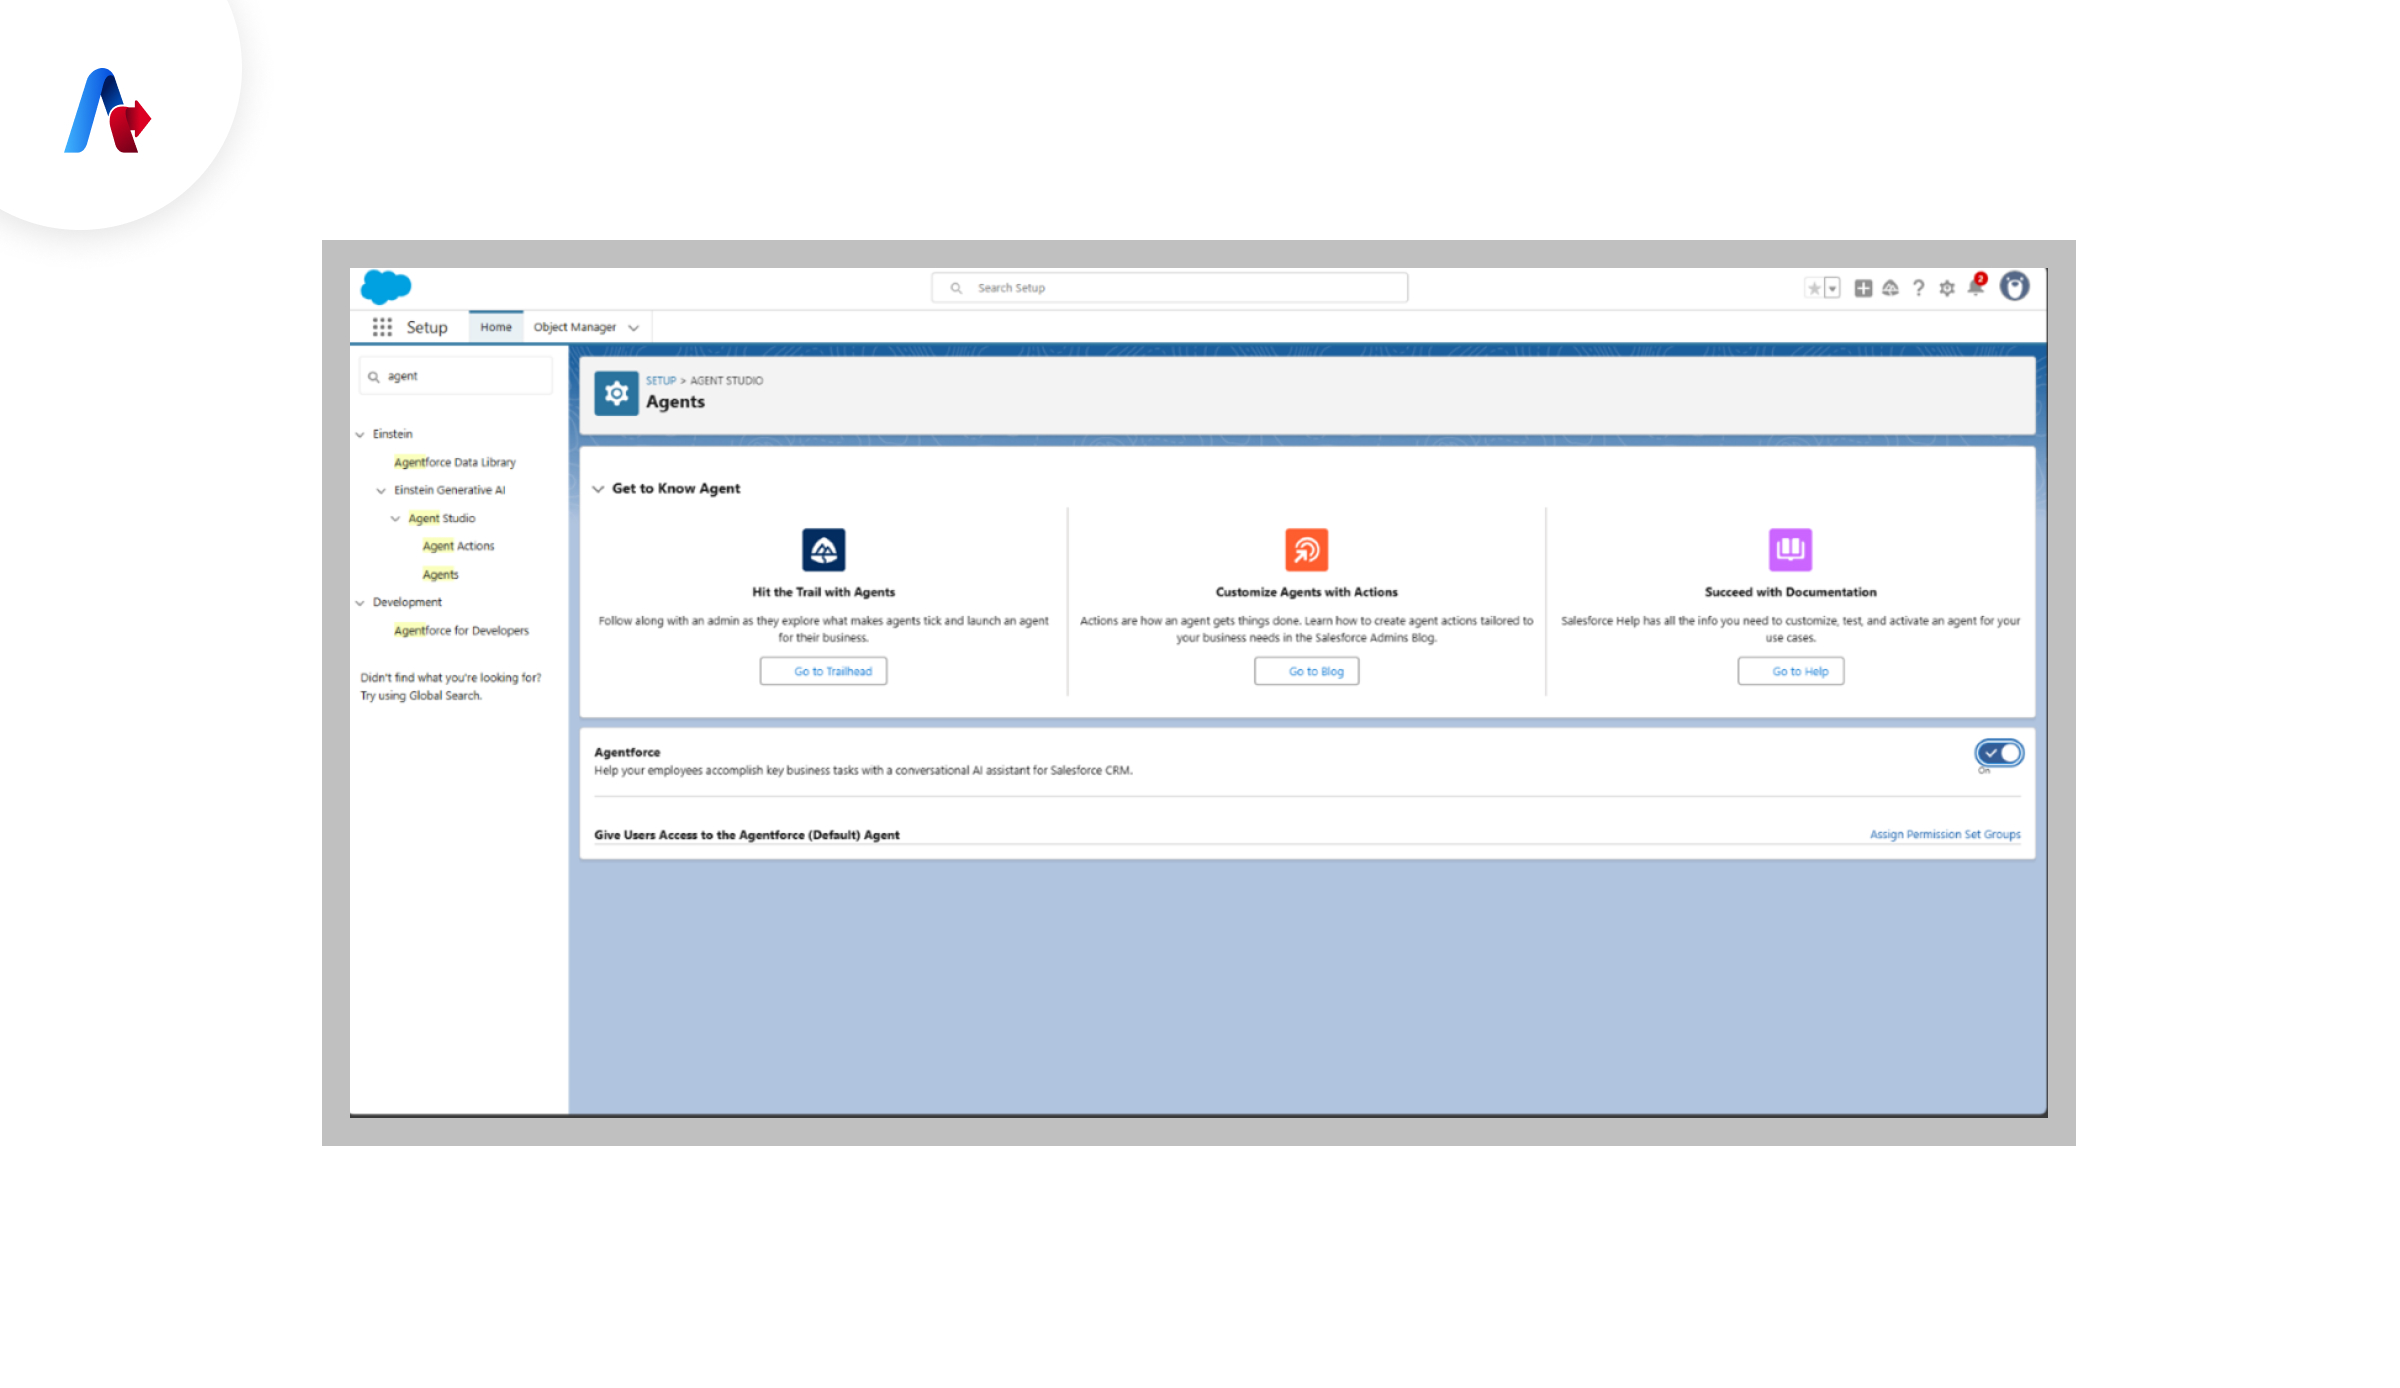
Step 2: Using Agentforce to Enable Agents
Once Einstein is enabled, you can proceed to activate agents within Agentforce.
- Go to Agentforce Dashboard.
- Click on Enable Agents.
- Configure agent settings and permissions.
- Save the changes and activate the agents.
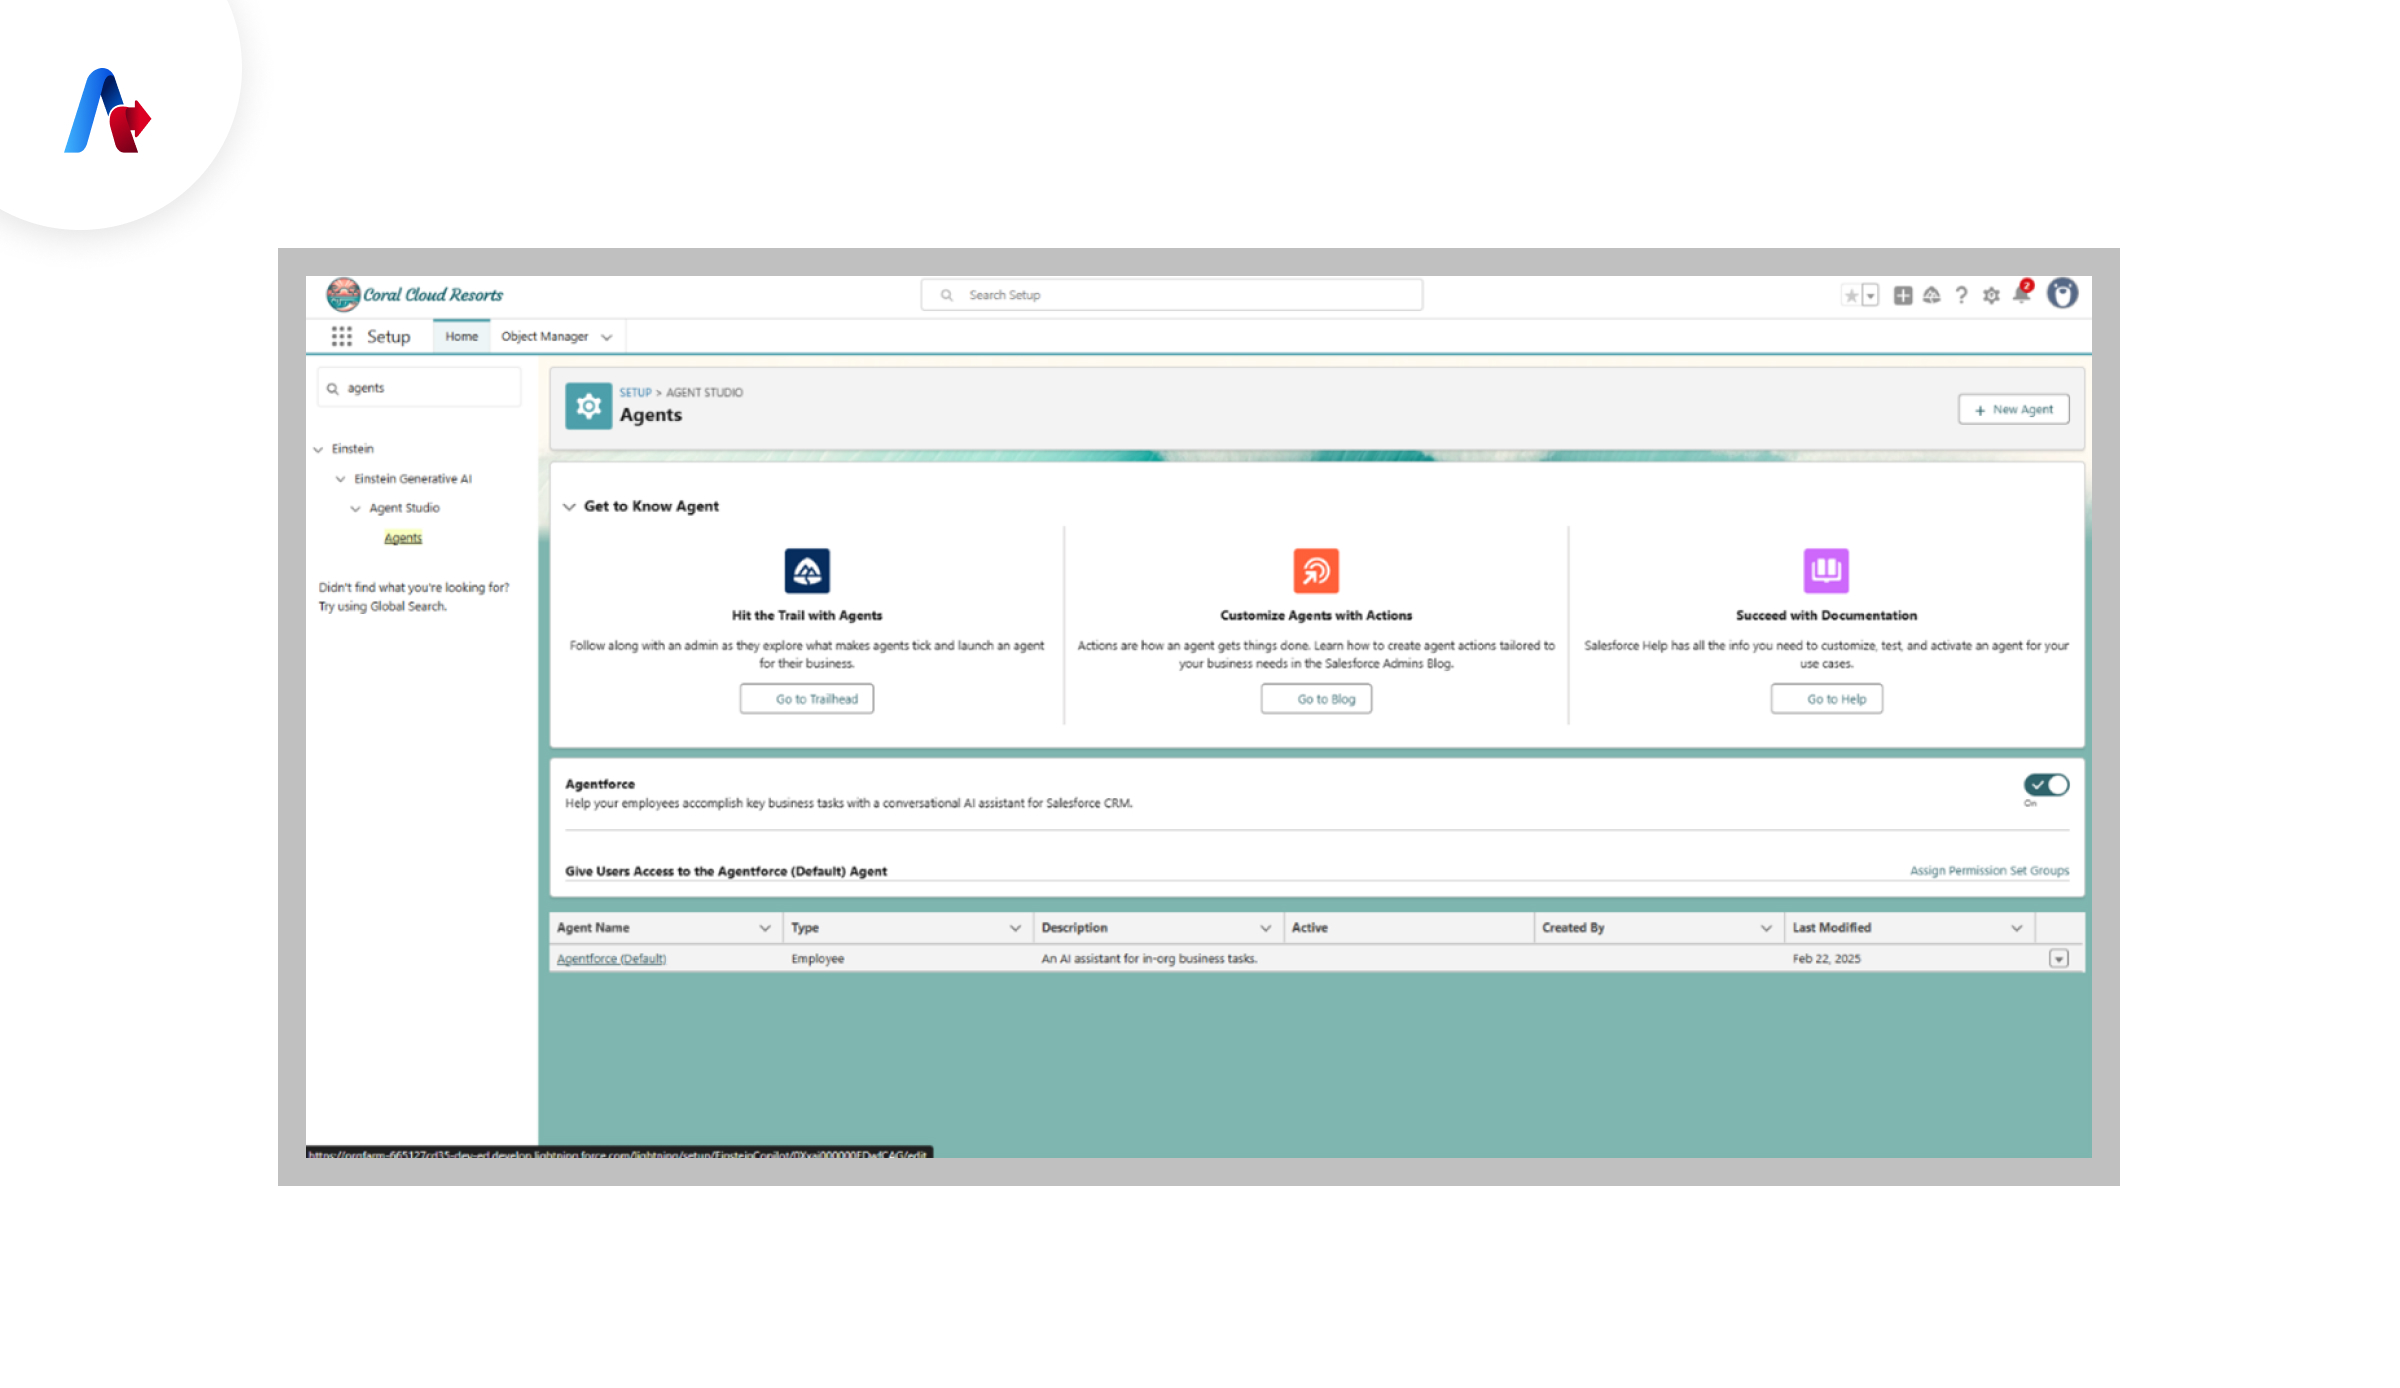
Step 3: Creating an Agent Using Agent Builder
Agent Builder allows you to create and configure agents to handle specific tasks.
- Navigate to Agent Builder.
- Click on Create New Agent.
- Define the agent’s role and tasks.
- Set up workflows and triggers.
- Save and activate the agent.
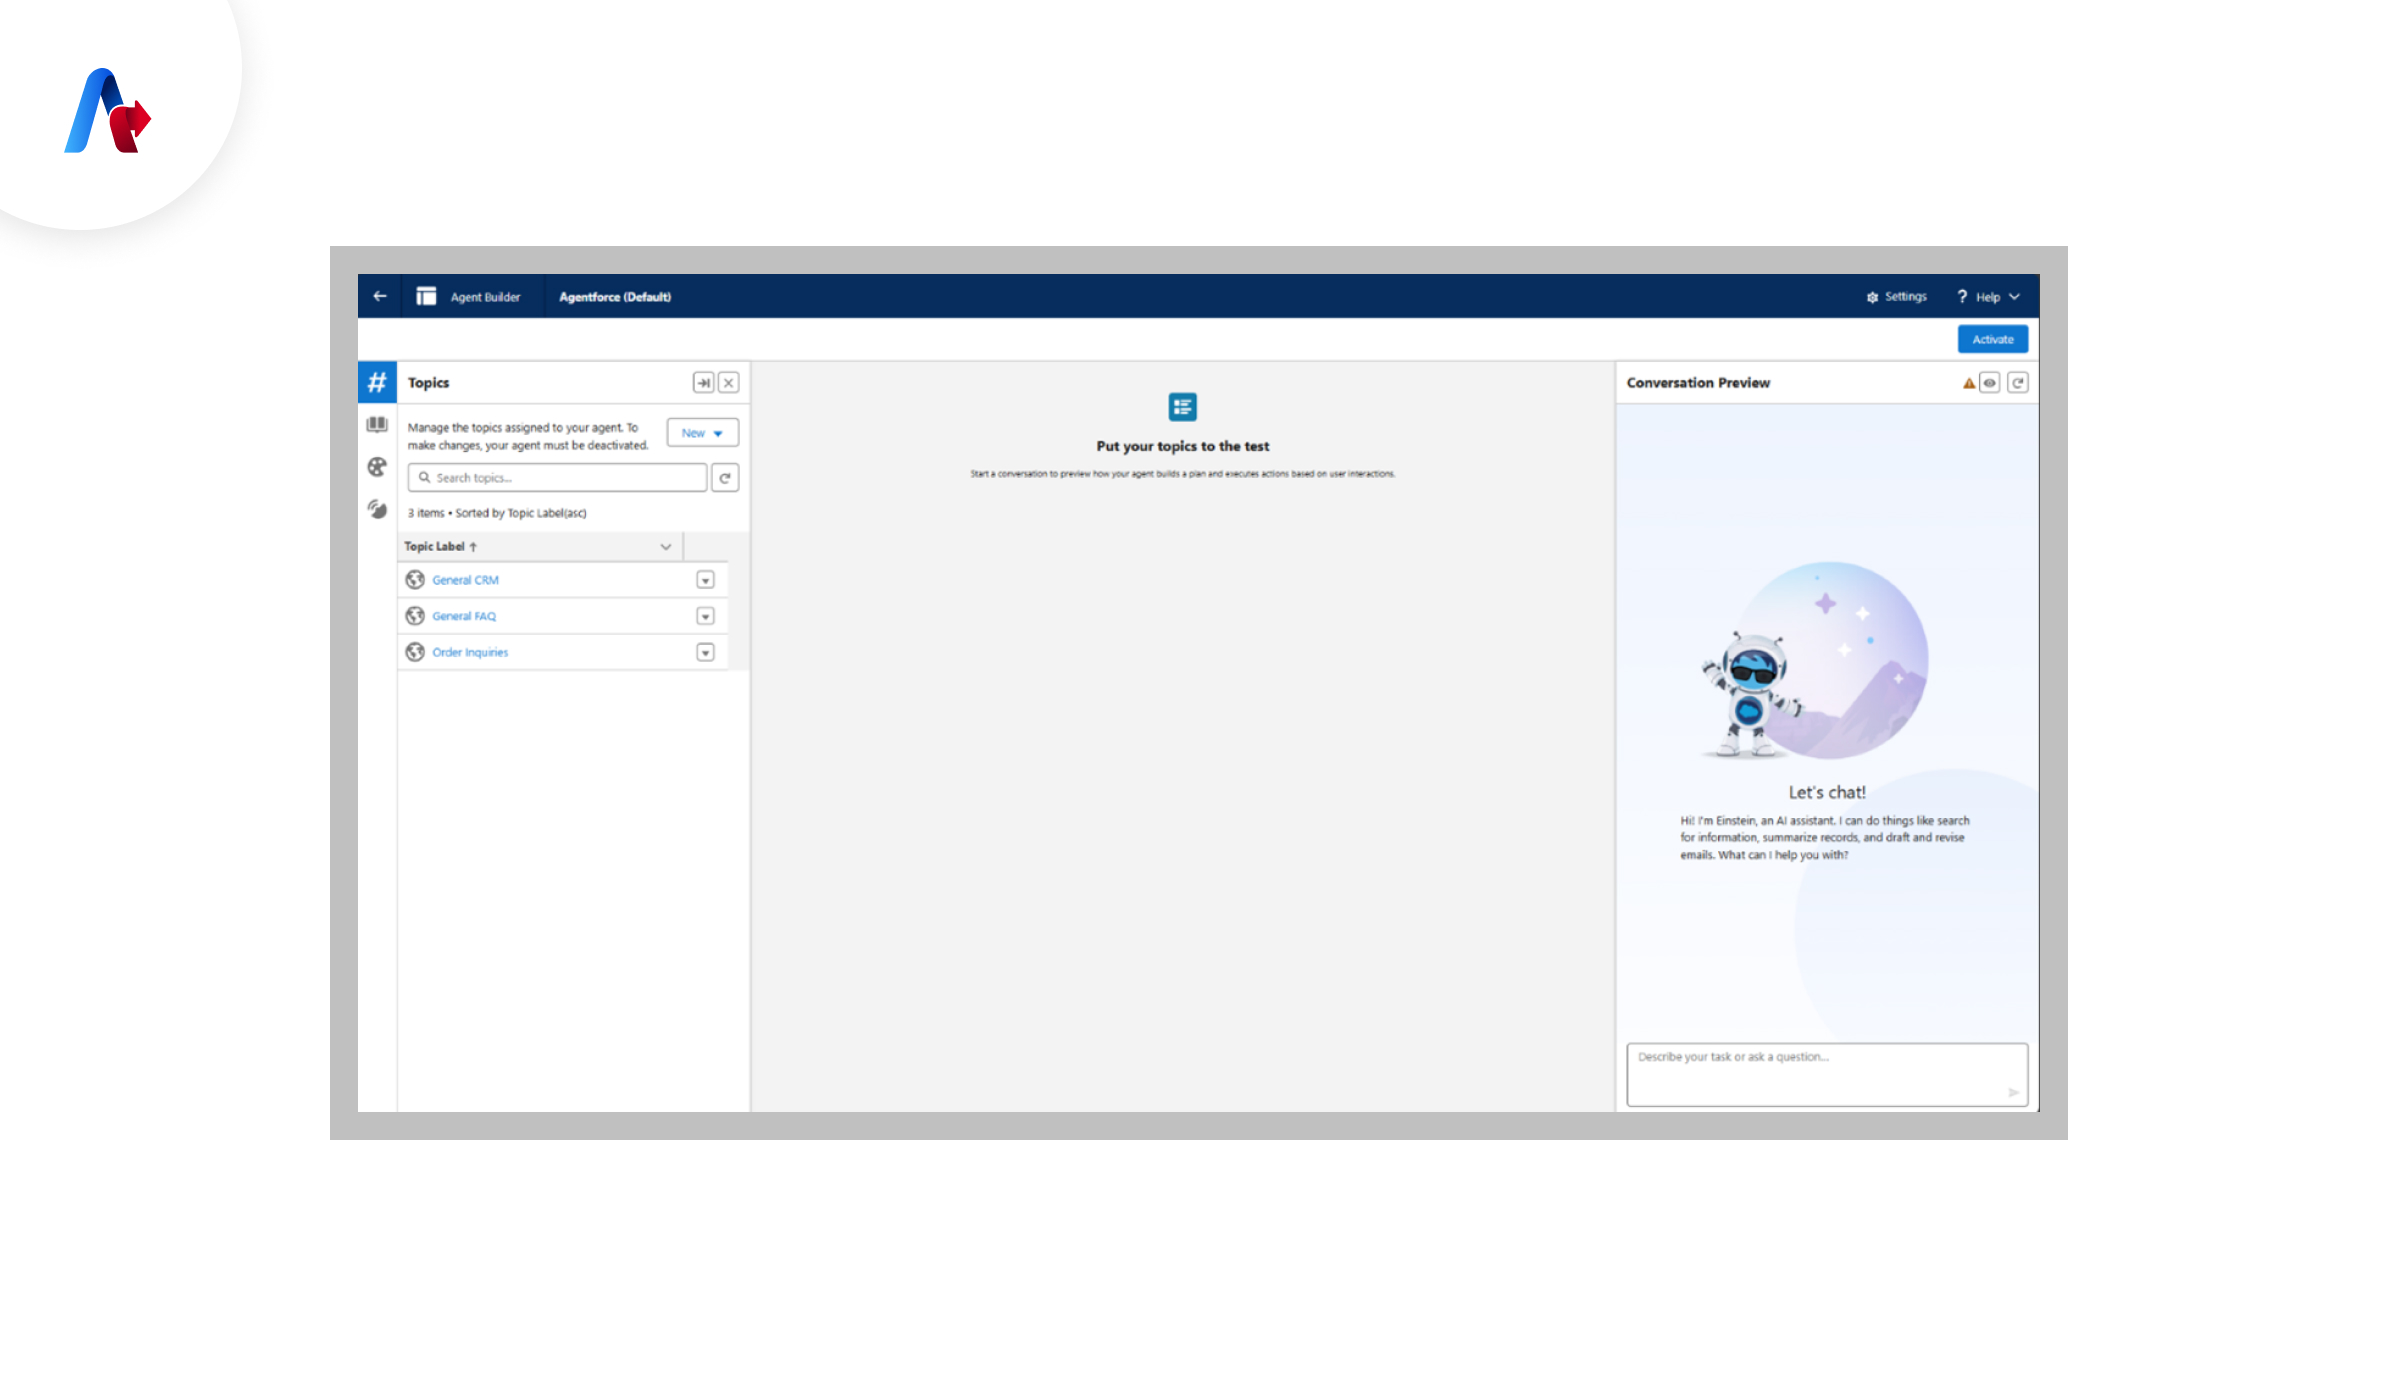
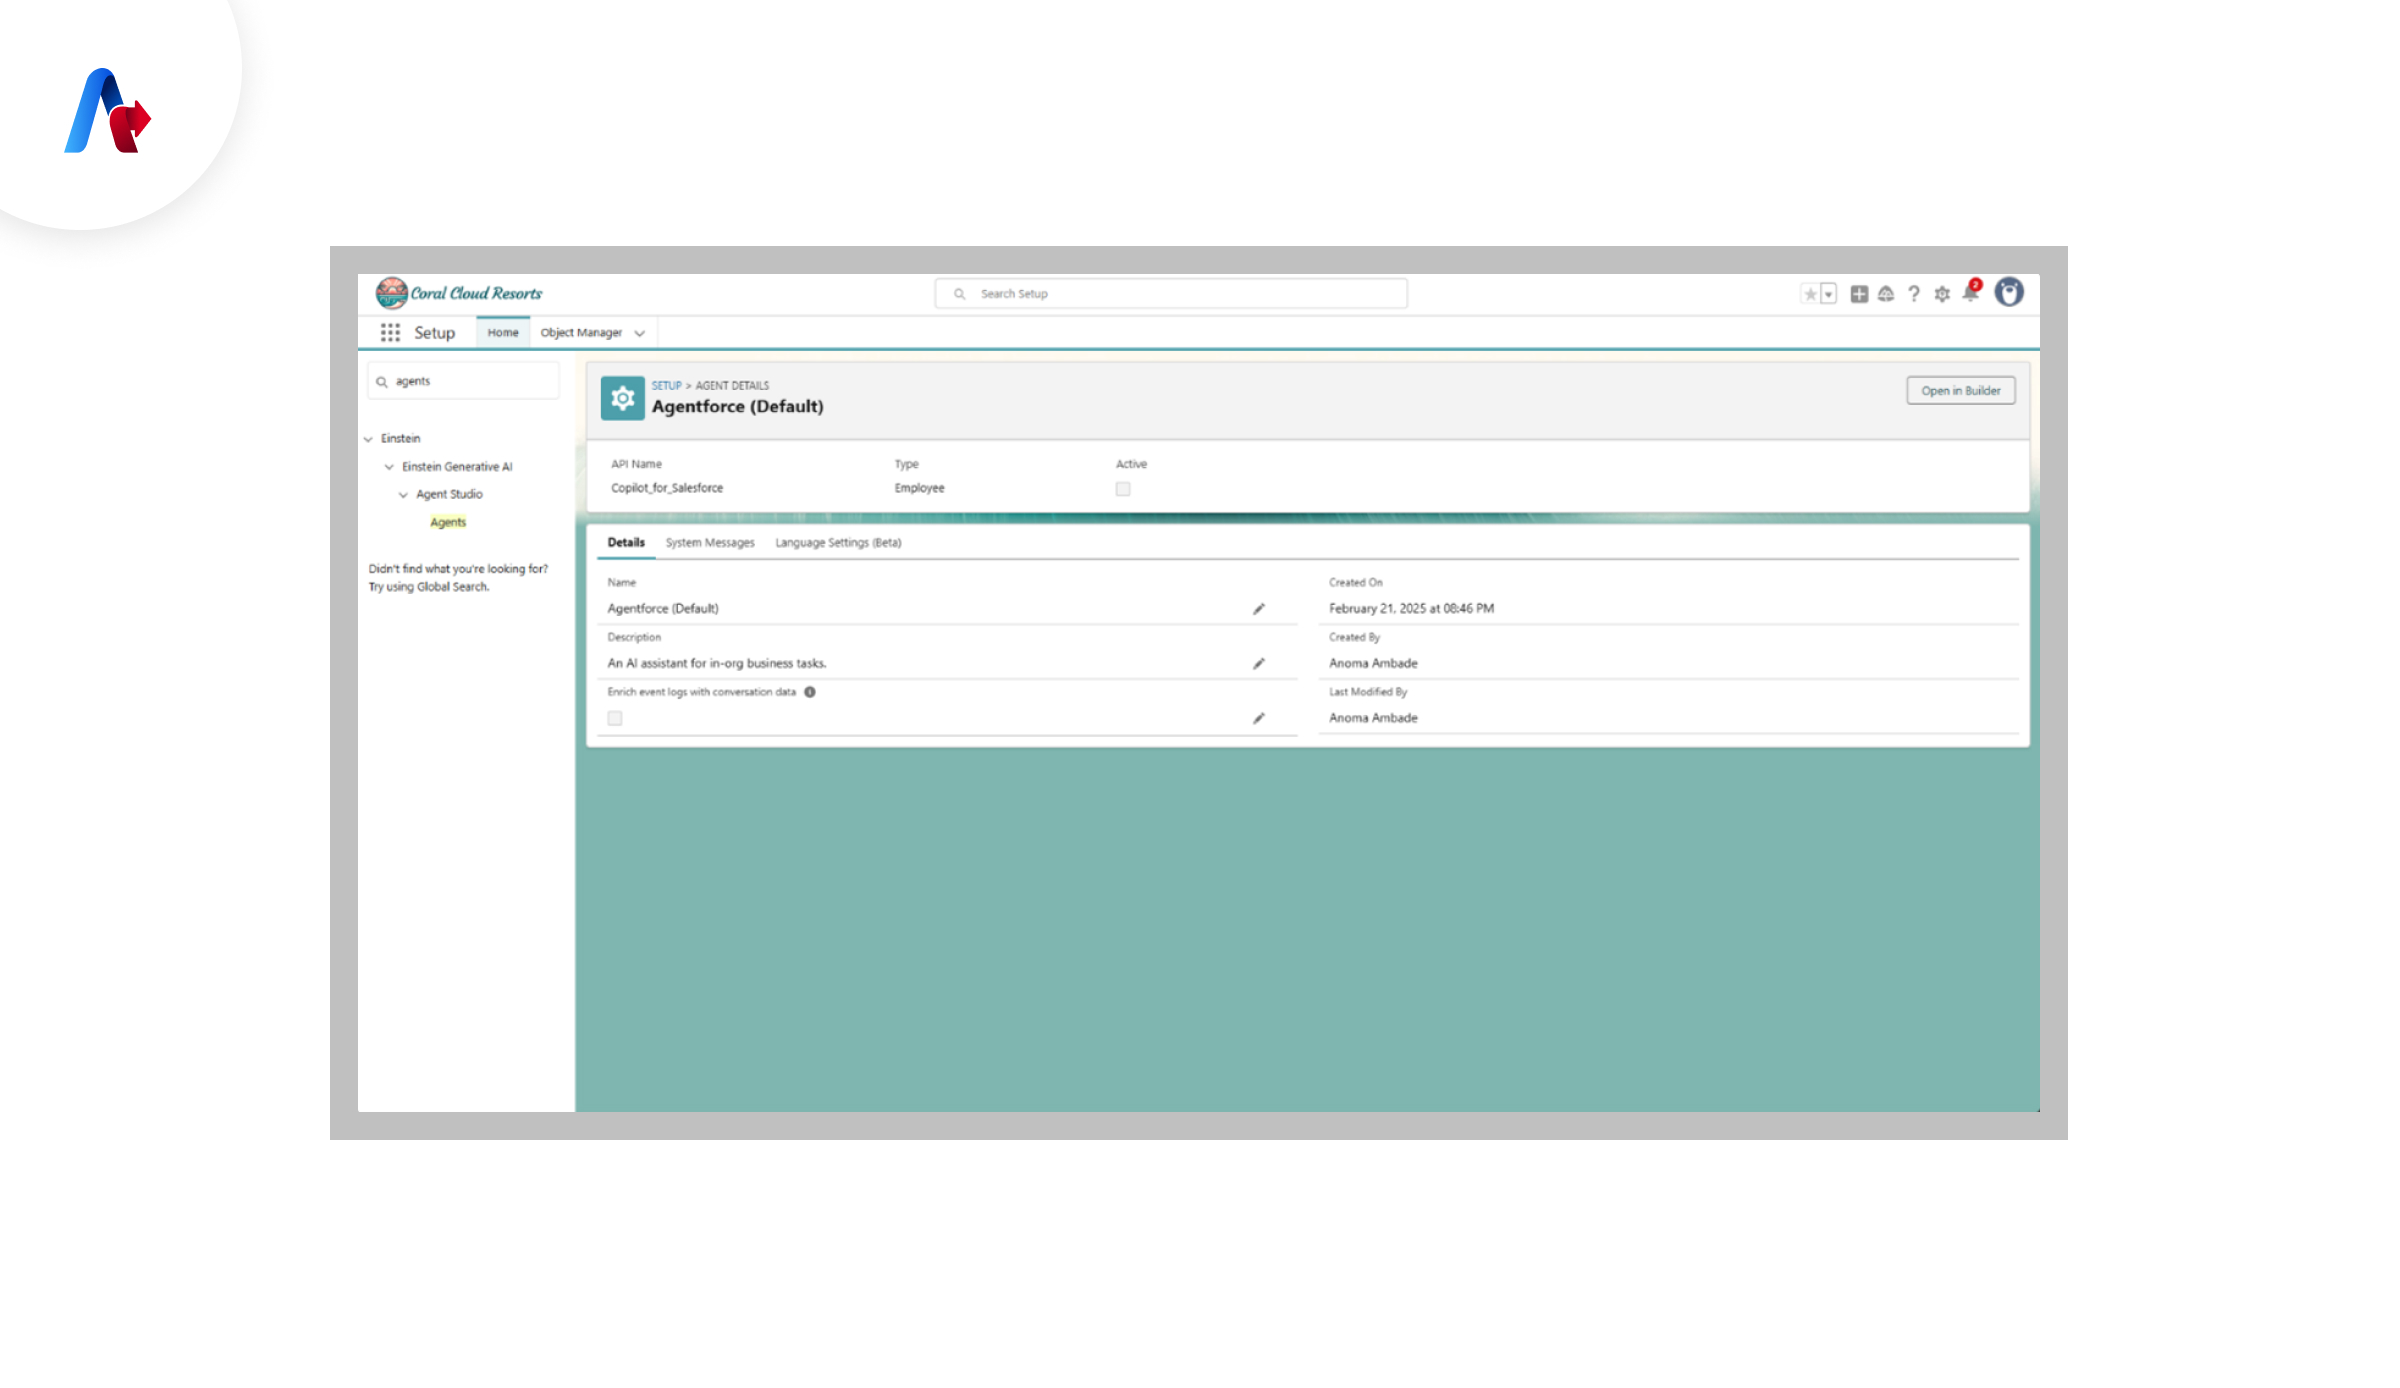
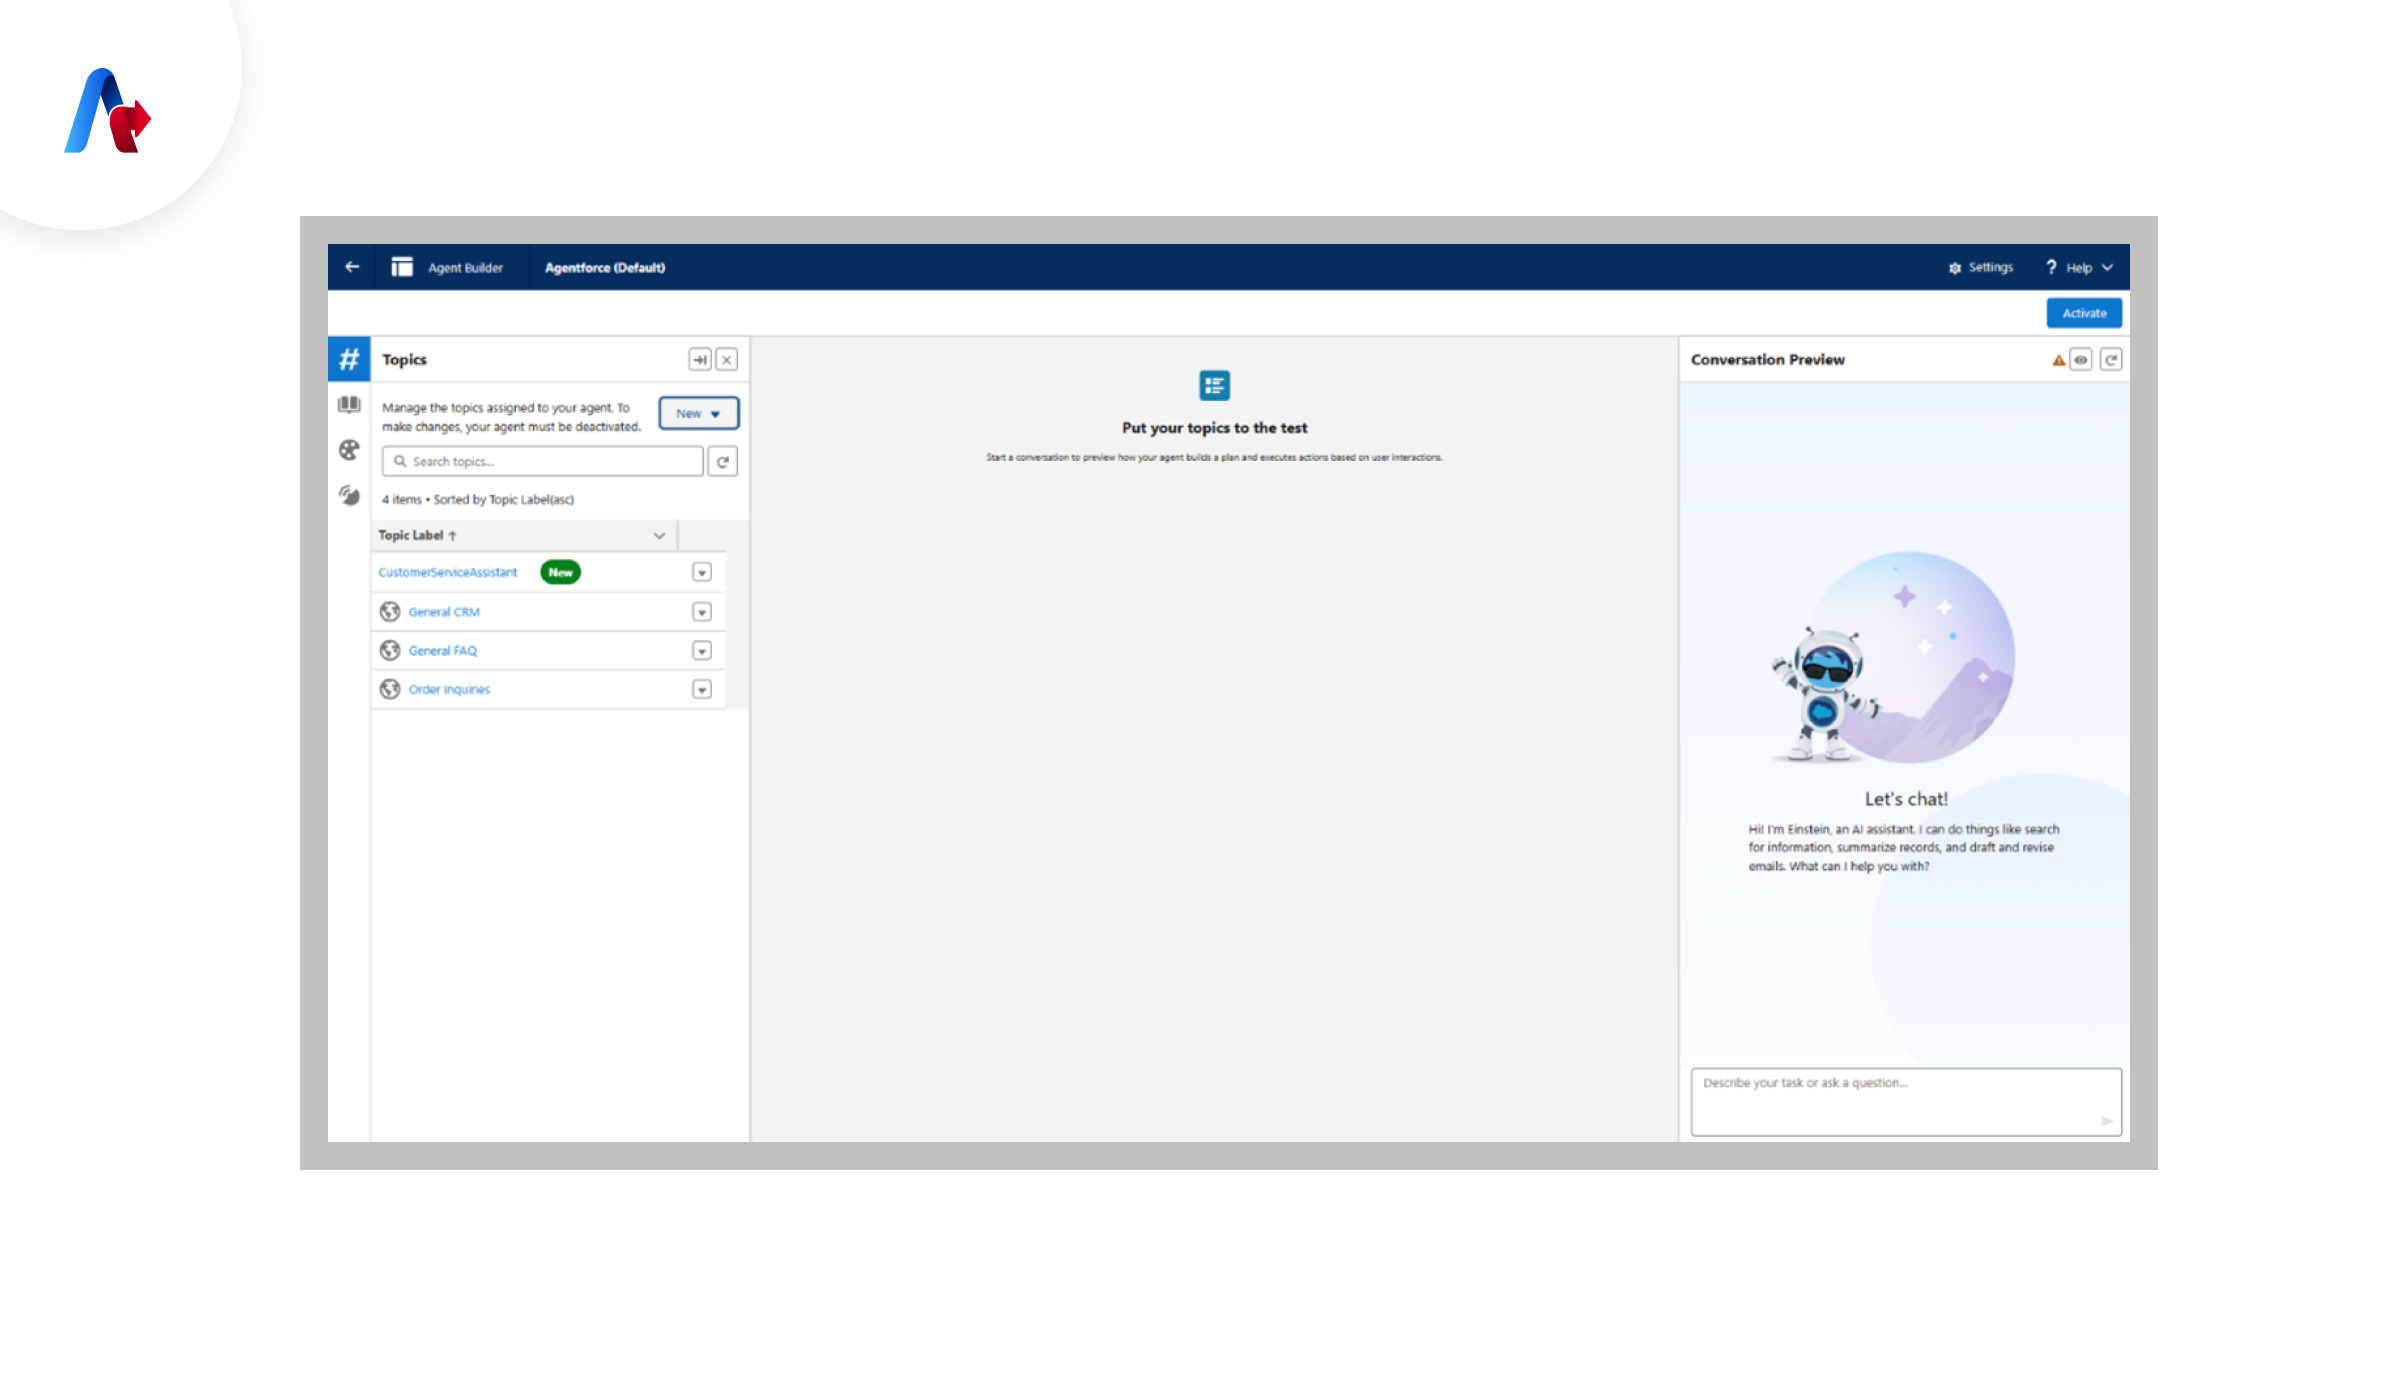
Step 4: Creating a Topic in Agentforce
Topics help categorize agent activities and interactions.
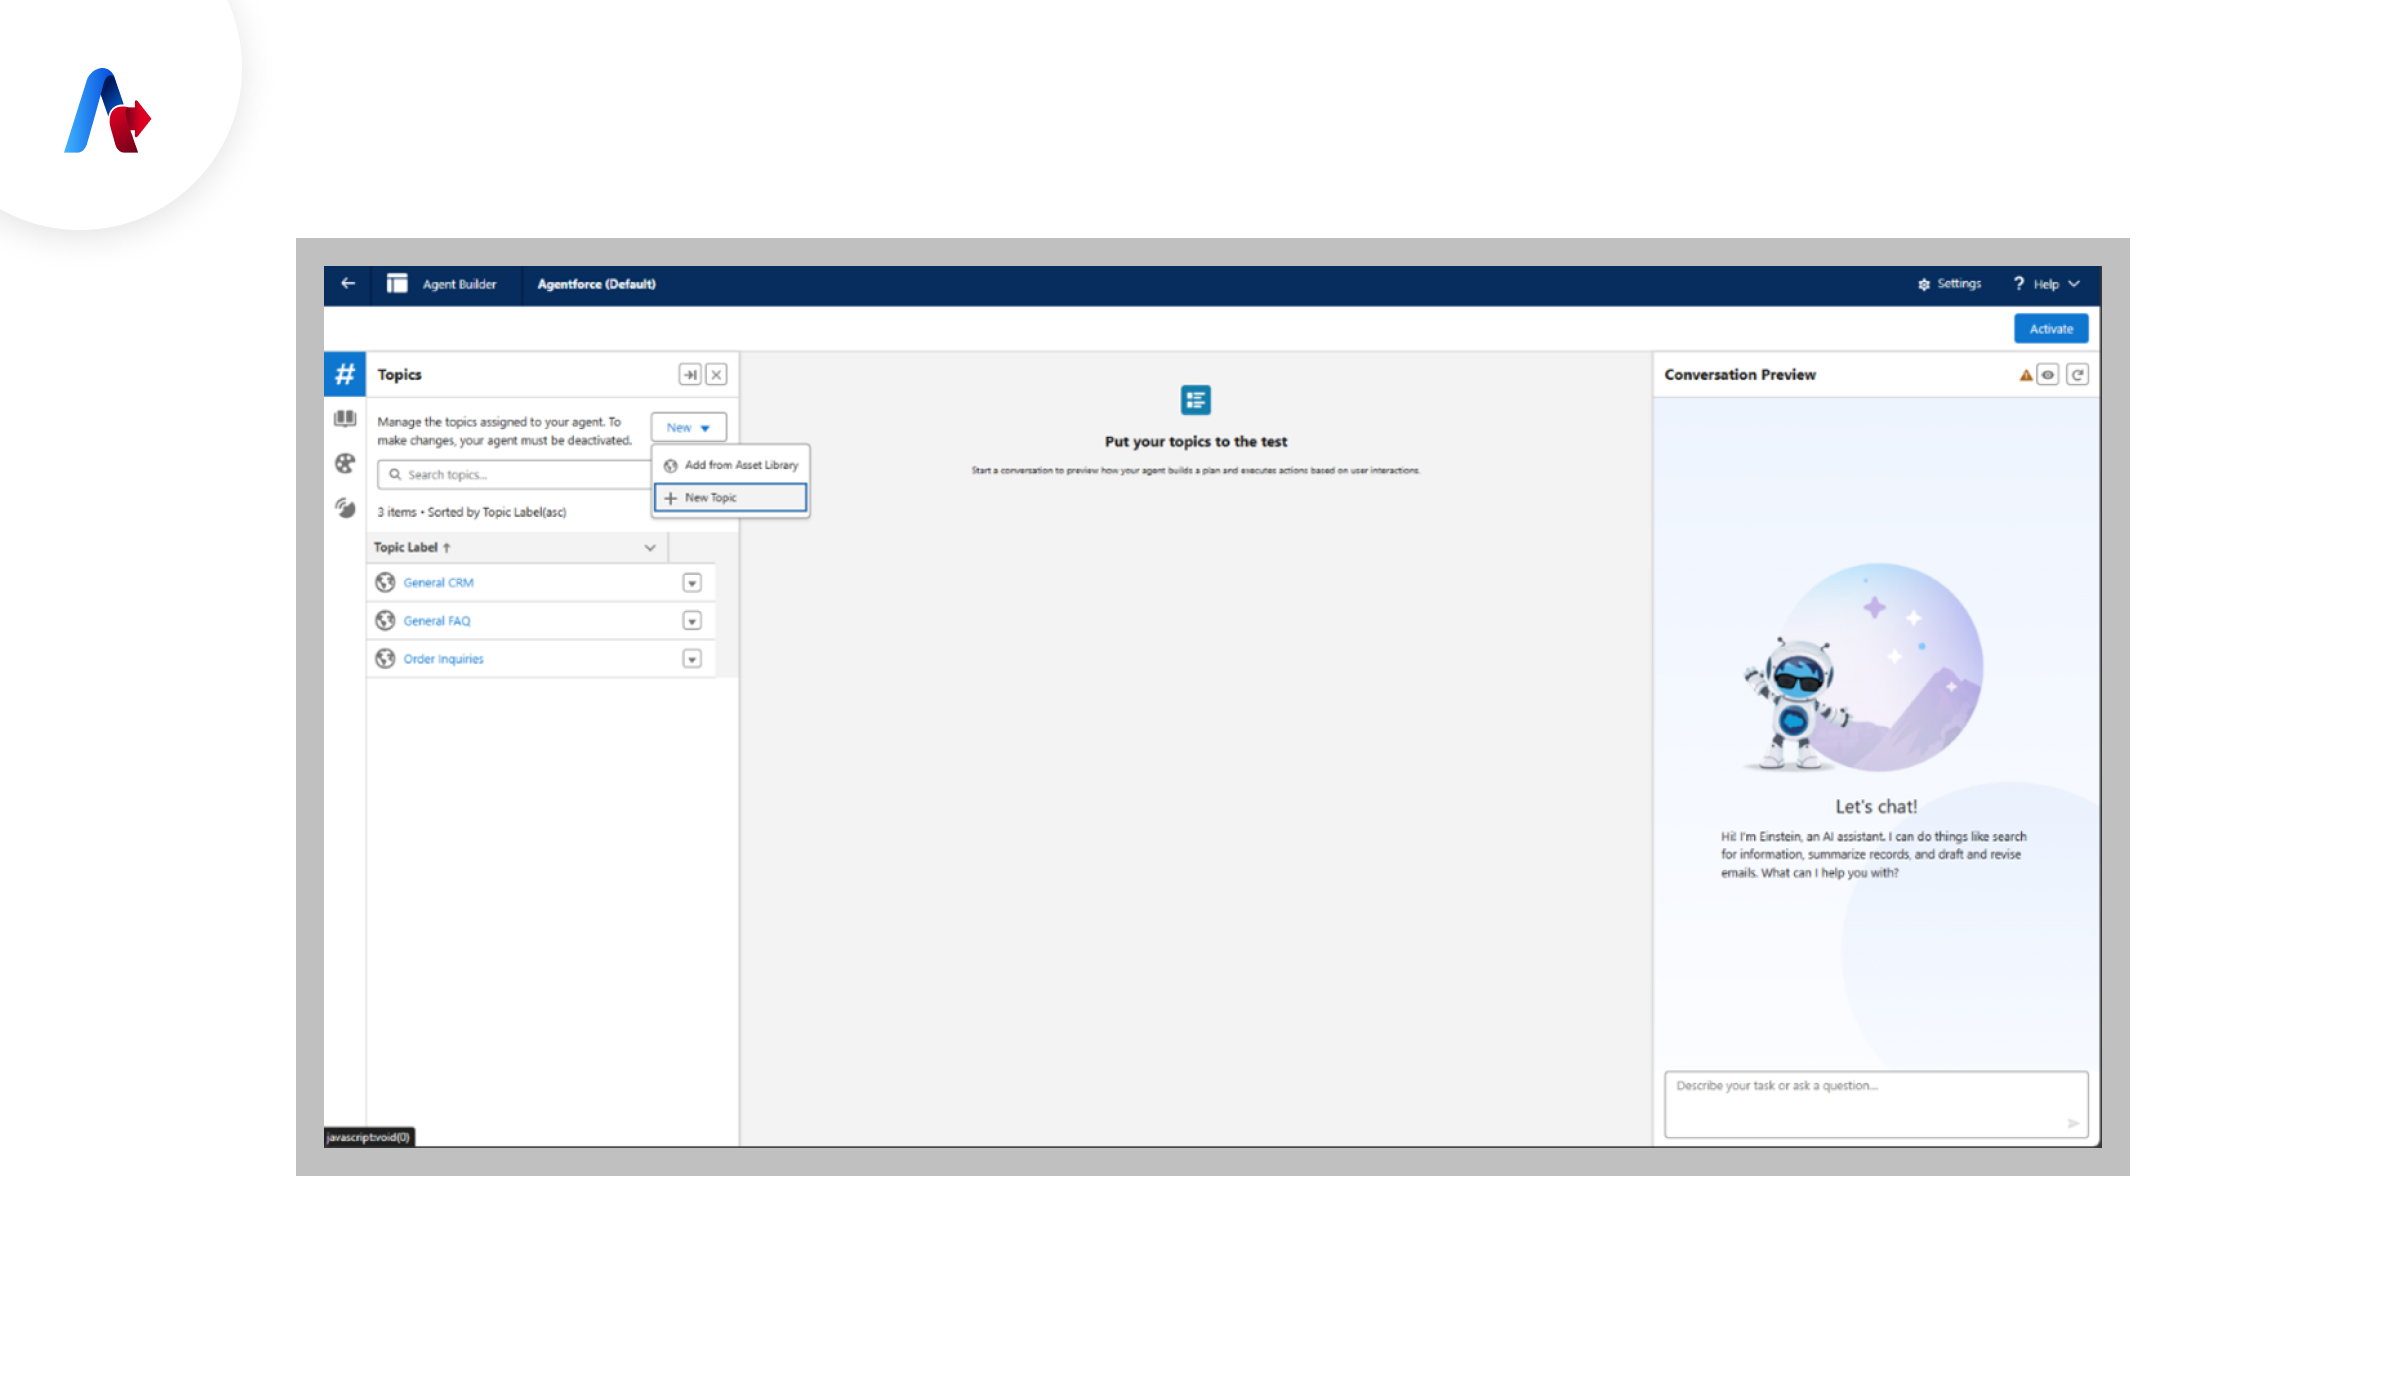
- Open Agentforce Topics.
- Click on Create Topic.
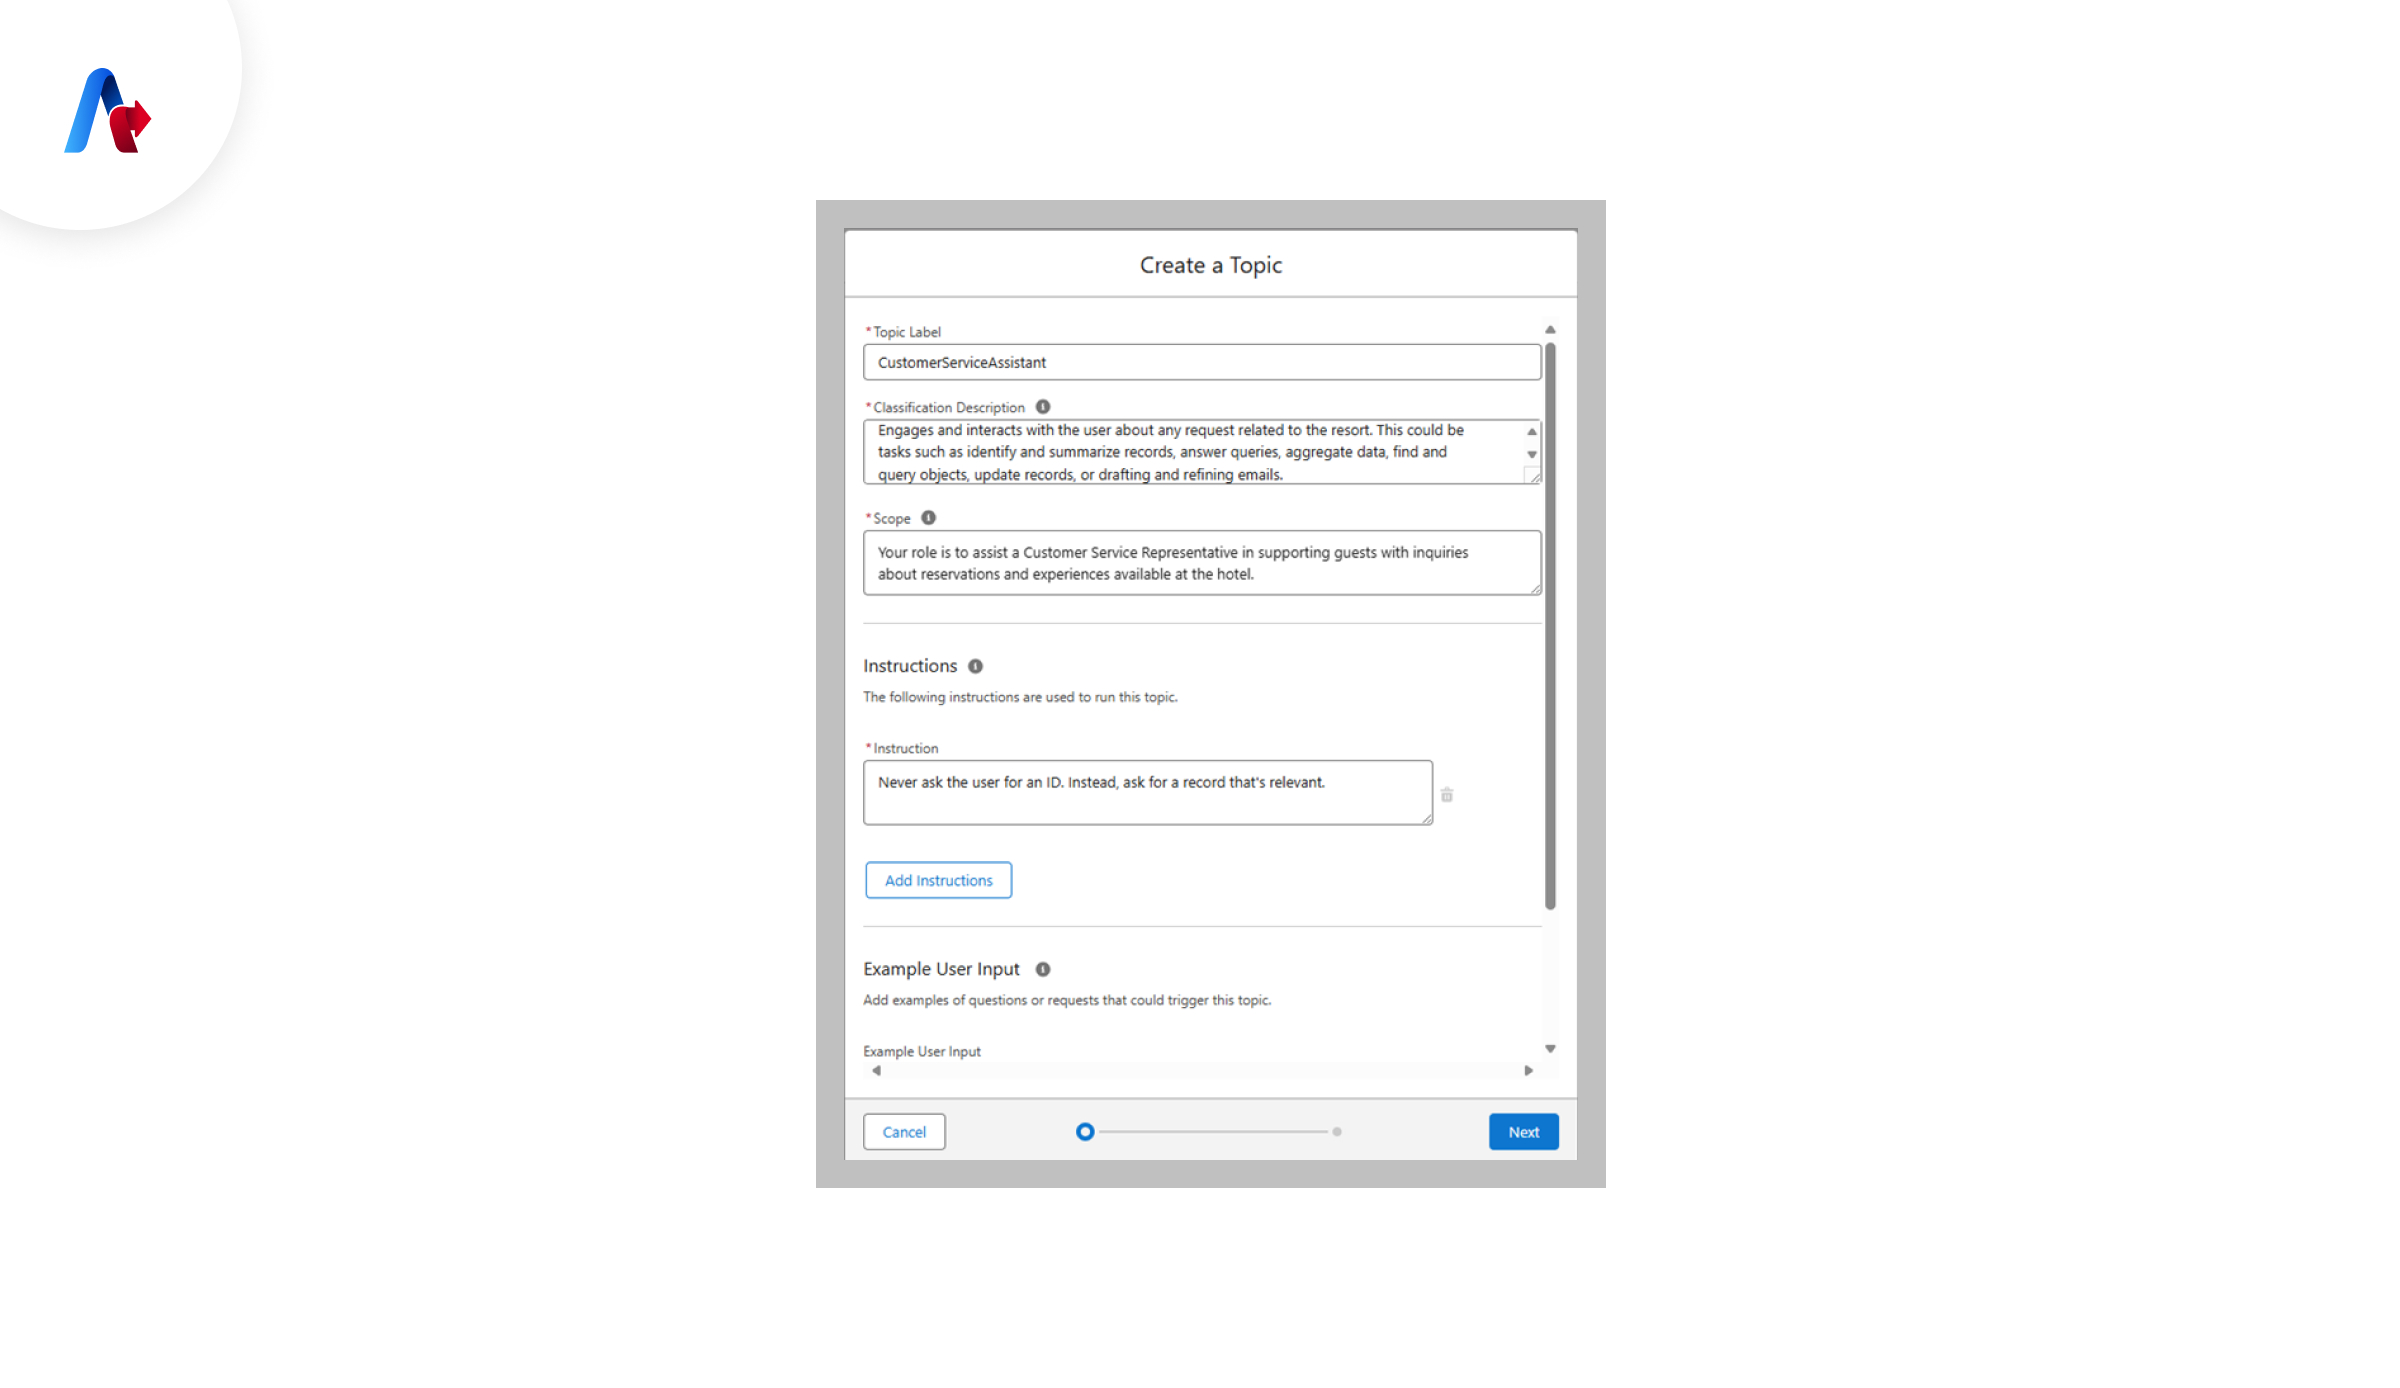
- Define the topic’s name and description.
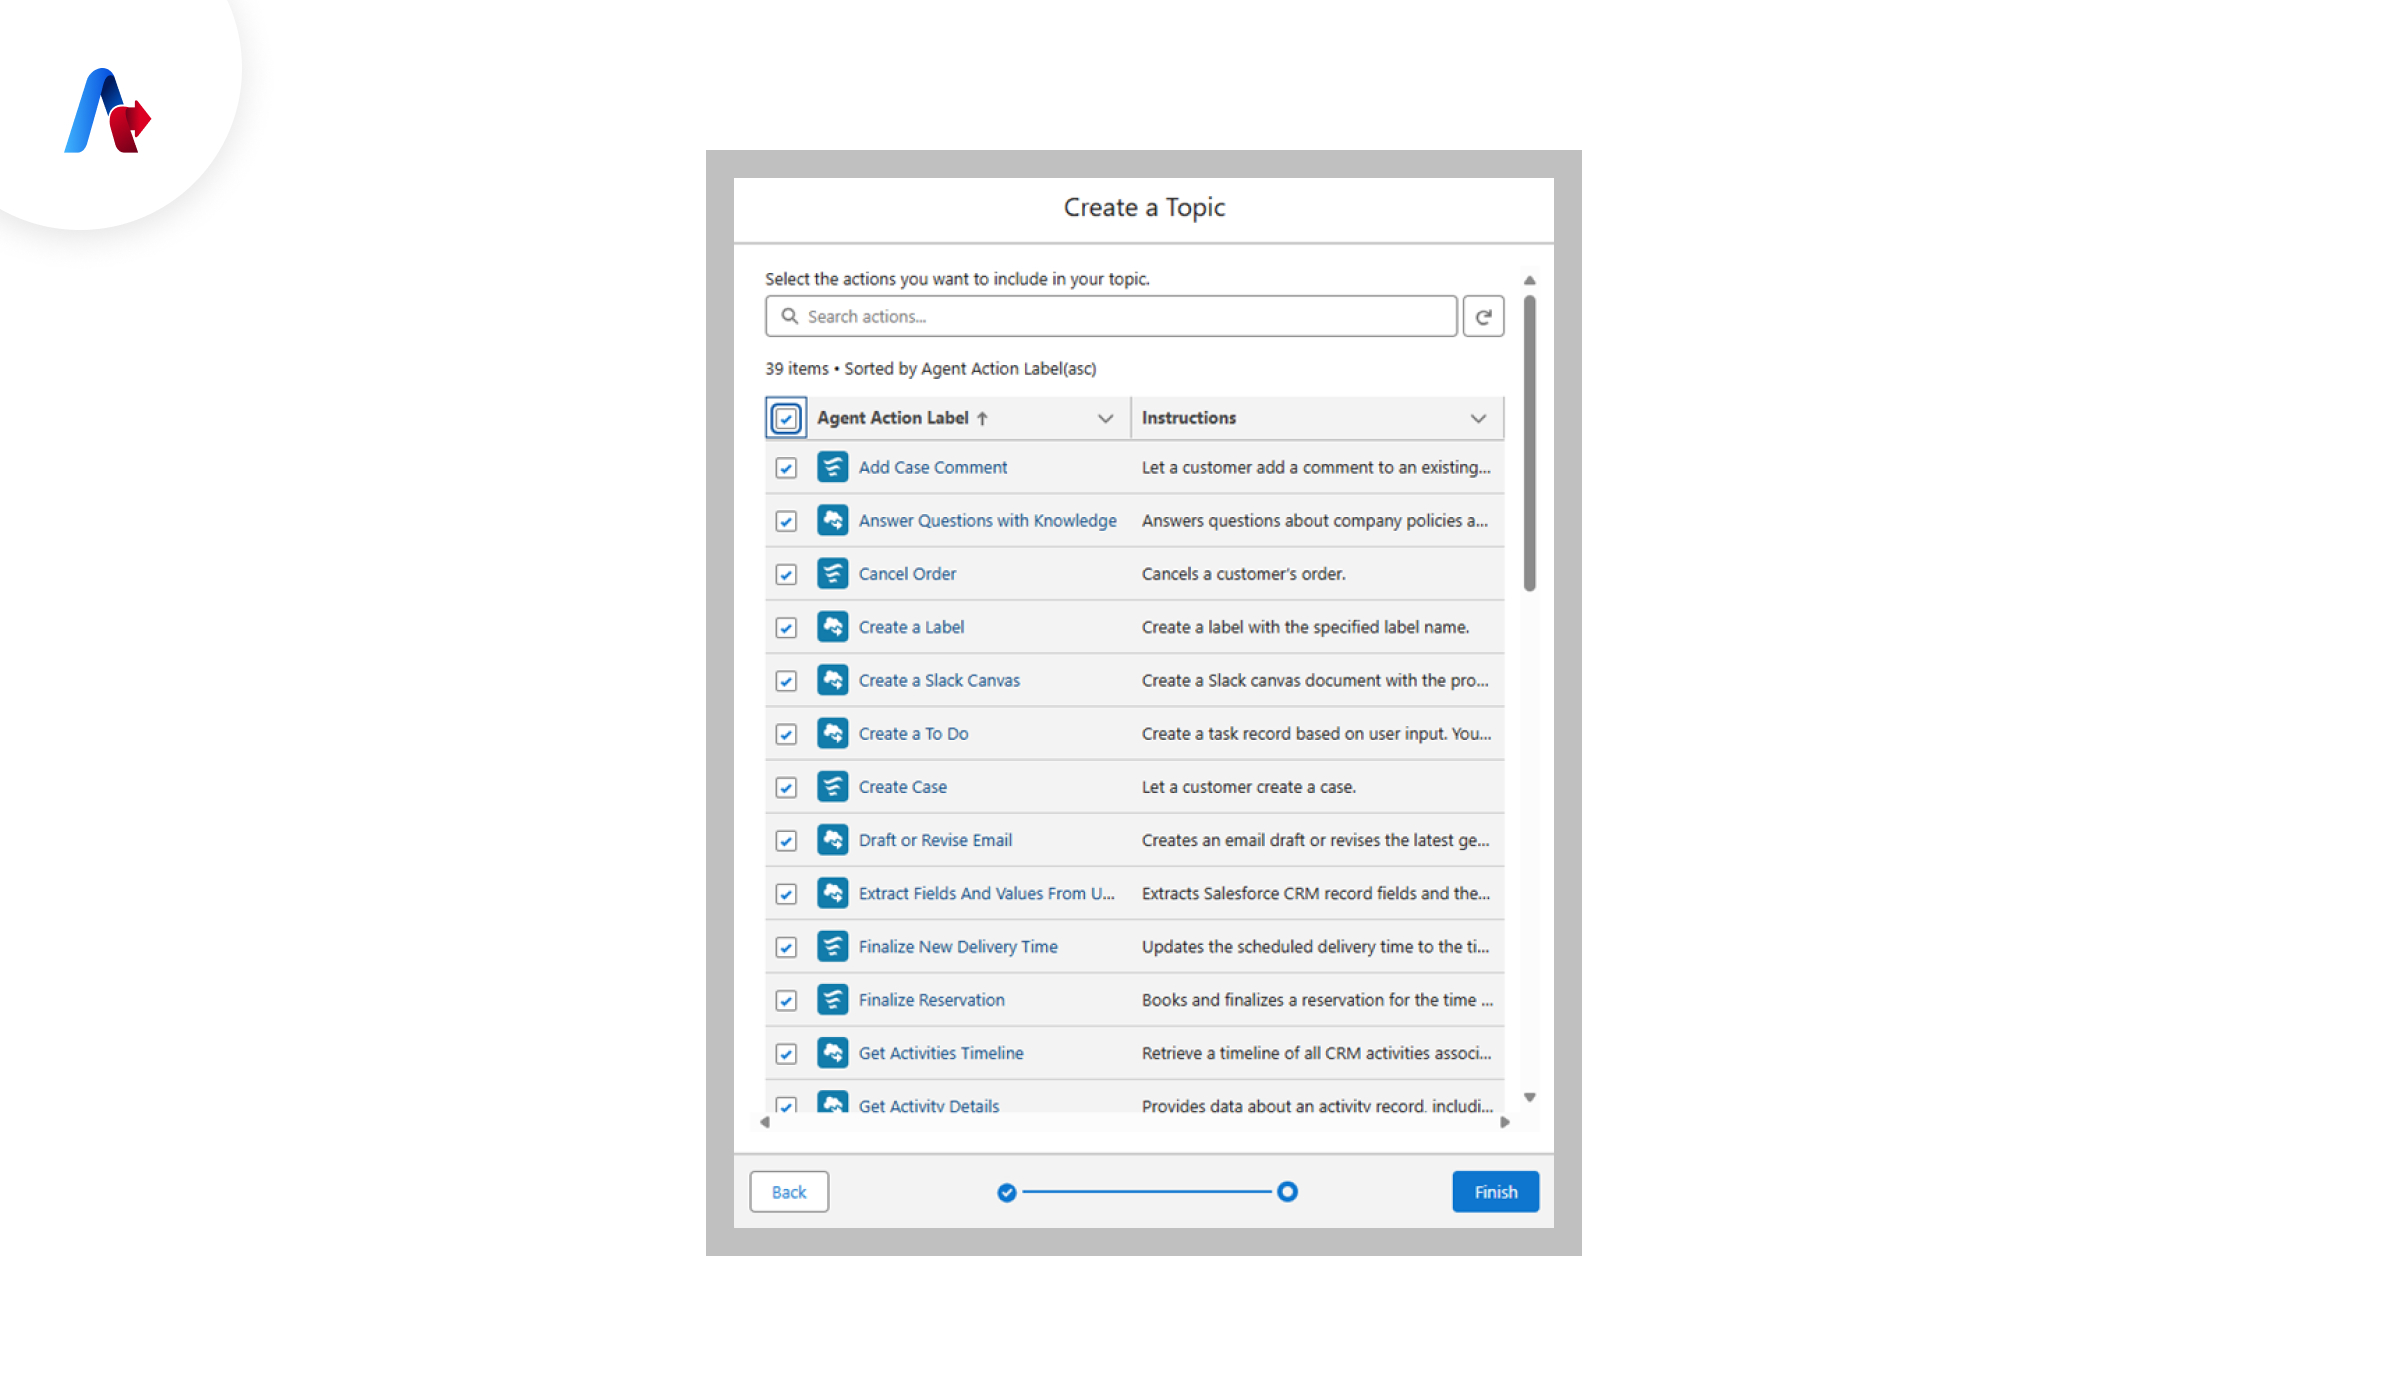
- Assign relevant agents.
- Save and activate the topic.
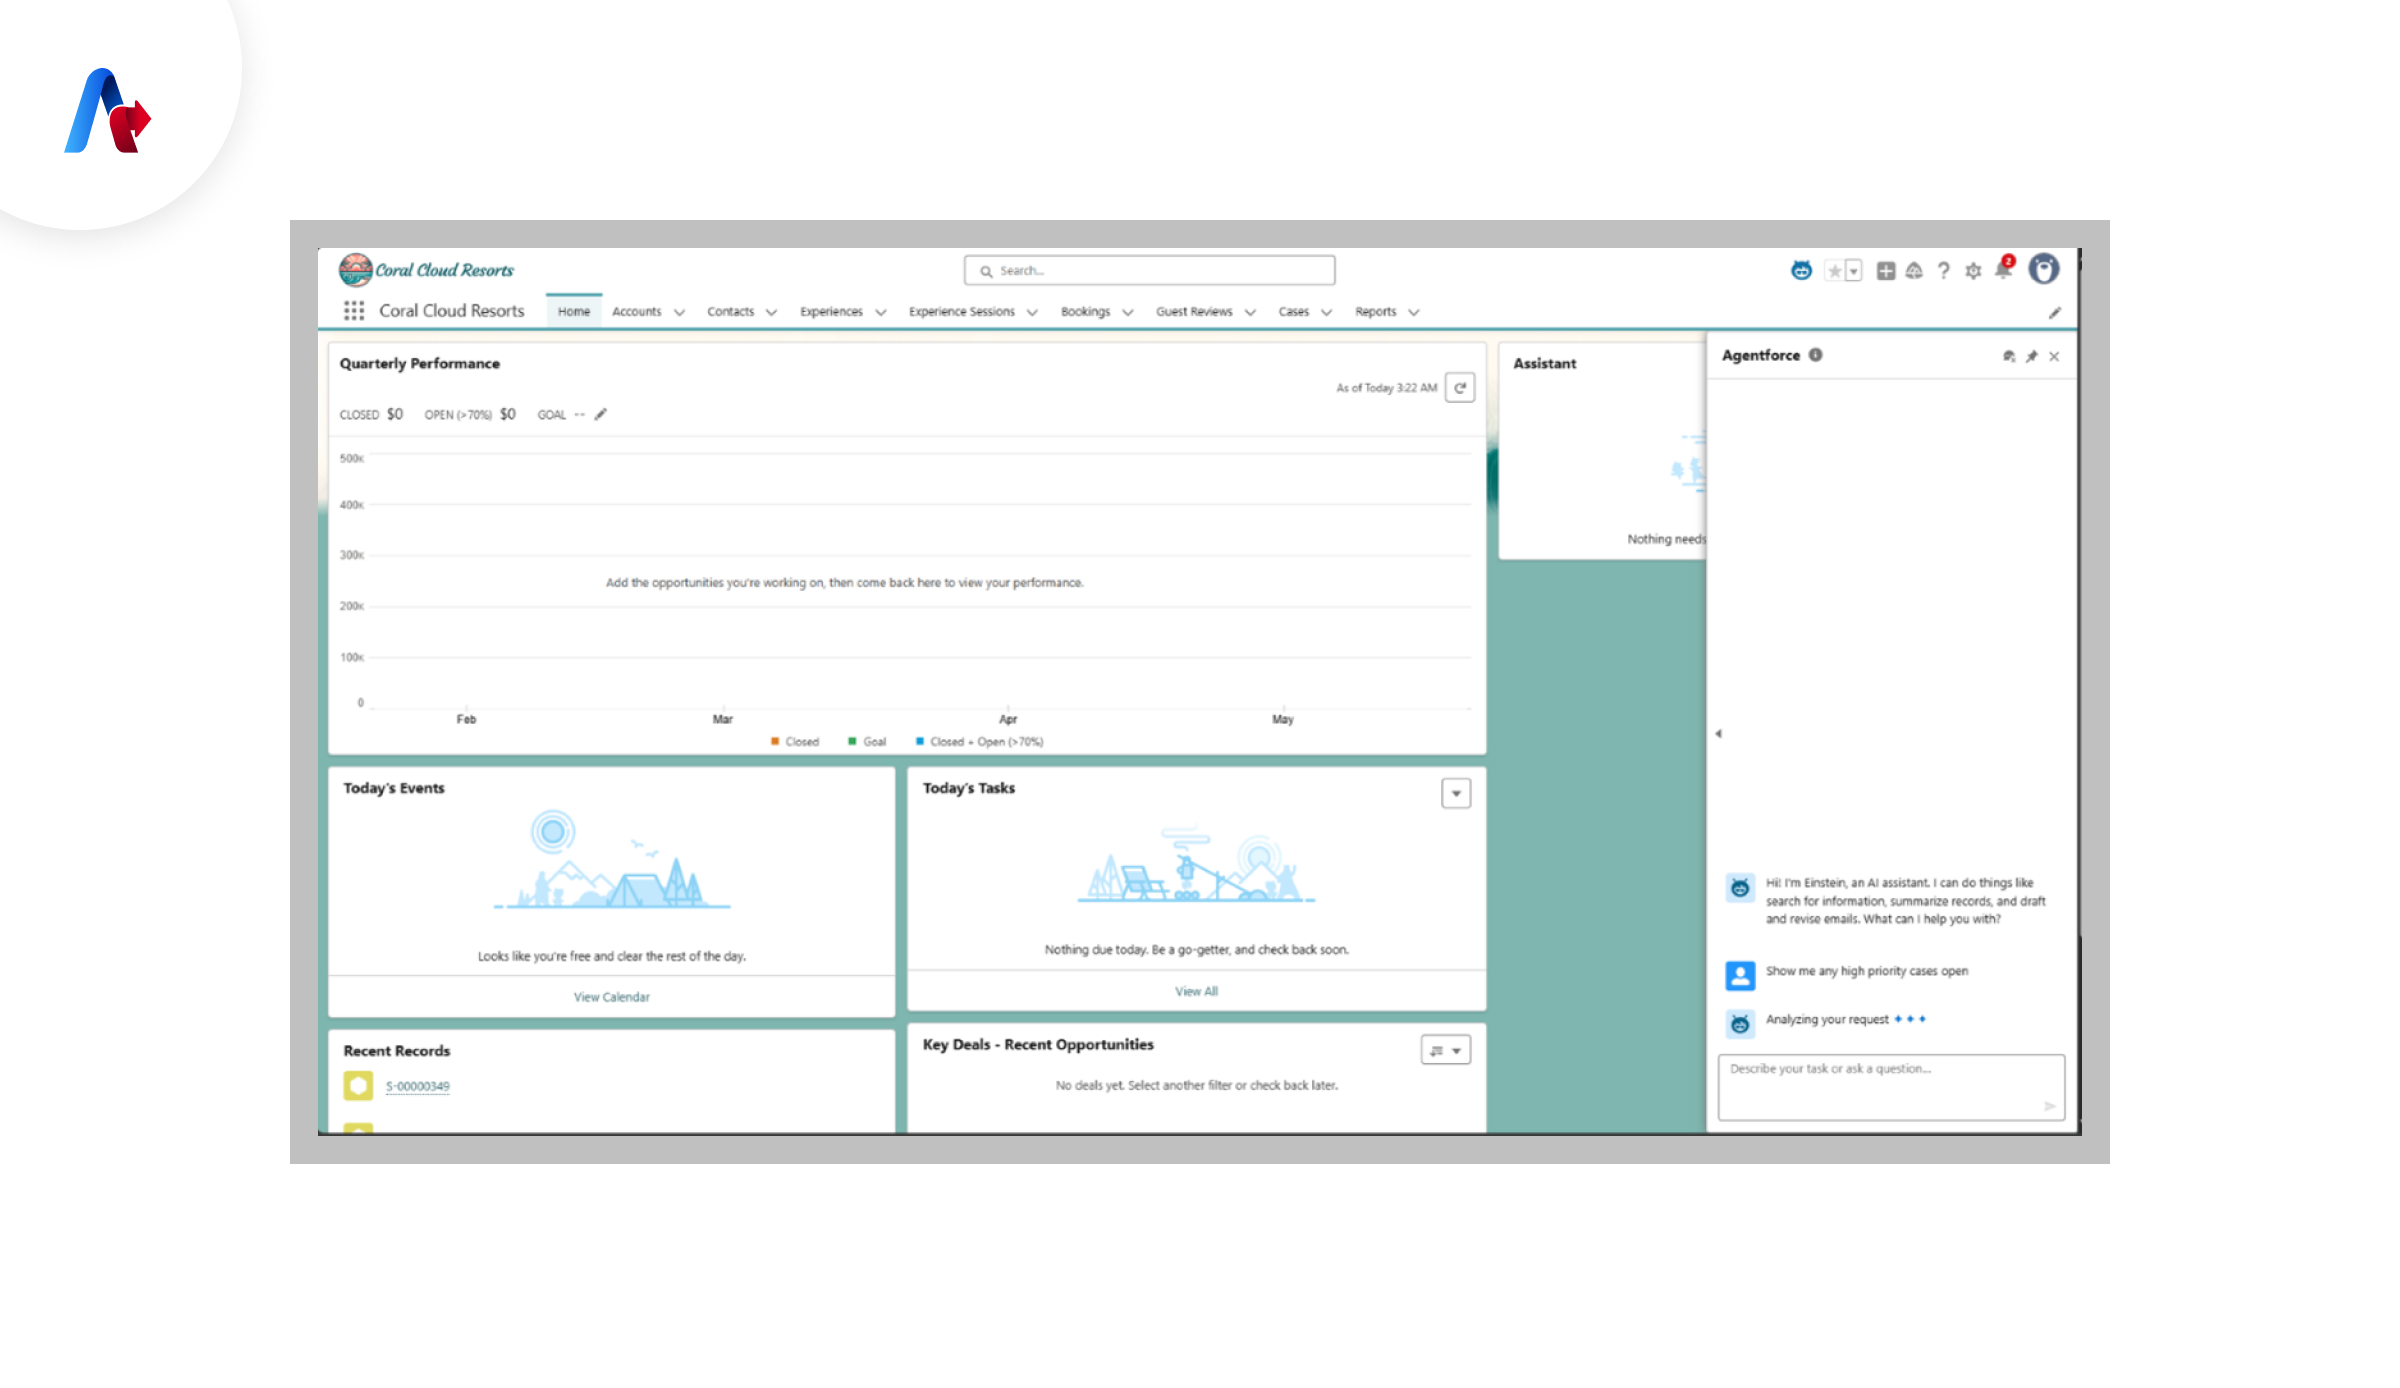
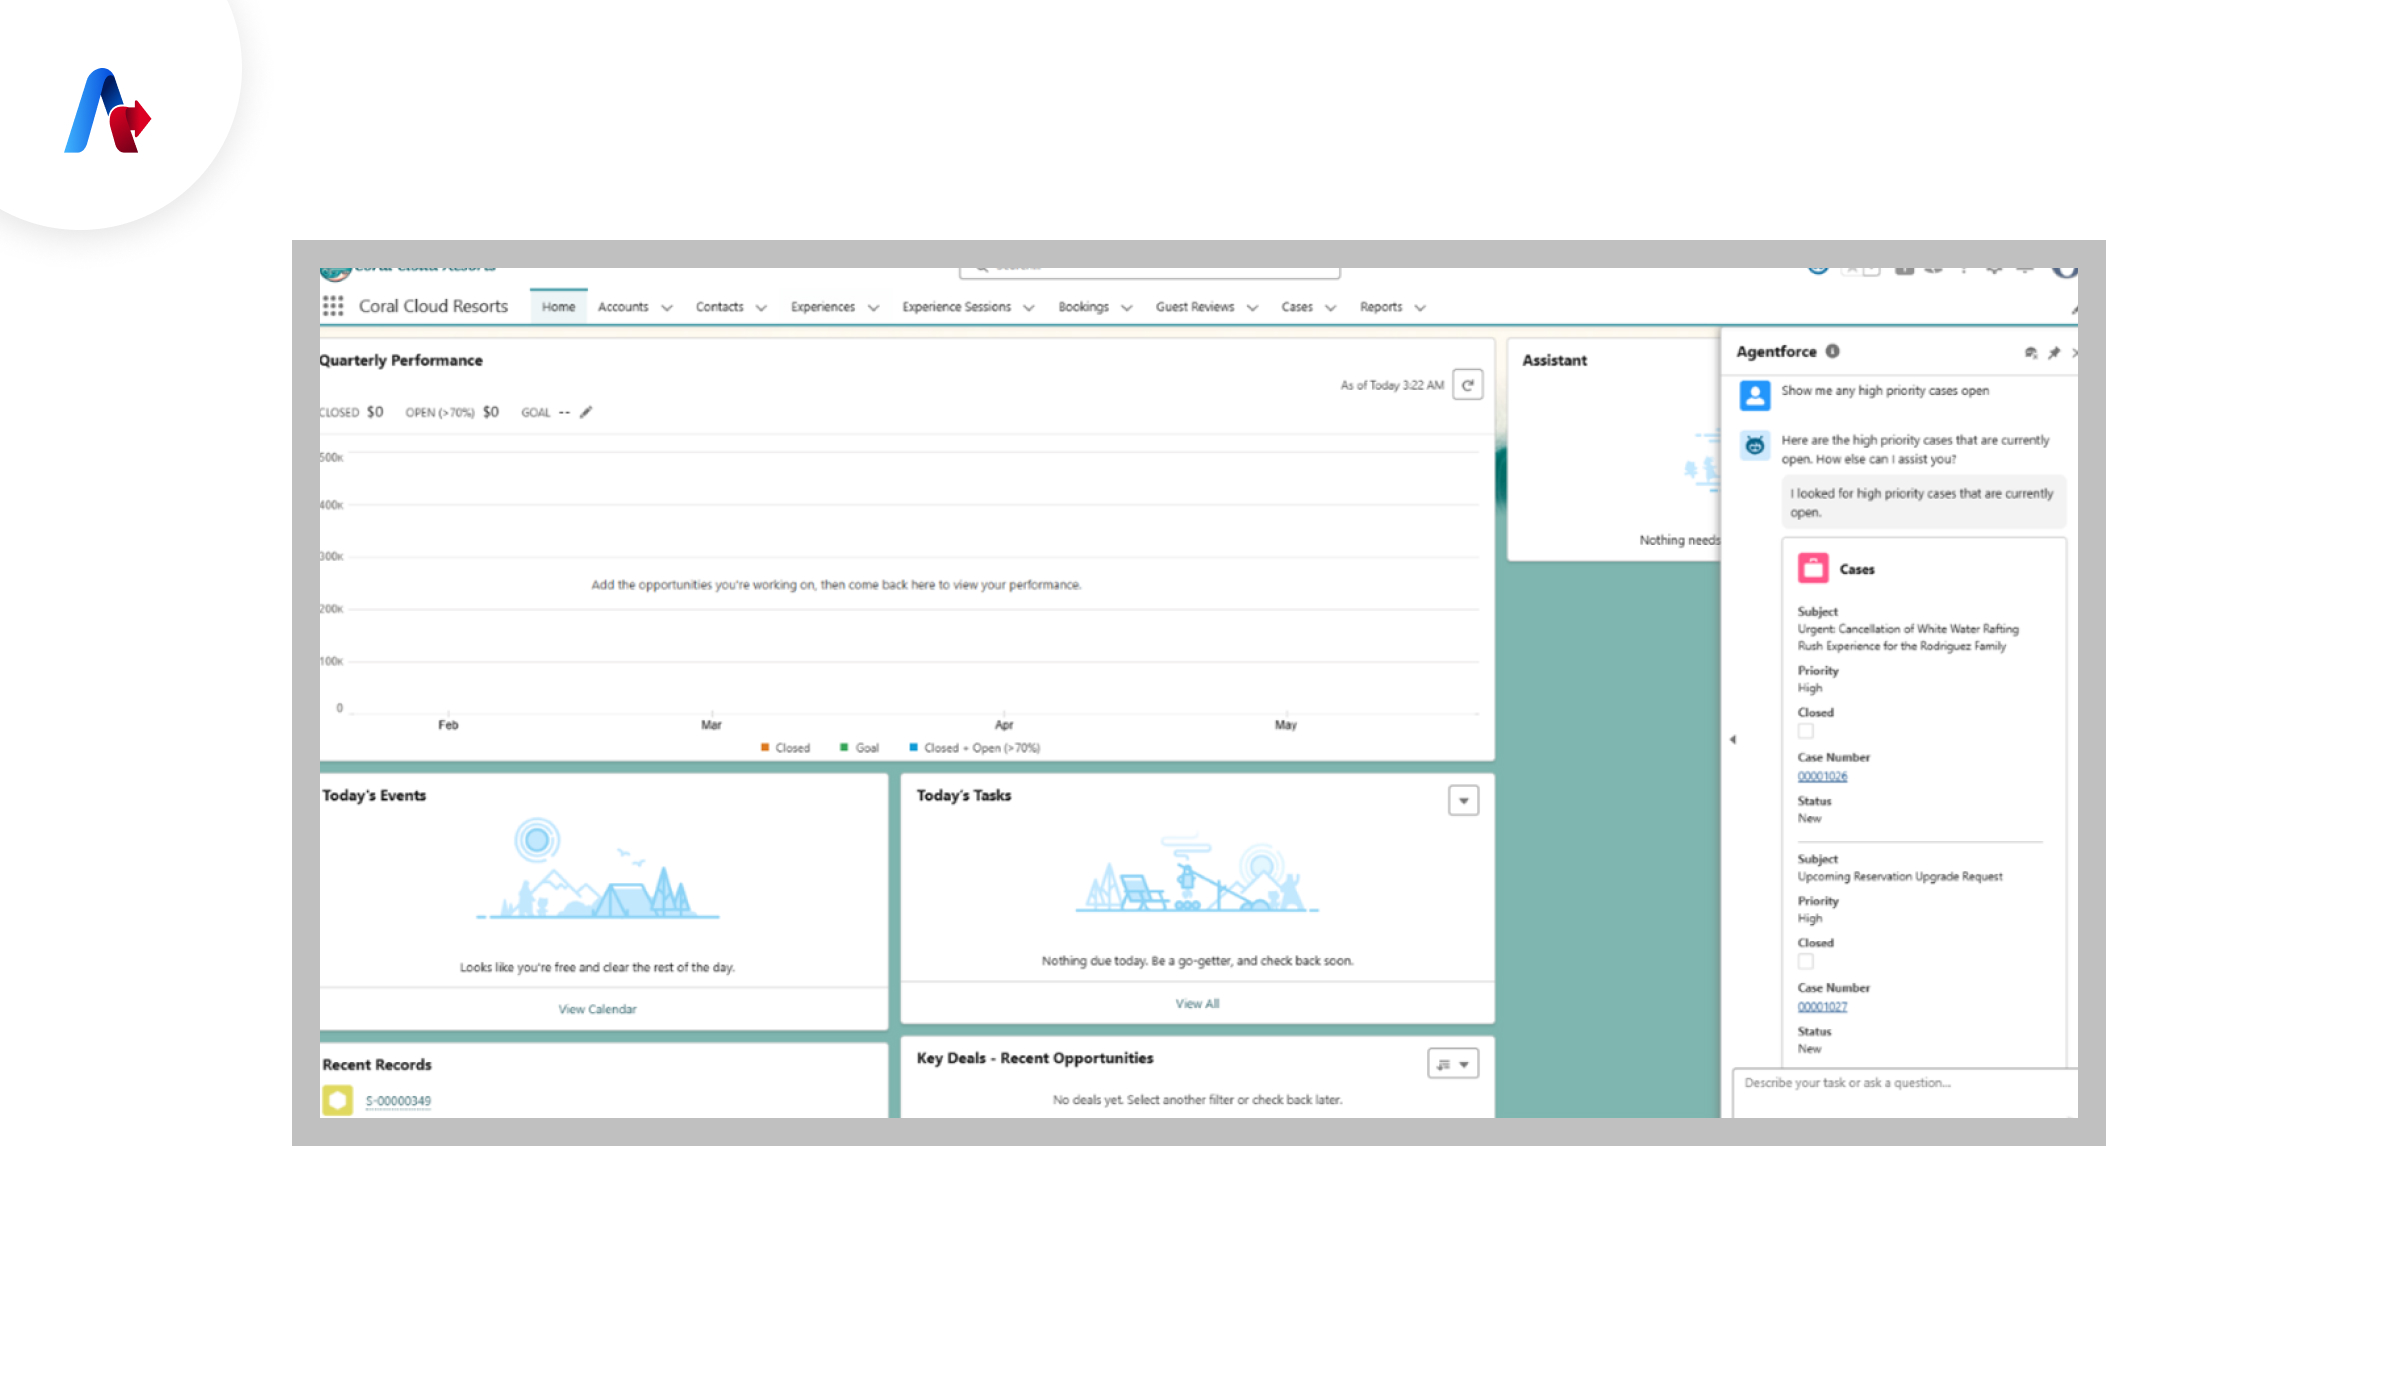
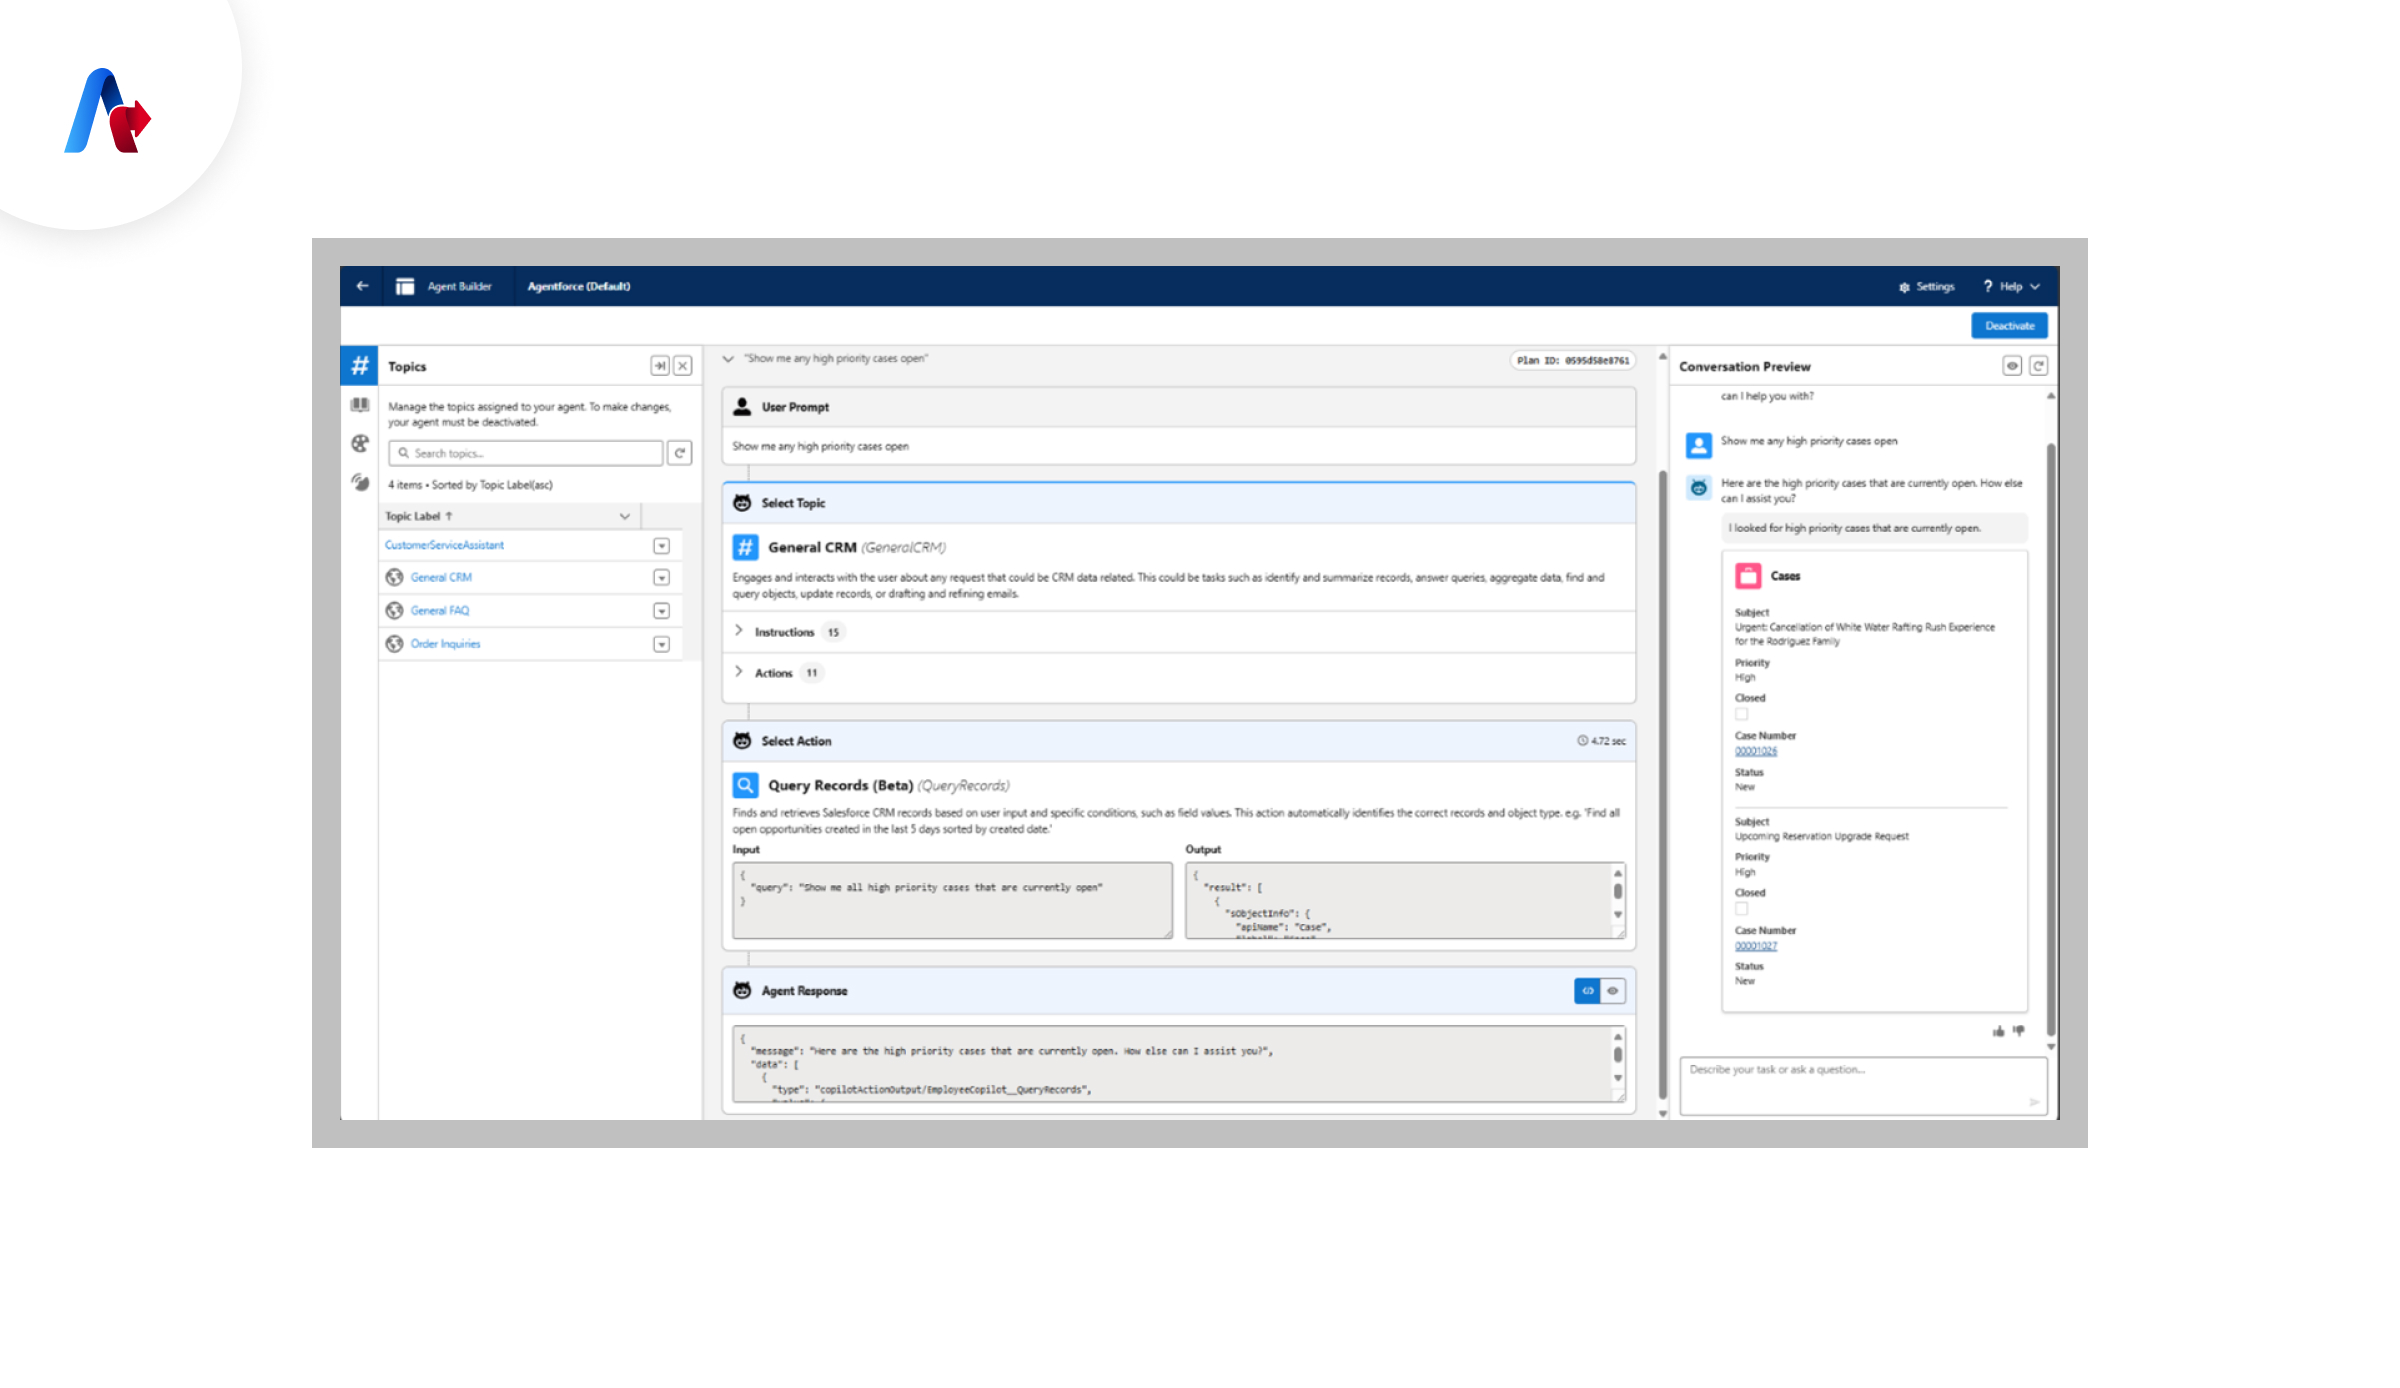
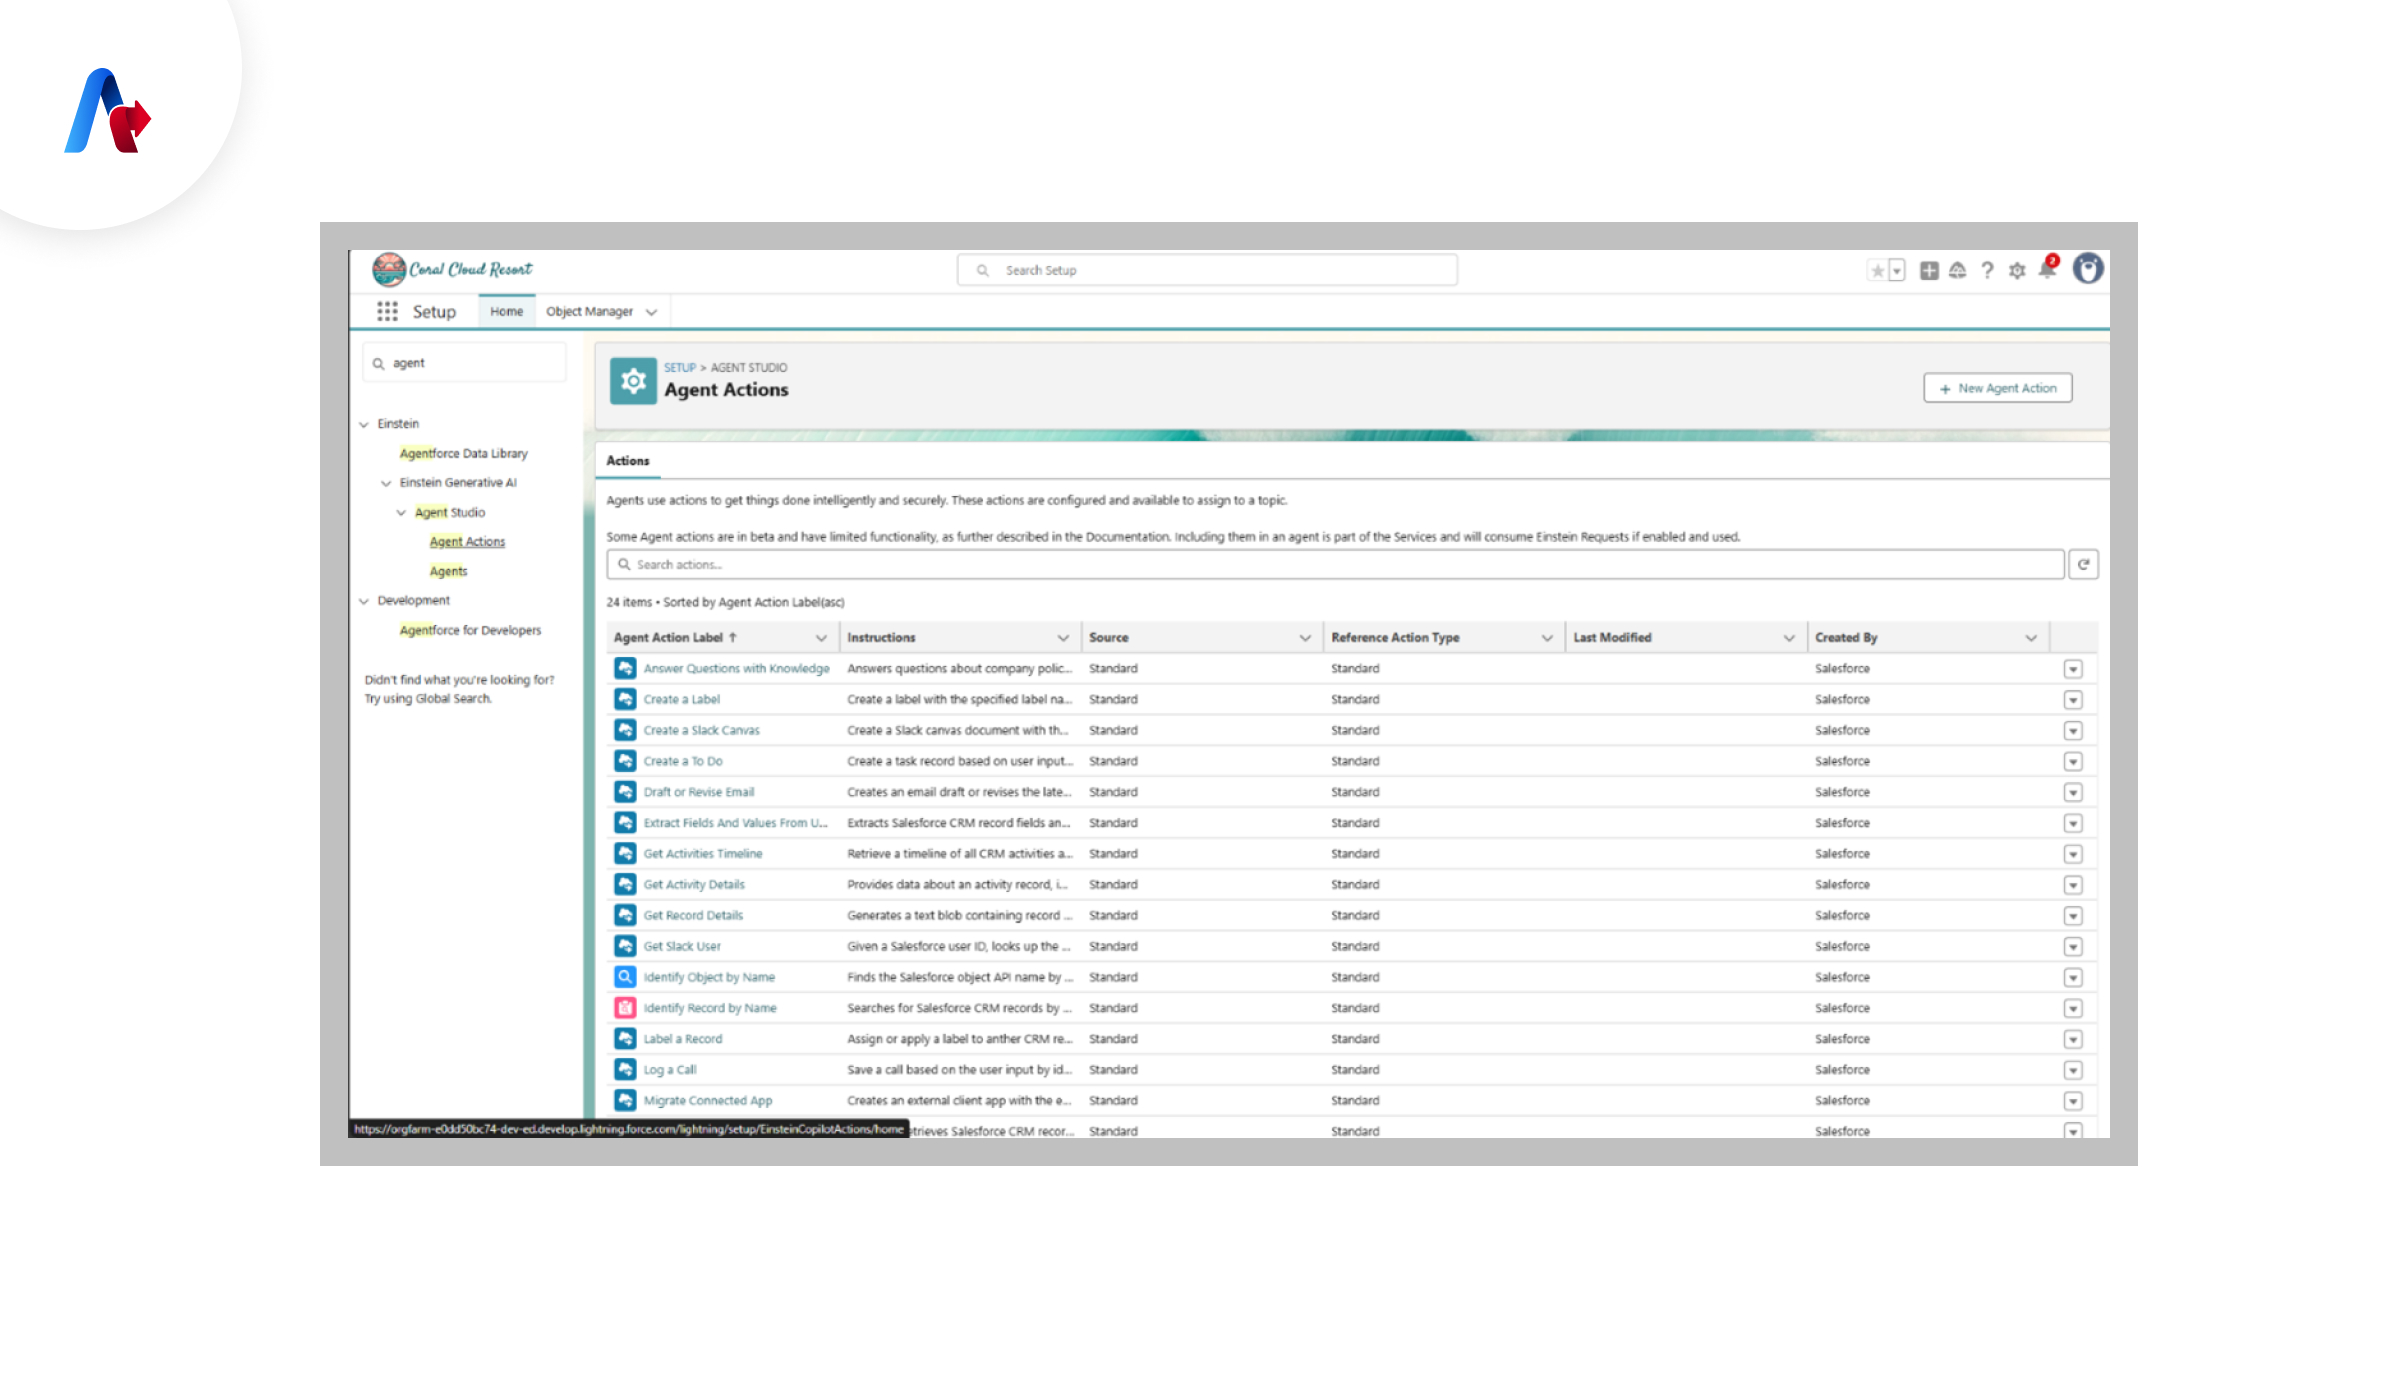
Step 5: Activating the Agent and Understanding Actions
After activation, agents perform specific actions based on predefined workflows.
- Check the Agent Actions section.
- Review automated actions assigned to each agent.
- Modify or customize actions if necessary.
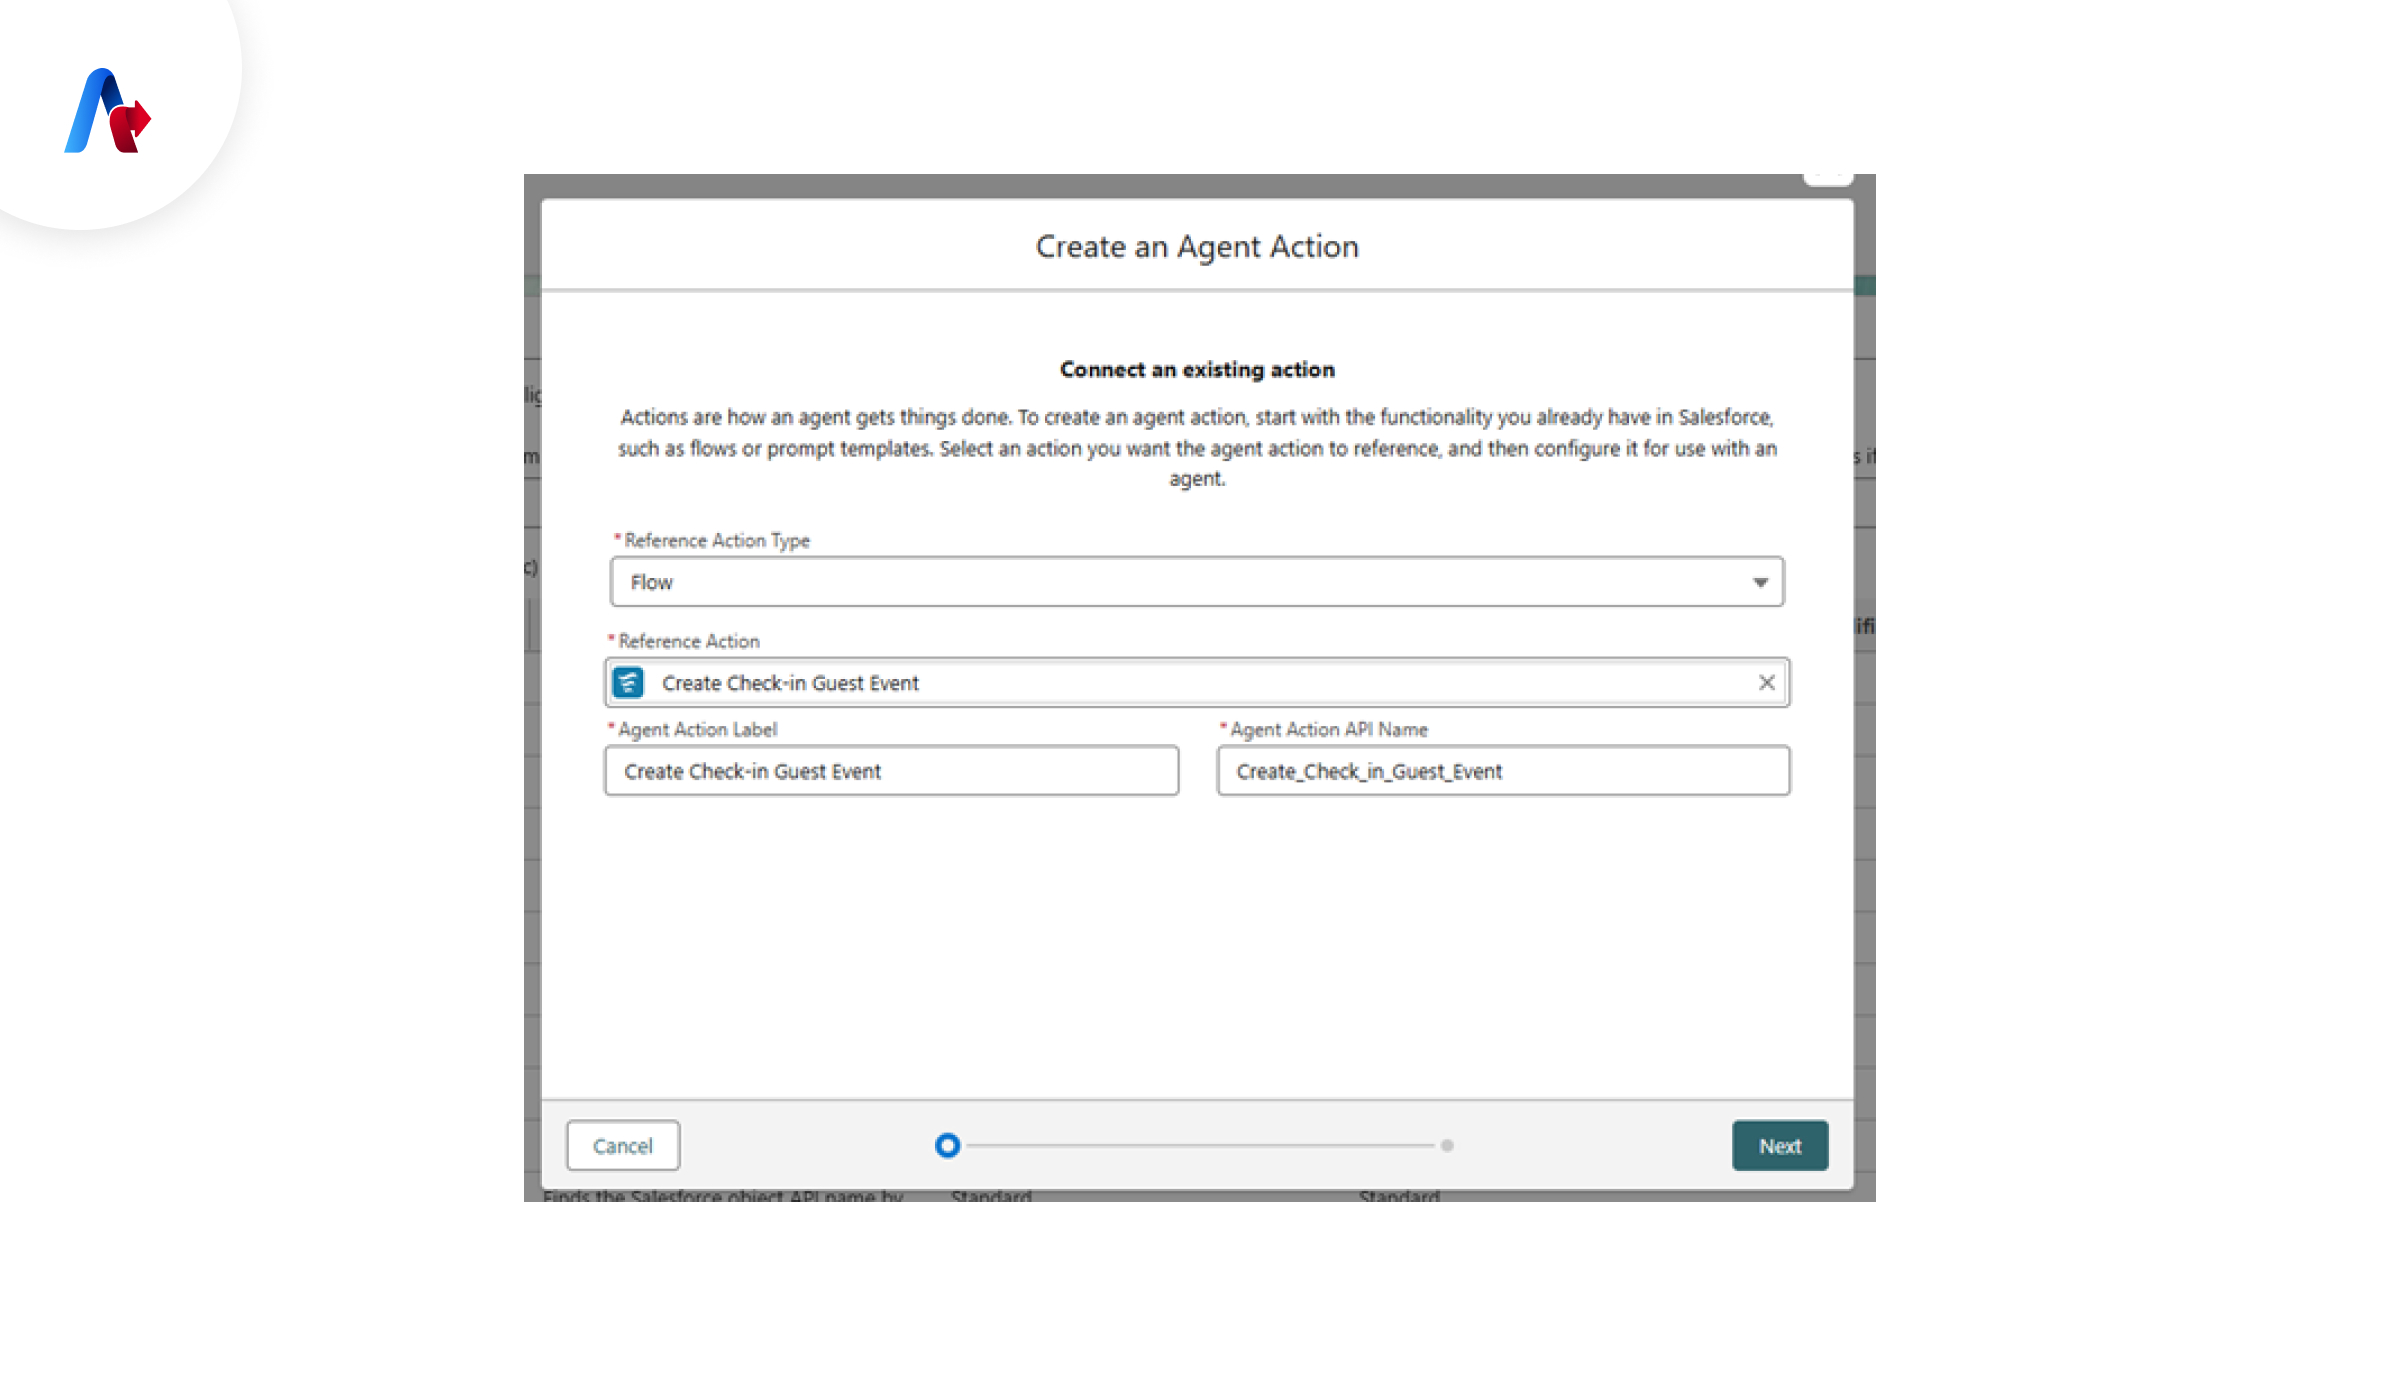
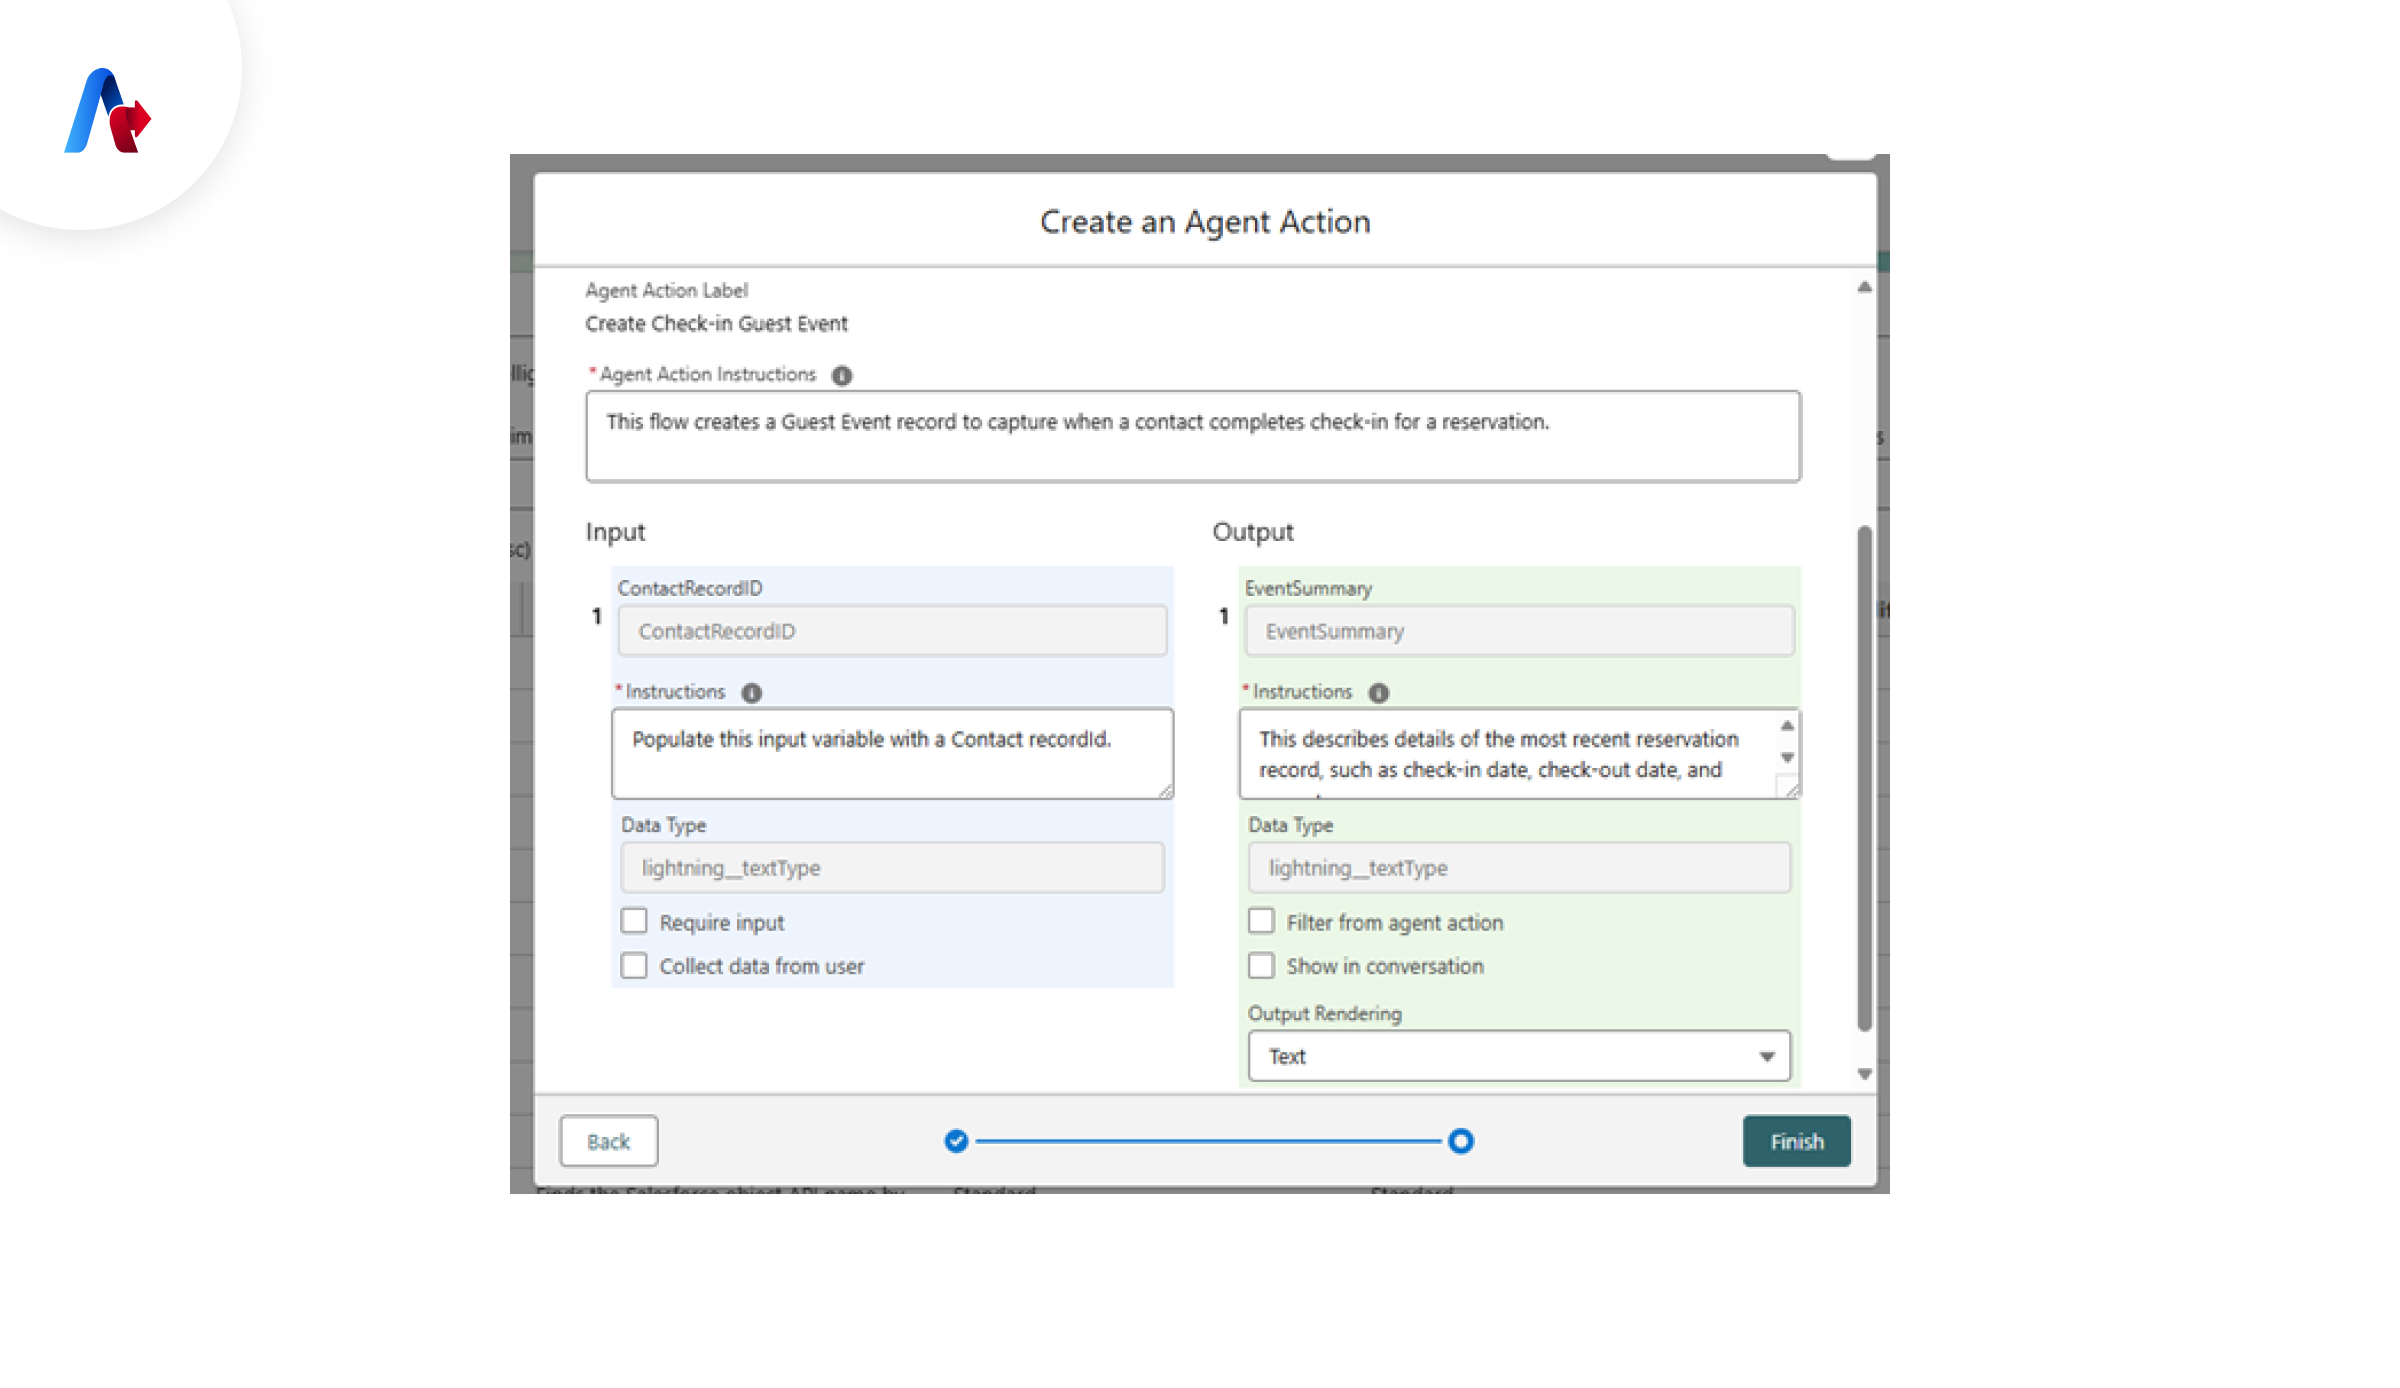
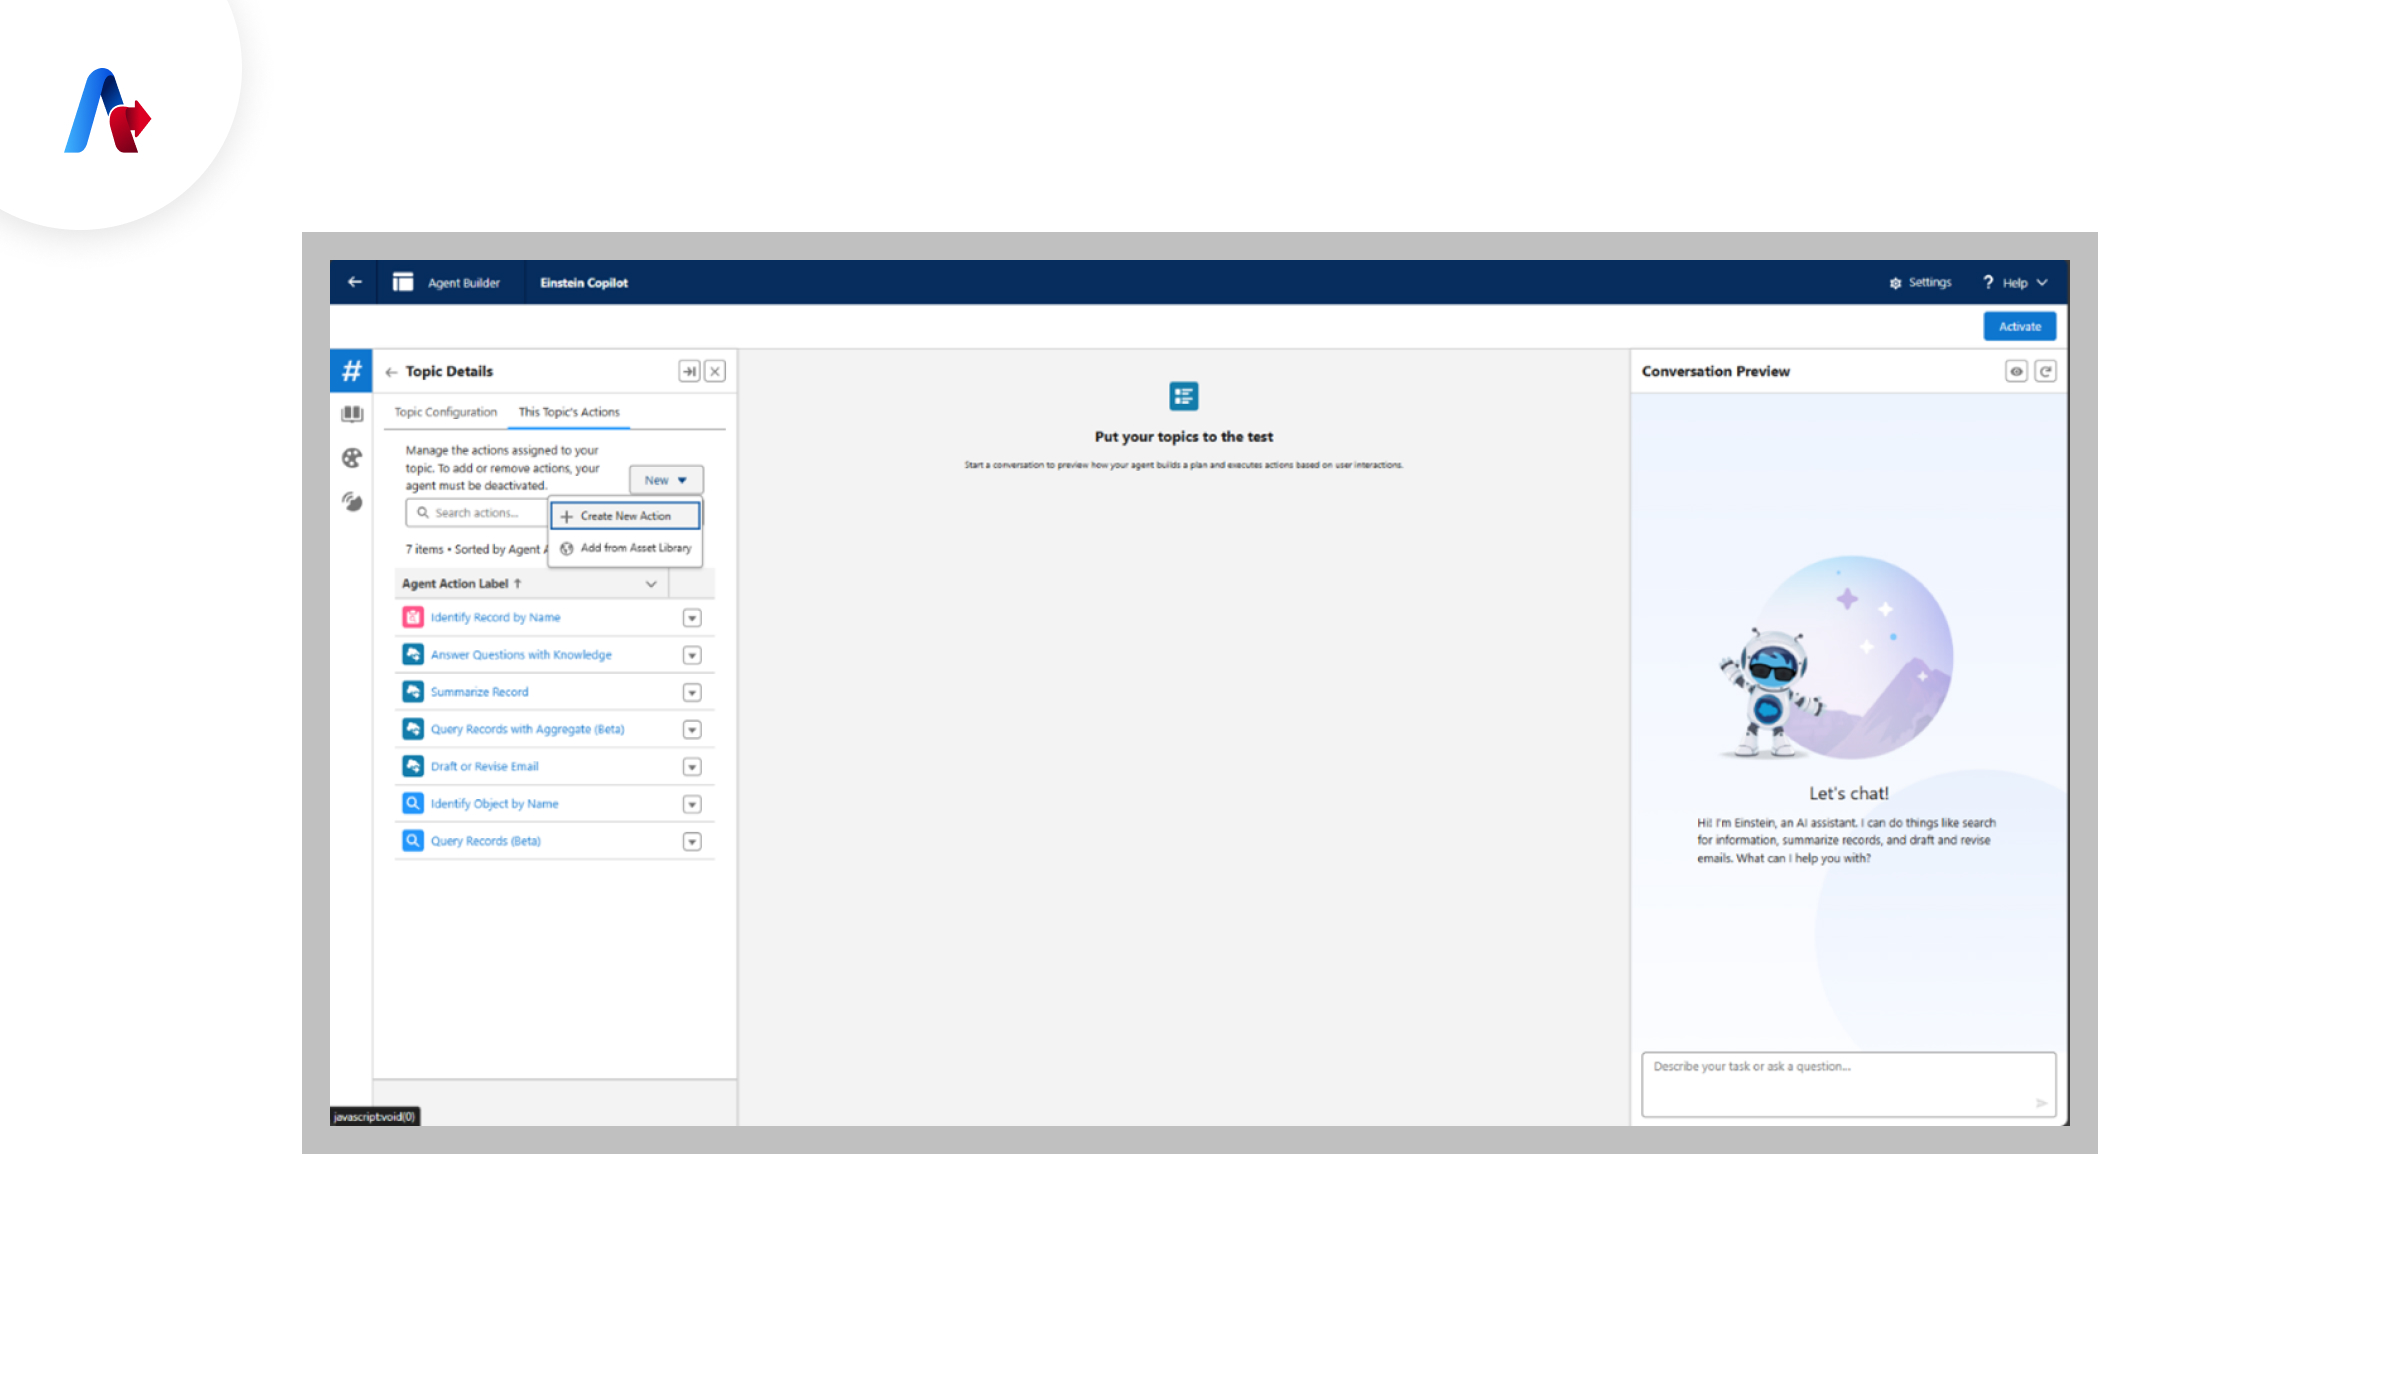
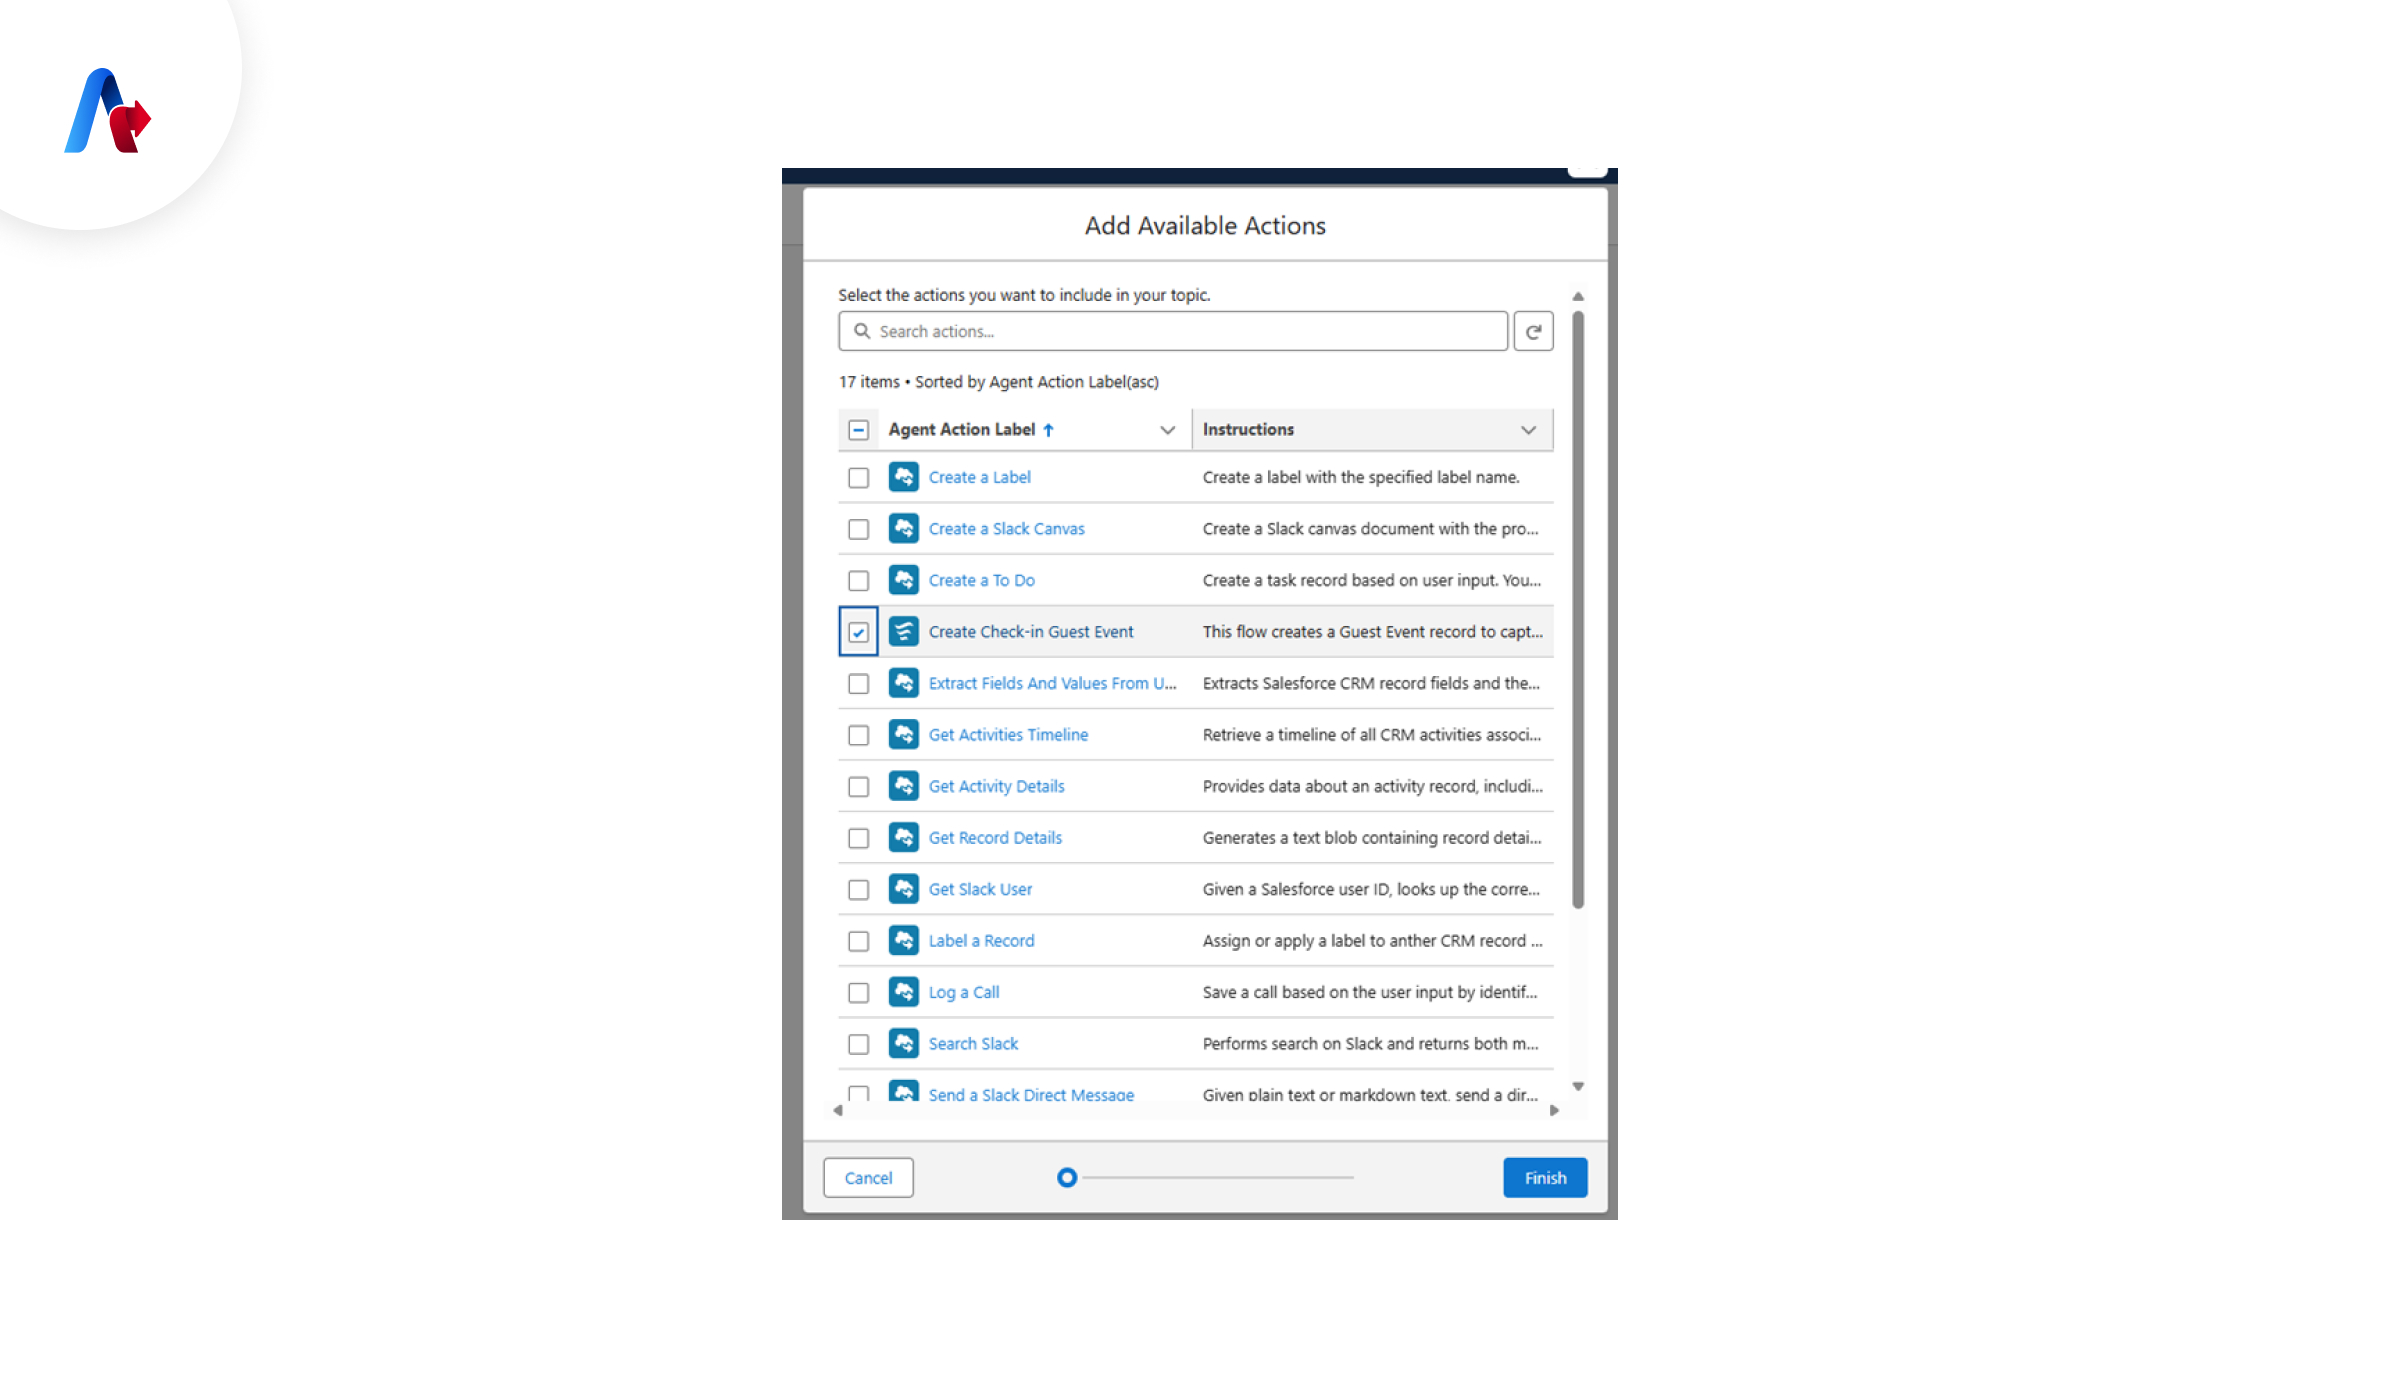
Step 6: Creating Agent Actions
Agent Actions define how an agent interacts with different systems and workflows.
- Navigate to Agent Actions.
- Click on Create New Action.
- Define the action type (e.g., ticket creation, email notifications).
- Set up conditions and triggers.
- Save and deploy the action.
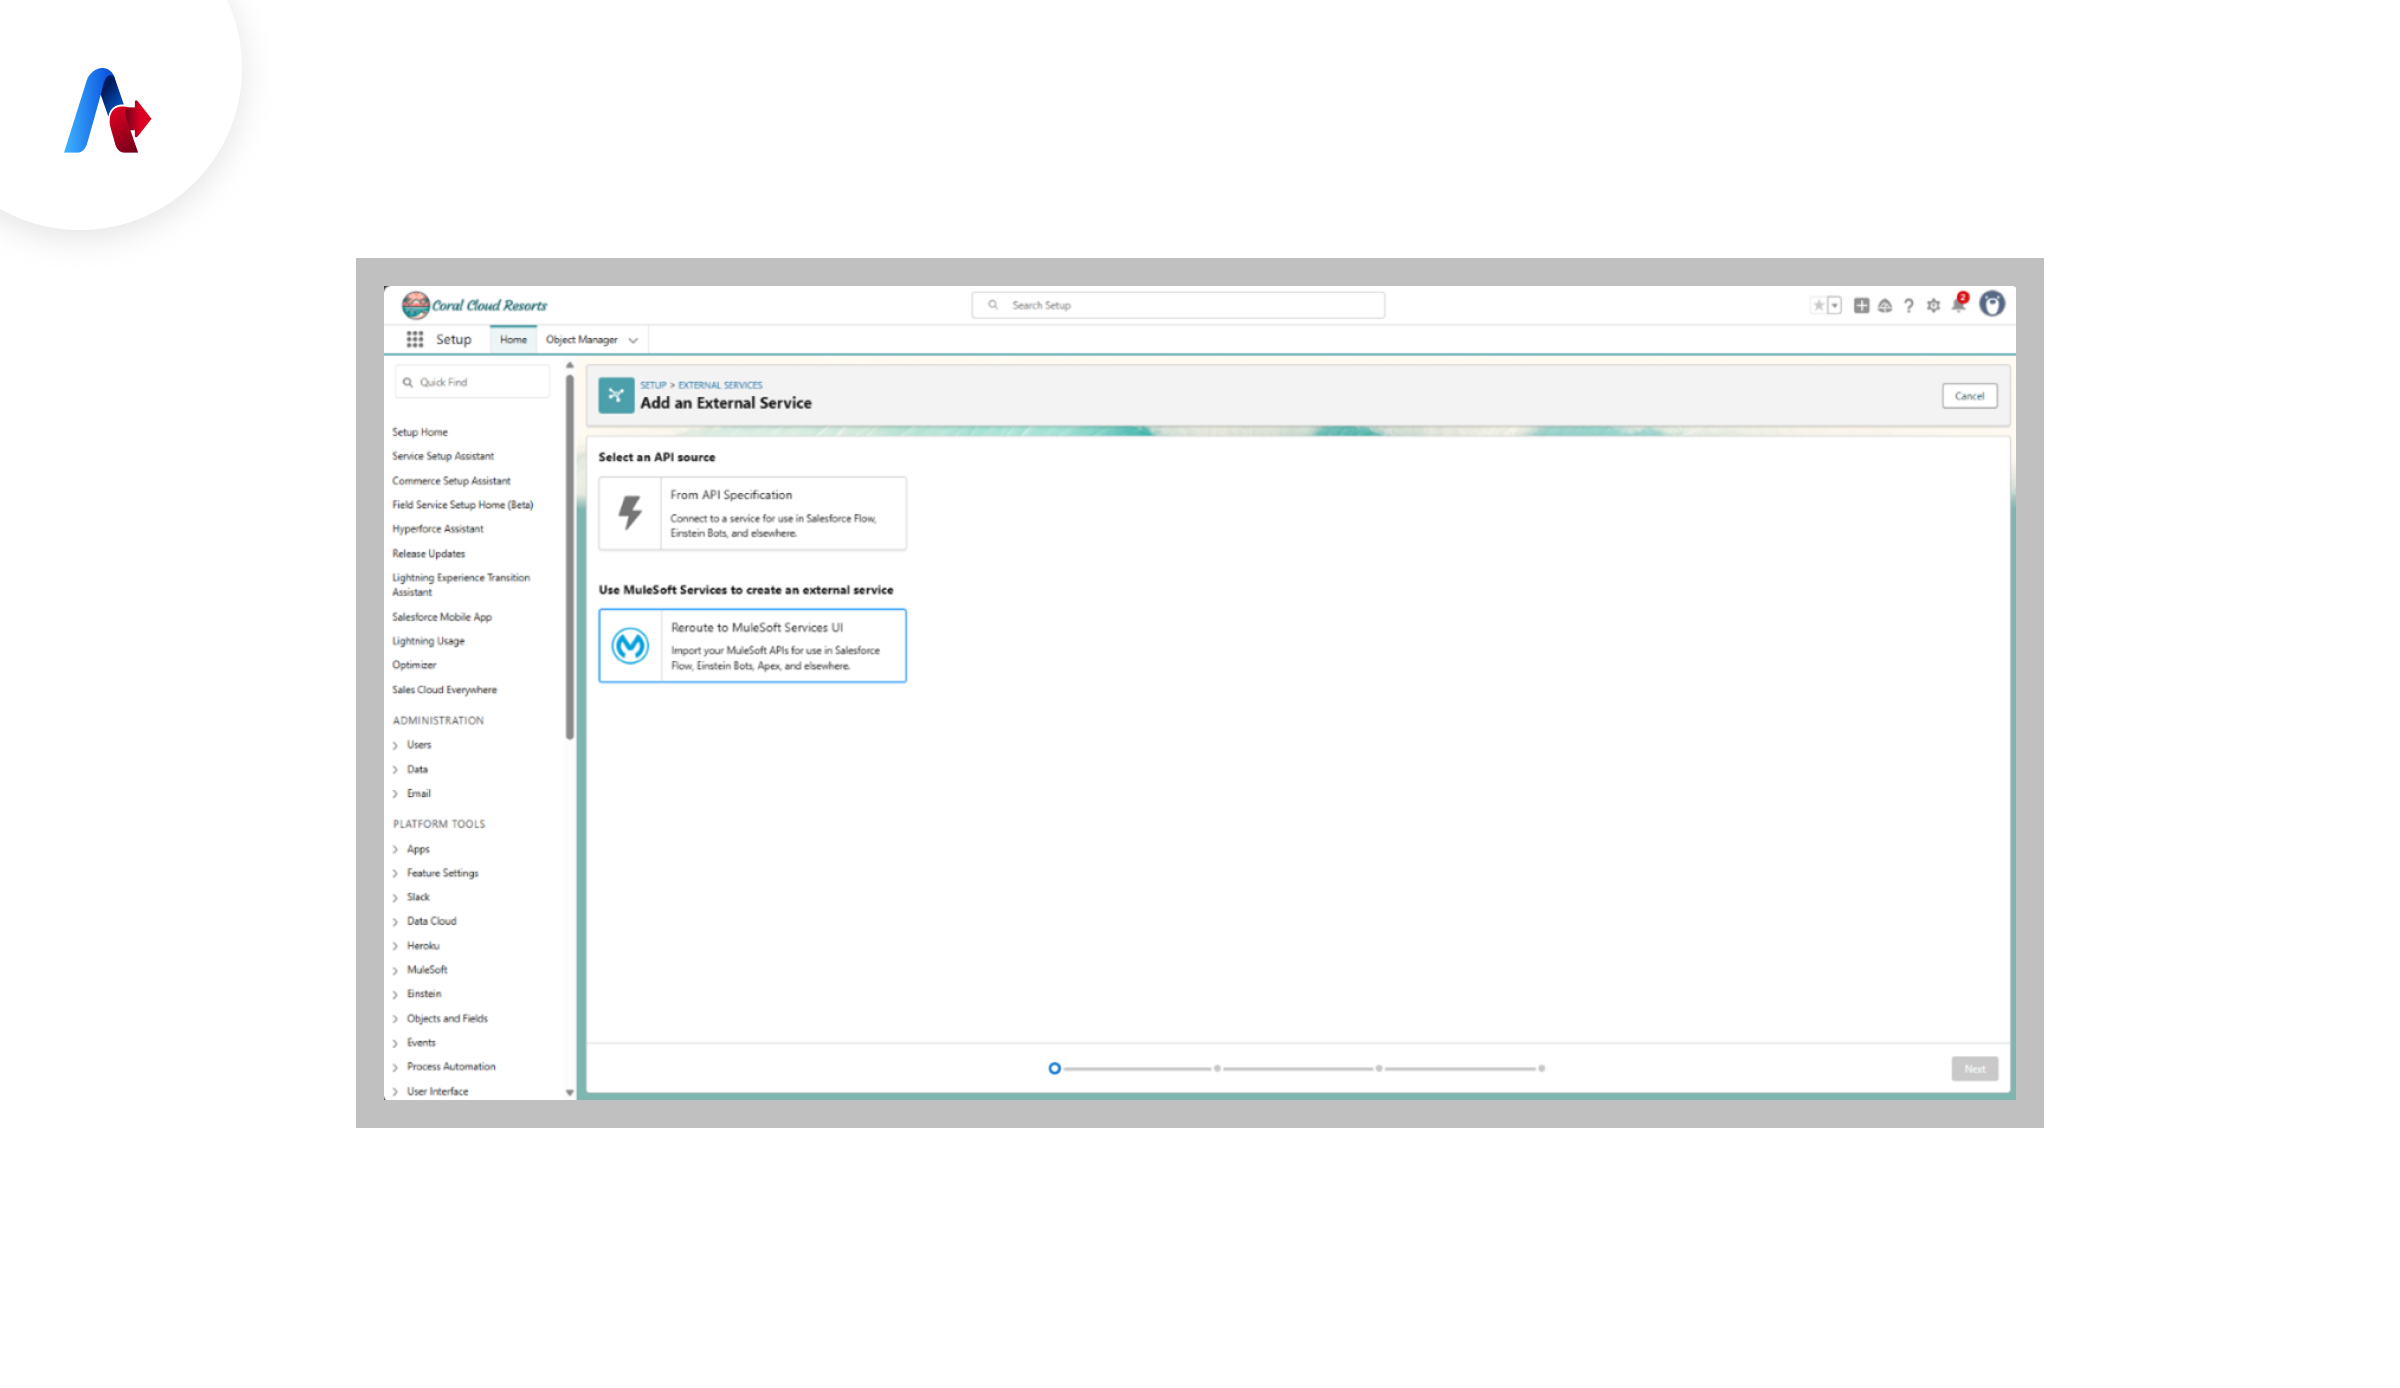
Step 7: Extending Agents with MuleSoft
By integrating MuleSoft with Agentforce, you can enhance connectivity with external systems like HRMS, CRMs, and ticketing tools.
- Go to Integration Settings in Agentforce.
- Select Extend Agents with MuleSoft.
- Enter the required API credentials.
- Save the settings and test the connection.
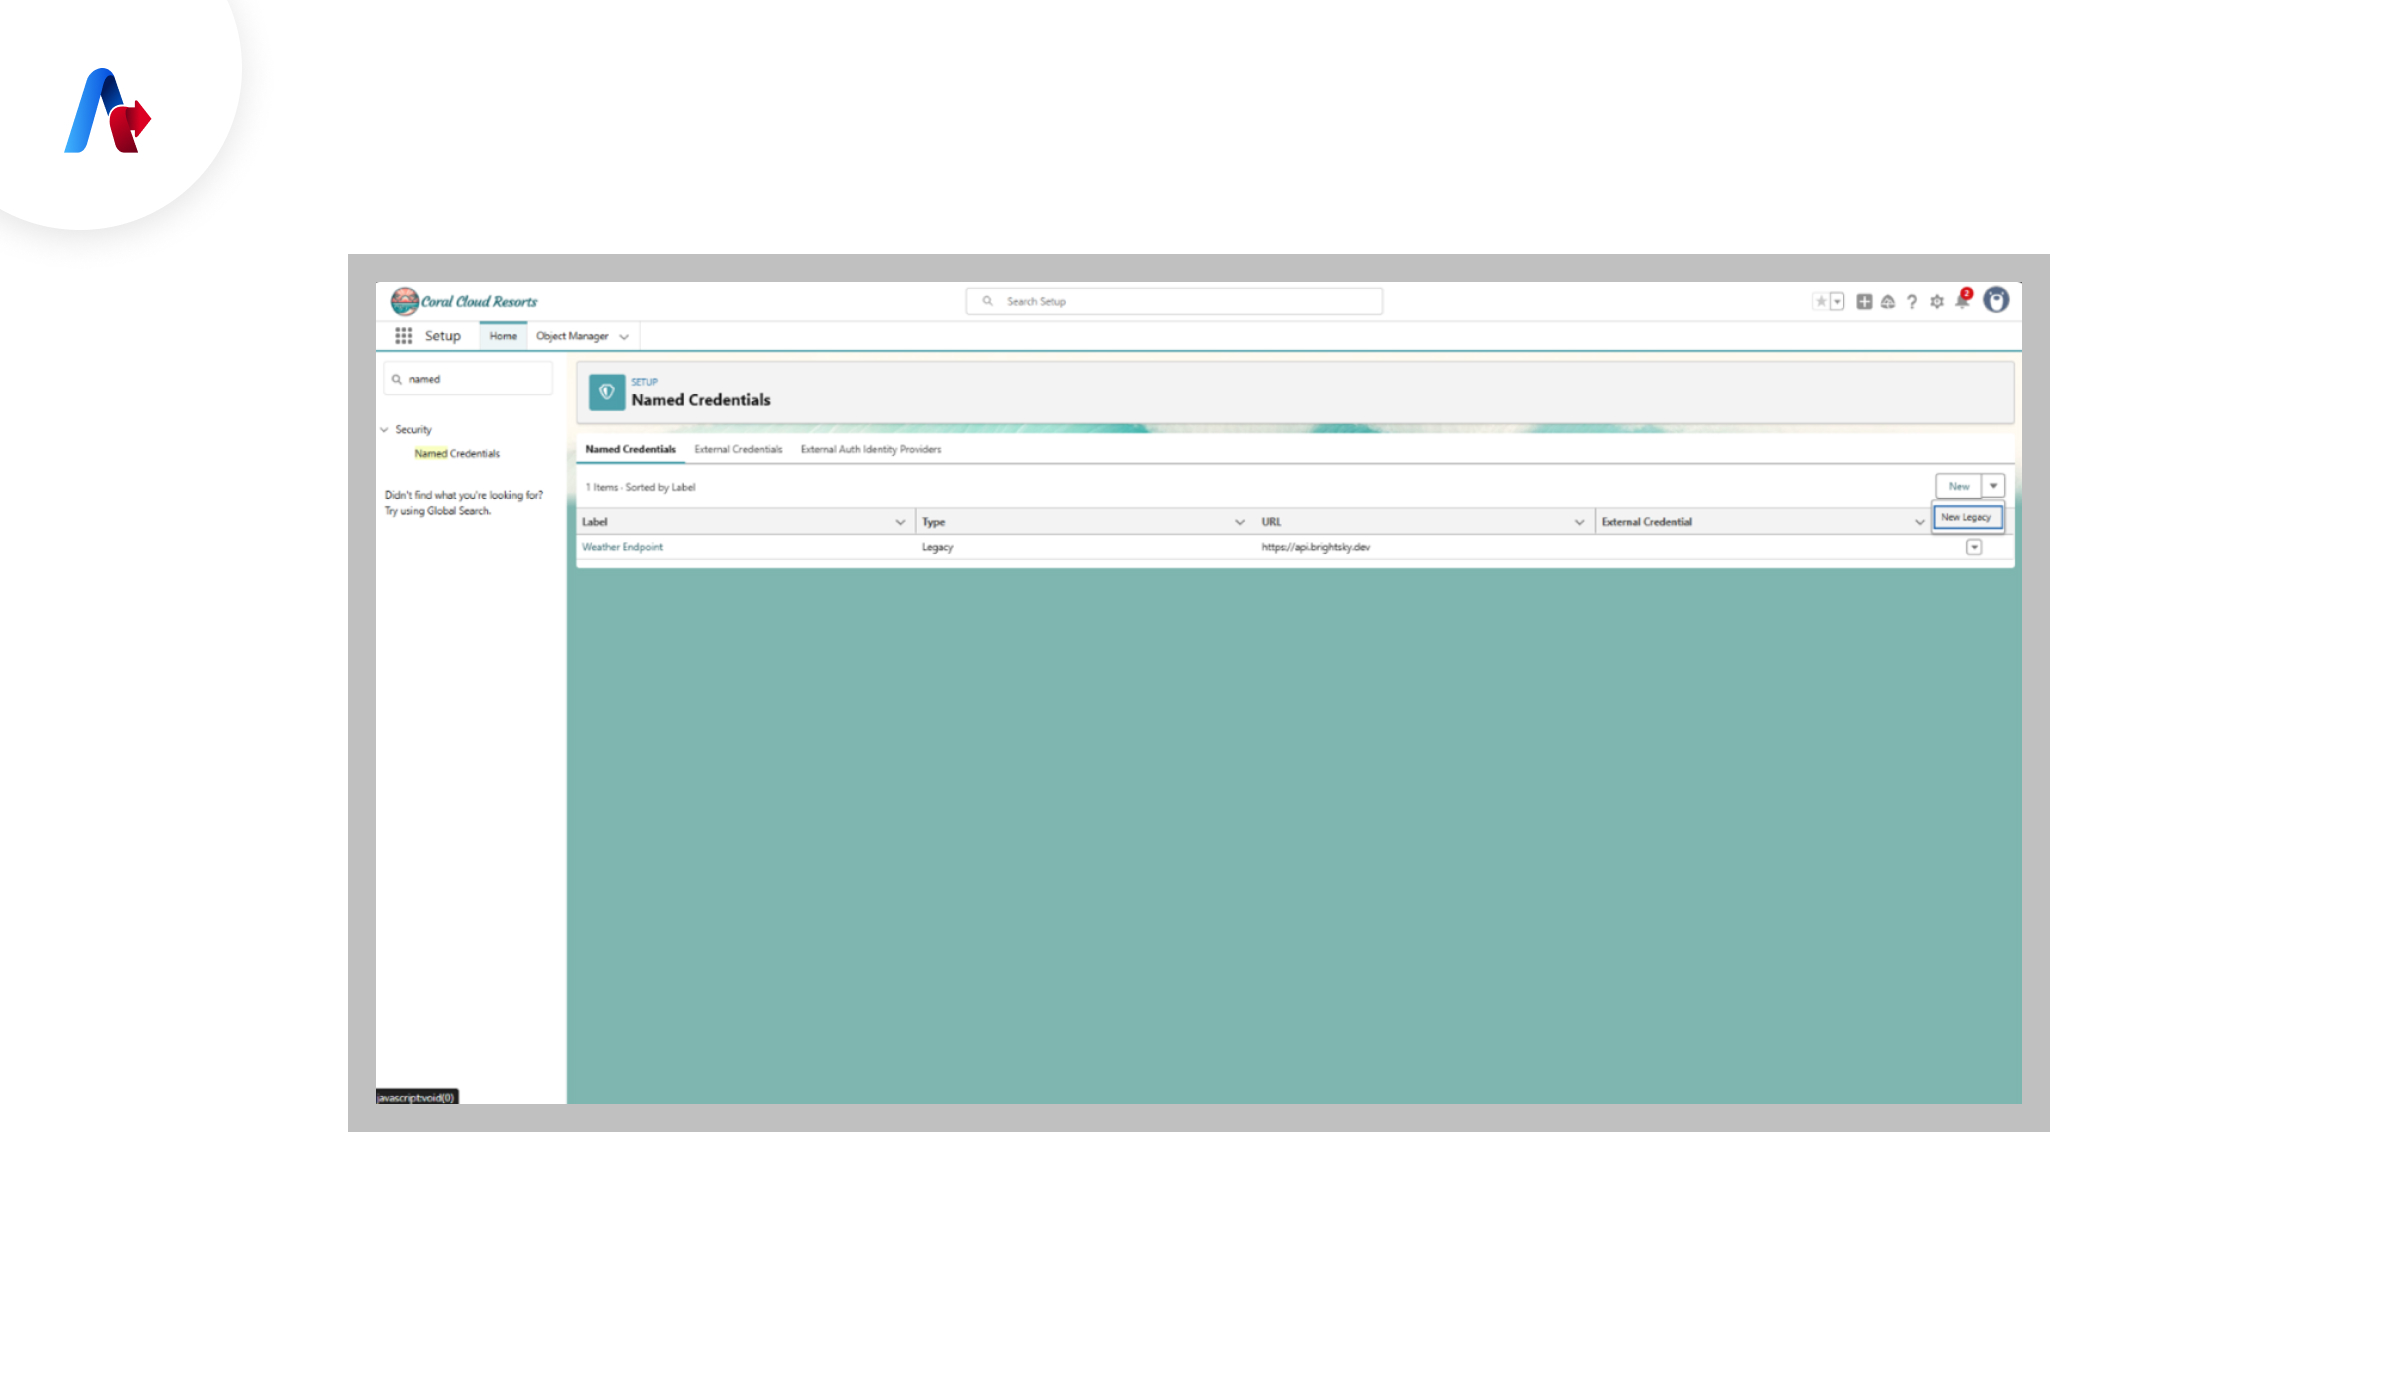
Step 8: Creating Named Credentials
Named credentials simplify authentication for secure API calls.
- Open Integration Settings.
- Click on Create Named Credentials.
- Enter API endpoint, authentication details, and permissions.
- Save the credentials.
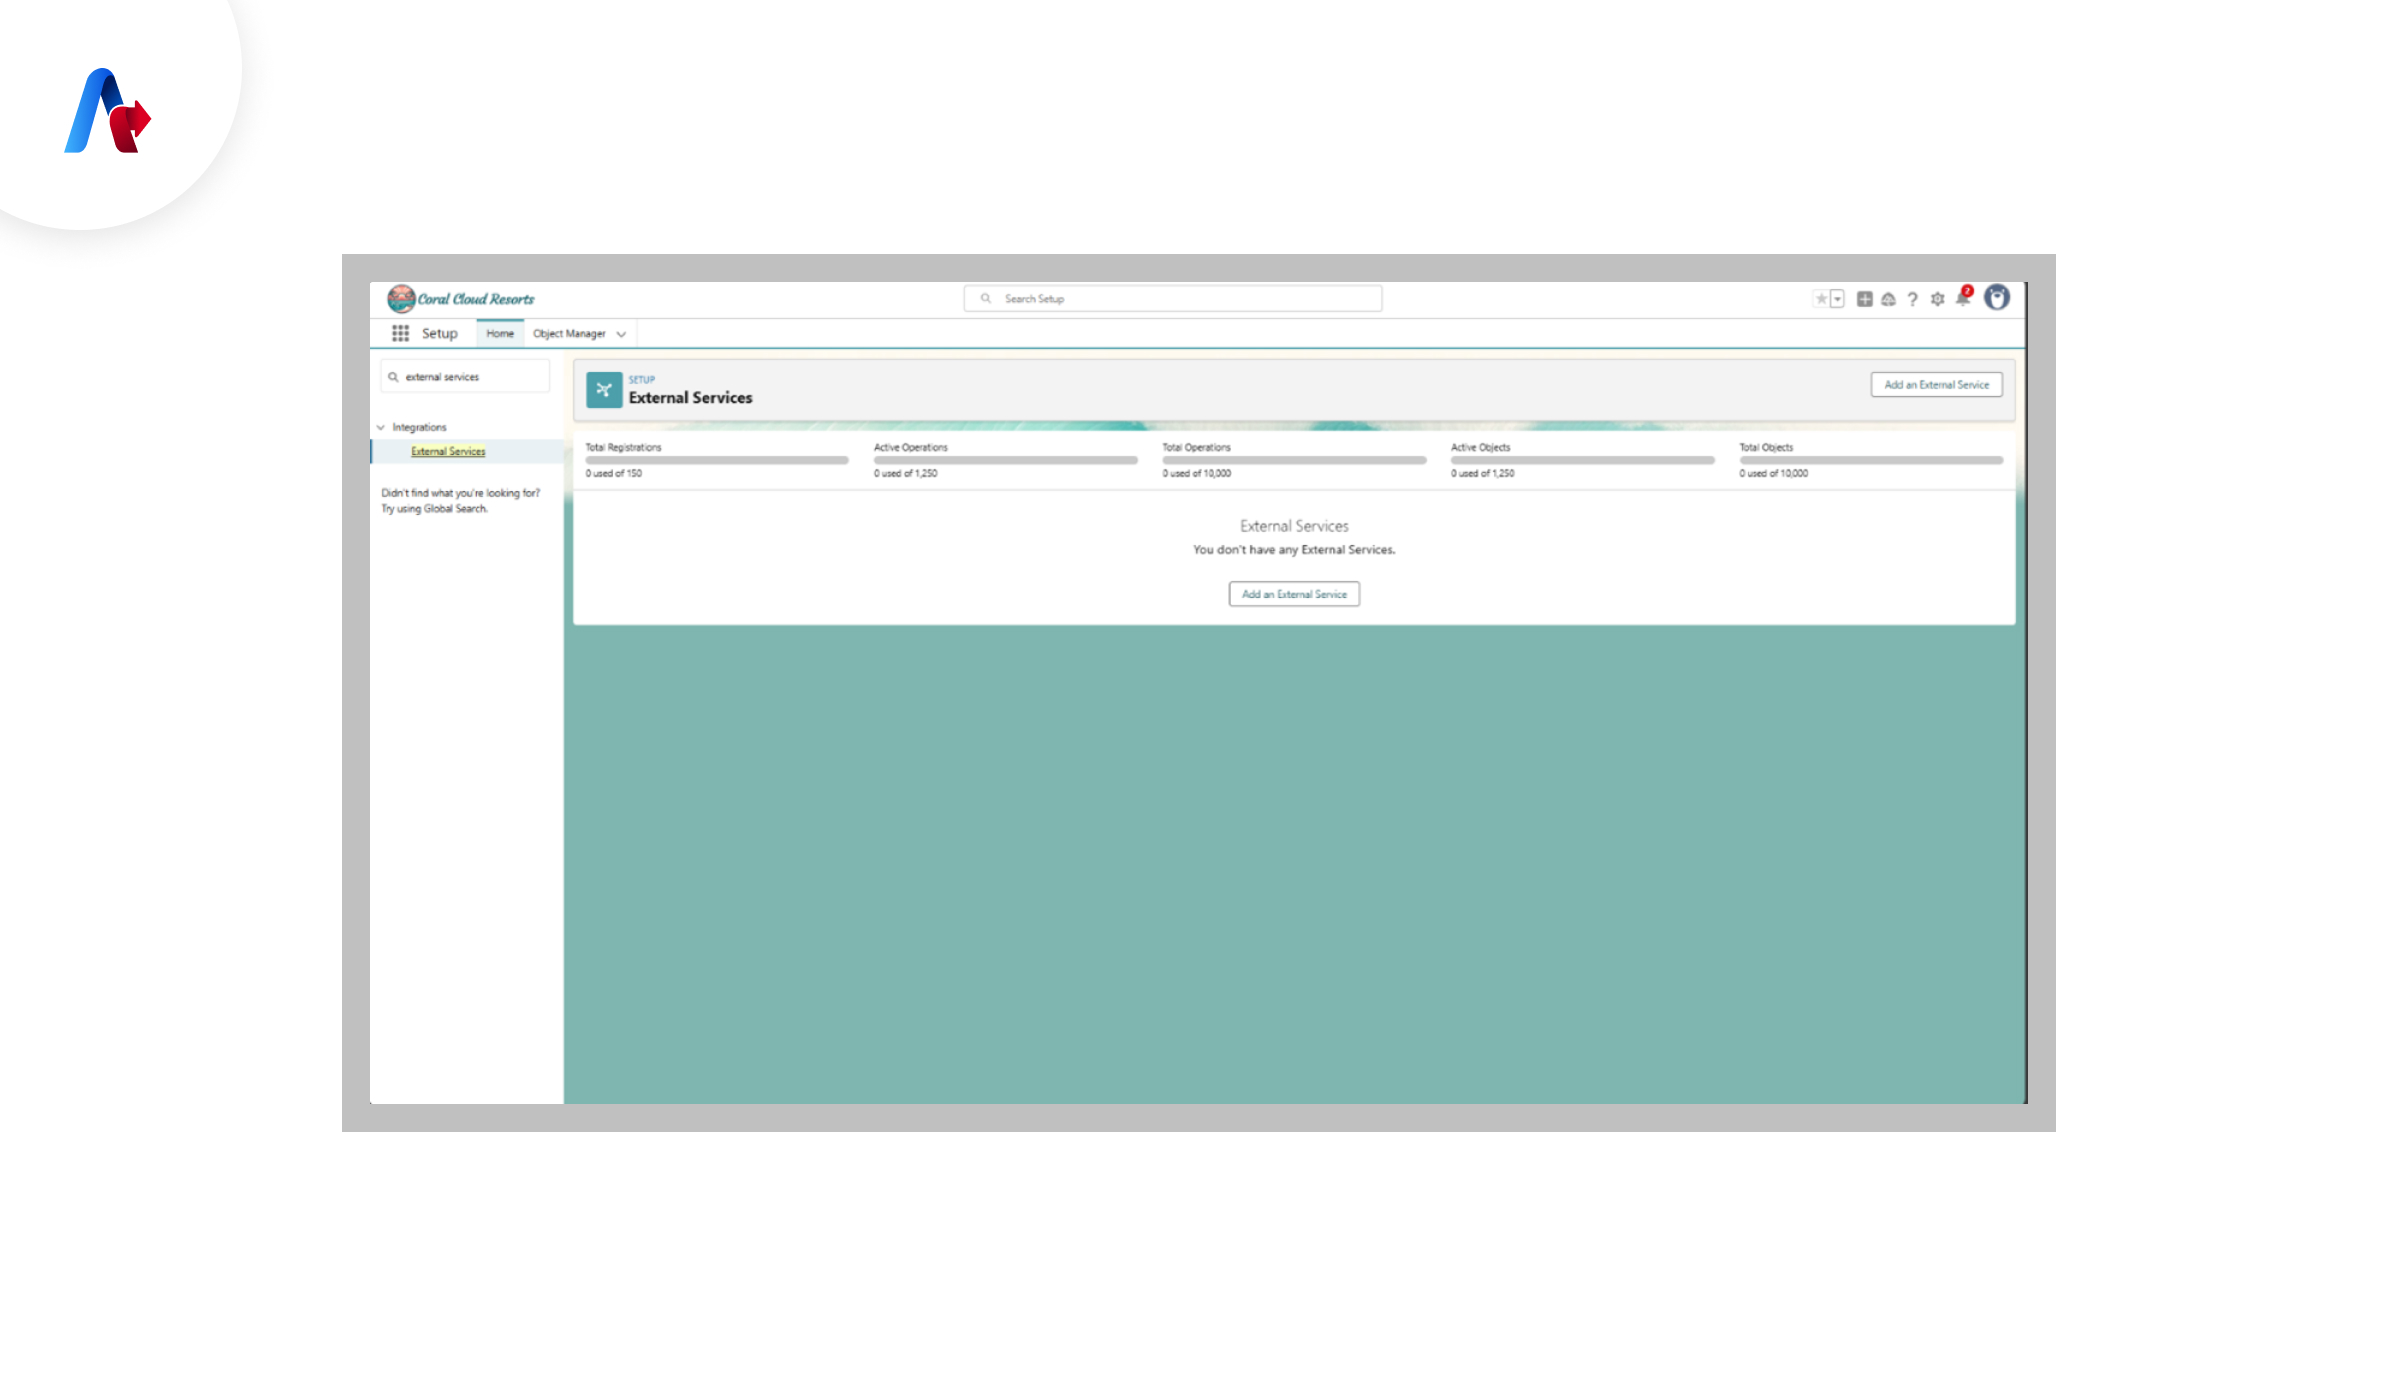
Step 9: Connecting to Anypoint Platform
To fully integrate MuleSoft with Agentforce, connect to the Anypoint Platform.
- Log into Anypoint Platform.
- Navigate to API Manager.
- Register the Agentforce API.
- Deploy an API proxy for secure connectivity.
- Configure policies and security settings.
- Save and deploy the integration.
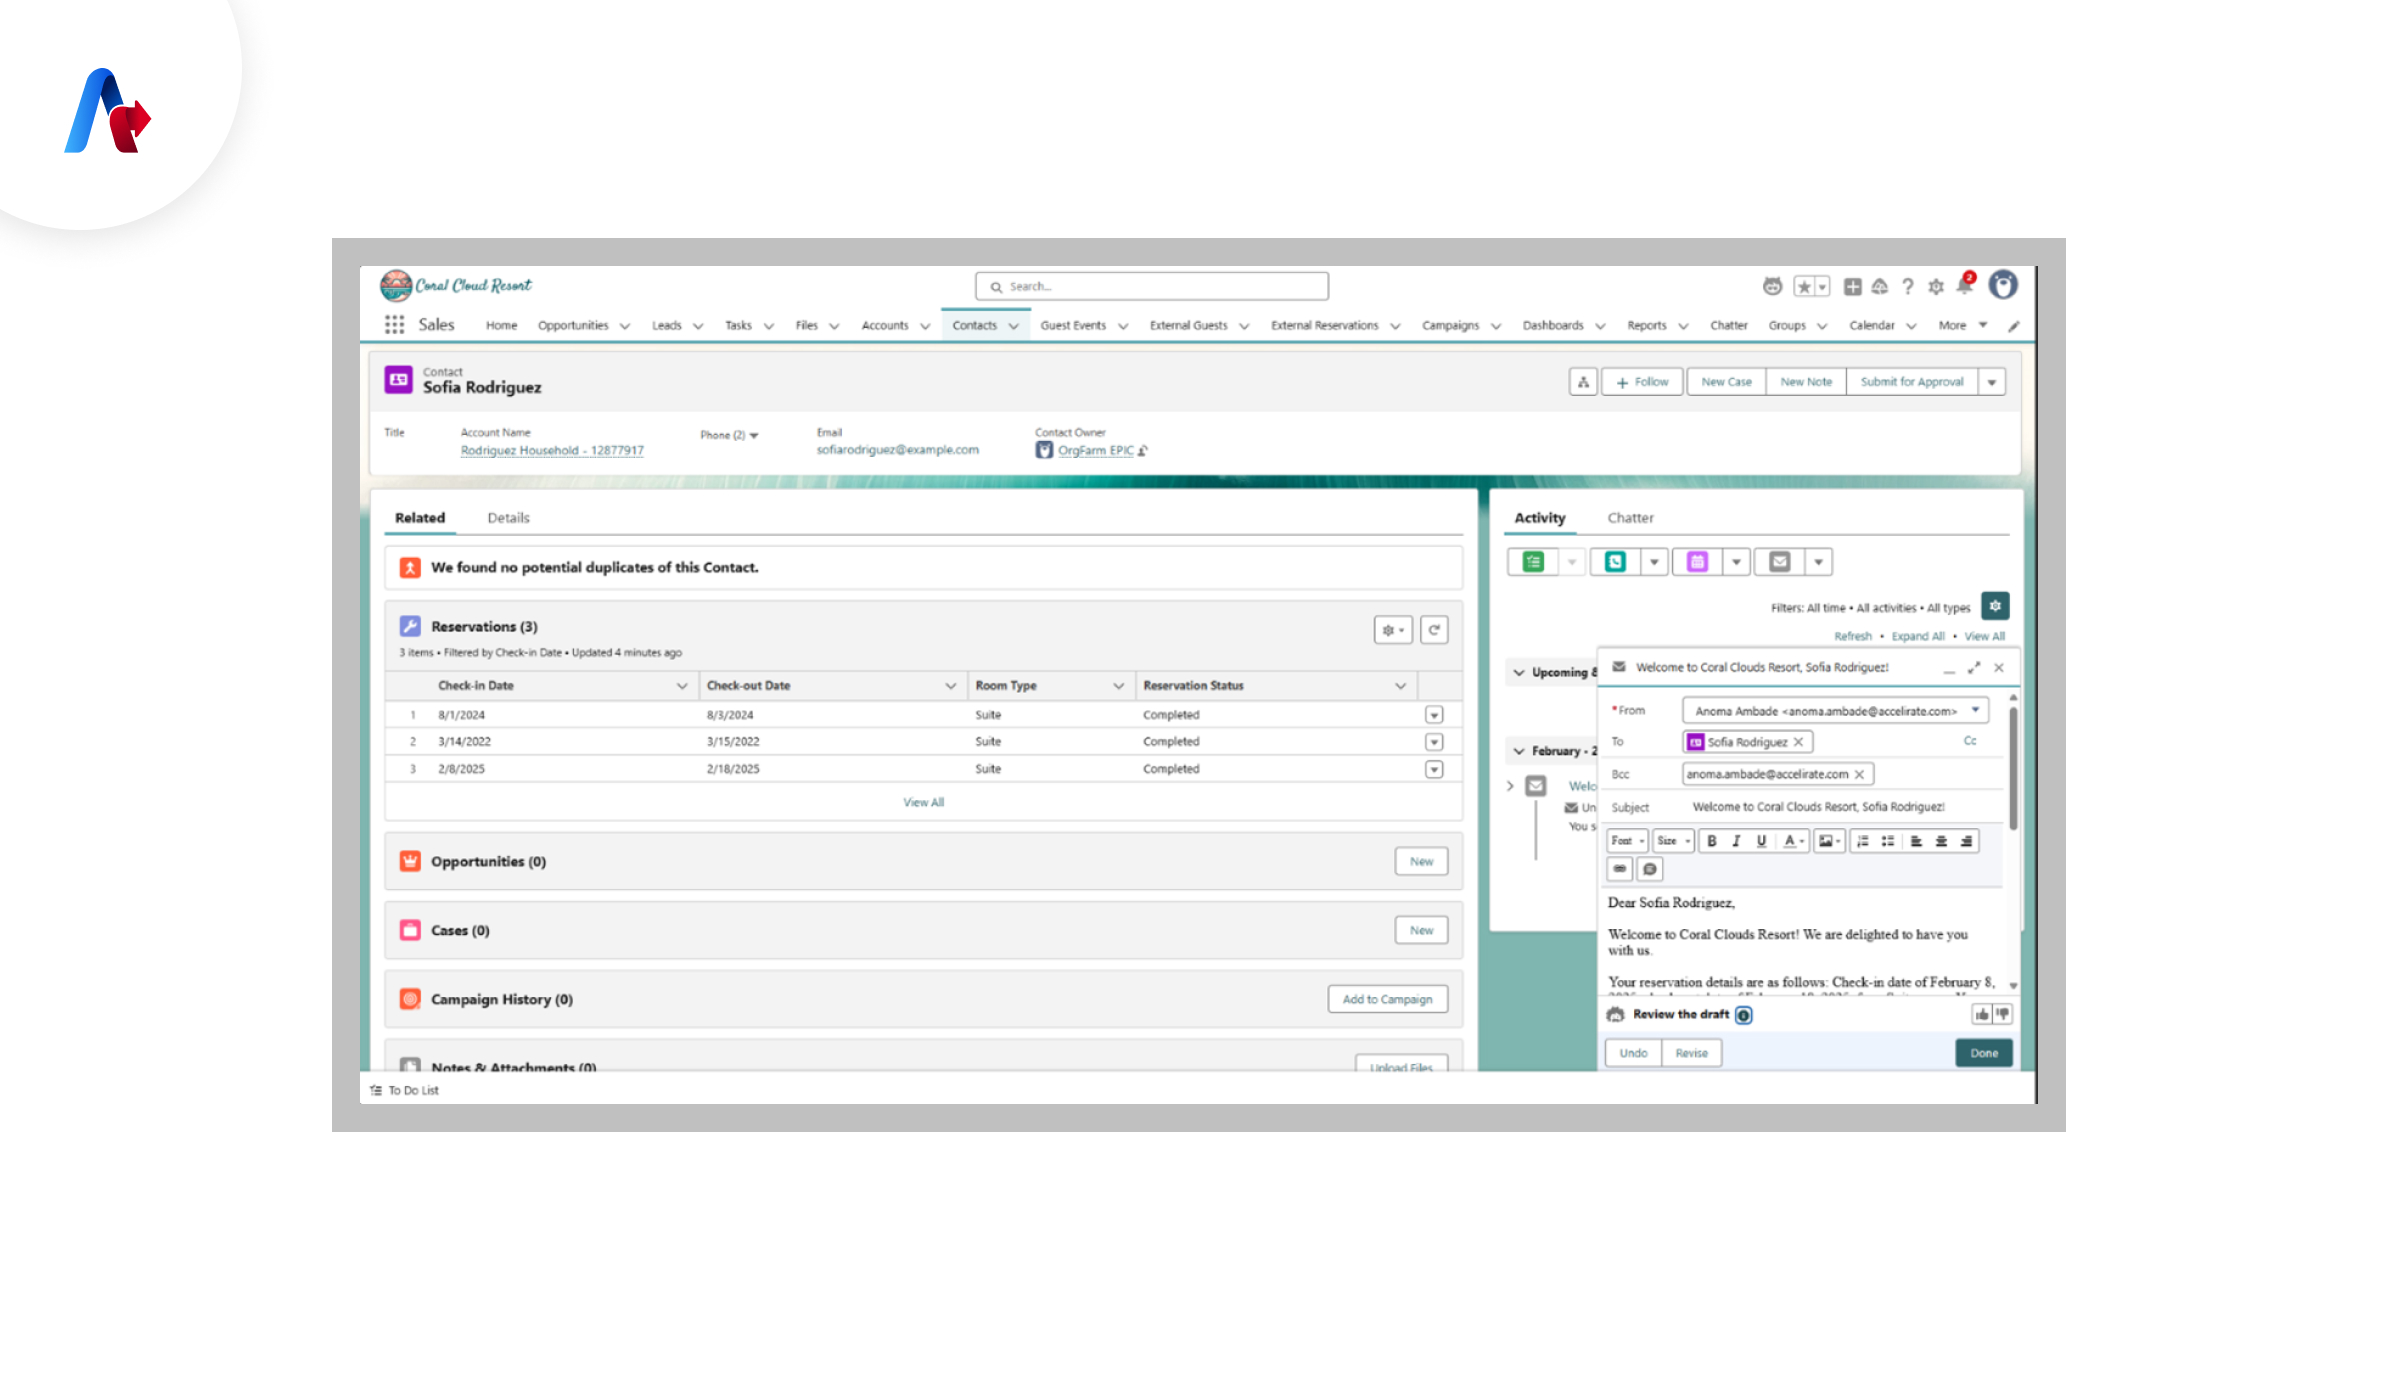
Step 10: Automating Workflows and Sending Sales Emails
Once the integration is complete, you can automate workflows like sending sales emails based on agent activities.
- Go to Automation Settings.
- Define email triggers (e.g., client feedback, ticket resolution).
- Connect the automation to MuleSoft.
- Test the email workflow.
Bringing It All Together to Maximize Customer Service Operations with Agentforce
By following these steps, you can successfully integrate Agentforce with MuleSoft, enabling better agent management, workflow automation, and seamless data exchange. This integration increases efficiency, improves customer interactions, and optimizes business processes.
Start integrating today and see how automation can improve efficiency and customer satisfaction! Need help with the setup? Connect with us for expert Agentforce consulting today!
Got questions?
Talk to Our Experts Today!

Related Blogs